Oki ML186 OKI MICROLINE 186 User's Guide - Page 23
and the paper is skewed, back the paper out and try again
 |
View all Oki ML186 manuals
Add to My Manuals
Save this manual to your list of manuals |
Page 23 highlights
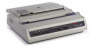
9. Insert the first sheet of continuous forms paper through the opening in the printer stand and into the bottom of the printer, gently feeding it into the printer until it appears in front of the platen, and above the bail arm. Important Check to be sure that the matching holes on either side are engaging the sprockets (A). If they are not evenly matched and the paper is skewed (B), back the paper out and try again! 23 • Setting Up Your Printer
-
 1
1 -
2
-
3
-
4
-
5
-
6
-
7
-
8
-
9
-
10
-
11
-
12
-
13
-
14
-
15
-
16
-
17
-
 18
18 -
 19
19 -
 20
20 -
 21
21 -
 22
22 -
 23
23 -
 24
24 -
 25
25 -
 26
26 -
 27
27 -
 28
28 -
29
-
30
-
31
-
32
-
33
-
34
-
35
-
36
-
37
-
38
-
39
-
40
-
41
-
42
-
43
-
44
-
45
-
46
-
47
-
48
-
49
-
50
-
51
-
52
-
53
-
54
-
55
-
56
-
57
-
58
-
59
-
60
-
61
-
62
-
63
-
64
-
65
-
66
-
67
-
68
-
69
-
70
-
71
-
72
-
73
-
74
 |
 |

23
•
Setting Up Your Printer
9. Insert the first sheet of continuous forms paper through the
opening in the printer stand and into the bottom of the printer,
gently feeding it into the printer until it appears in front of the
platen, and above the bail arm.
Important
Check to be sure that the matching holes on either side are
engaging the sprockets (
A
). If they are not evenly matched
and the paper is skewed (
B
), back the paper out and try again!