Olympus E-1 E-1 Reference Manual (English)
Olympus E-1 - Digital Camera SLR Manual
 |
UPC - 050332143913
View all Olympus E-1 manuals
Add to My Manuals
Save this manual to your list of manuals |
Olympus E-1 manual content summary:
- Olympus E-1 | E-1 Reference Manual (English) - Page 1
DIGITAL CAMERA REFERENCE MANUAL ● Thank you for purchasing an Olympus digital camera. Before you start to use your new camera, please read these instructions carefully to enjoy optimum performance and a longer service life. Keep this manual in a safe place for future reference. ● We recommend that - Olympus E-1 | E-1 Reference Manual (English) - Page 2
undesired operation. For customers in Canada This Class B digital apparatus meets all requirements of the Canadian InterferenceCausing Equipment Regulations. their respective owners. • The standards for camera file systems referred to in this manual are the "Design Rule for Camera File System/DCF - Olympus E-1 | E-1 Reference Manual (English) - Page 3
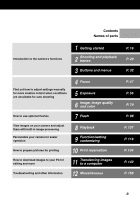
processing Personalize your camera for easier operation 7 Flash 8 Playback 9 Function/setting customizing How to prepare pictures for printing How to download images to your PC for editing and more 10 Print reservation 11 Transferring images to a computer Troubleshooting and other information - Olympus E-1 | E-1 Reference Manual (English) - Page 4
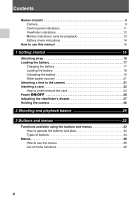
for playback 13 Battery check indications 14 How to use this manual 15 1 Getting started 16 Attaching strap 16 Loading the battery 17 Charging the battery 17 Loading the battery 18 Unloading the battery 19 Other power sources 21 Attaching a lens to the camera 21 Inserting a card 23 How - Olympus E-1 | E-1 Reference Manual (English) - Page 5
shooting 53 RELEASE PRIORITY S & RELEASE PRIORITY C 54 Manual focus (MF 54 AF ILLUMINATOR 55 5 Exposure 56 Exposure mode 56 P : Program shooting 57 A : Aperture priority shooting 59 S : Shutter priority shooting 61 M: Manual shooting 63 Preview function 65 Exposure compensation - Olympus E-1 | E-1 Reference Manual (English) - Page 6
97 COLOR SPACE 97 7 Flash 98 Optional electronic flashes 98 Using the electronic flash 99 Flash mode 100 Types of flash modes 100 Setting the flash mode 103 Super FP flash 104 Flash intensity control 104 Using commercially available flashes 105 Non-specified commercial flashes 106 6 - Olympus E-1 | E-1 Reference Manual (English) - Page 7
customizing 118 CUSTOM RESET SETTING 118 AEL/AFL 122 EV STEP 125 DIAL 126 RESET LENS 127 FOCUS RING 127 ERASE SETTING 127 FILE NAME 128 REC VIEW 129 Beep sound 129 Monitor brightness adjustment 129 SLEEP 130 FORMAT (CARD SETUP 130 VIDEO OUT 131 Language selection - Olympus E-1 | E-1 Reference Manual (English) - Page 8
cable 148 Downloading image files to your computer 150 Windows 98/98 SE/Me/2000/XP 150 Macintosh 152 Disconnecting the camera from your computer 156 12 Miscellaneous 158 Error codes 158 Troubleshooting 160 Menu directory 166 Maintenance 169 PIXEL MAPPING and dust reduction 170 CLEANING - Olympus E-1 | E-1 Reference Manual (English) - Page 9
Names of parts Camera Control panel ~ P. 11 (Exposure compensation) button ~ P. 65 Mode dial ~ P. 56 Power switch ~ P. 26 Mode dial lock ~ P. 56 WB (White balance) button ~ P. 87 Sub dial ~ P. 33 Shutter button ~ P. 49 White balance sensor ~ P. 85 Self-timer/Remote control lamp, AF illuminator ~ P. - Olympus E-1 | E-1 Reference Manual (English) - Page 10
Names of parts Diopter adjustment dial ~ P. 27 Eyepiece shutter lever ~ P. 75 Strap eyelet ~ P. 16 Viewfinder ~ P. 12, 27, (Menu) button ~ P. 38 Card cover lock ~ P. 24 OK button ~ P. 39 DRIVE button ~ P. 73 Focus mode lever ~ P. 51 Connector cover ~ P. 112, 148 10 Card slot ~ P. 24 IEEE 1394 - Olympus E-1 | E-1 Reference Manual (English) - Page 11
Names of parts Control panel indications 1 23 4 5 15 16 6 17 18 19 7 8 10 11 12 14 9 13 1 Flash mode ...P. 102 2 Metering mode P. 68 3 Focus mode ...P. 51 4 Record mode P. 80 5 Aperture value P. 57 - 64 6 Shutter speed P. 57 - 64 7 Battery check P. 14 8 Number of storable still - Olympus E-1 | E-1 Reference Manual (English) - Page 12
Names of parts Viewfinder indications 1 234 5 6 7 89 10 1112 13 14 15 1 AF frame ...P. 49, 50 2 Super FP flash P. 104 3 AF lock ...P. 69 4 AE lock ...P. 69 5 Shutter speed P. 57 - 64 6 Aperture value P. 57 - 64 7 Exposure mode P. 58 8 Auto bracket ...P. 70 9 White balance P. 88 10 Flash - Olympus E-1 | E-1 Reference Manual (English) - Page 13
of parts 10 sRGB / CS3 13 11 45mm 14 12 1/200 F5.6 0.0 0.0 15 16 WB: AUTO - 2STEP 17 18 CONTRAST: -2 19 SHARPNESS: -2 Shooting information 1 Battery check P. 14 10 Color space/Saturation P. 94, 97 11 Focal length P. 110 12 Shutter speed P. 57 - 64 13 Aperture value P. 57 - 64 14 - Olympus E-1 | E-1 Reference Manual (English) - Page 14
. Depleted. Replace the battery with a charged battery. * The digital camera's power consumption varies greatly depending on usage and operating conditions. Under some operating conditions, the camera may turn off without warning that battery power is low. If this occurs, re-charge the battery. 14 - Olympus E-1 | E-1 Reference Manual (English) - Page 15
This sample page is only for your reference. It may differ from the actual instructions in this manual. Shows operating procedures. 9 Function/setting customizing CUSTOM RESET SETTING Even when the power is turned off, the settings you made while the power was on will be saved. To restore the - Olympus E-1 | E-1 Reference Manual (English) - Page 16
1 Thread one end of the strap through the strap eyelet on the camera. 1 Ring 2 Thread the end of the strap through the ring, to the other eyelet. Note ● Be careful with the strap when you carry the camera, since it can easily catch on stray objects, causing injury or damage. ● Attach the strap correctly - Olympus E-1 | E-1 Reference Manual (English) - Page 17
Loading the battery This camera uses an Olympus lithium ion battery (BLM-1). Never use any other type of battery. The battery is not fully charged when purchased. Before use, be sure to charge the battery with the specified provided charger (BCM-1). Note ● Never use a charger other than the one - Olympus E-1 | E-1 Reference Manual (English) - Page 18
Olympus. - Charging has not finished after 6 hours. - The indicator blinks red even though the battery is inserted properly as described in the instruction manual. ● Be sure to read the precautions in the battery's manual. Loading the battery 1 Make sure that the camera's power switch is set - Olympus E-1 | E-1 Reference Manual (English) - Page 19
the illustration. 4 Push the battery in all the way so that the battery compartment cover closes. Turn the battery compartment lock to . Loading the battery Direction indicating mark 1 Getting started Unloading the battery 1 Make sure the power switch is set to OFF and the card access lamp is not - Olympus E-1 | E-1 Reference Manual (English) - Page 20
1 3 Take out the battery. ● Hold the camera sideways or upside down to keep the battery from falling out. 4 Close the battery compartment cover and turn the battery compartment lock to . Battery compartment cover When using the optional power battery holder, remove the battery compartment cover by - Olympus E-1 | E-1 Reference Manual (English) - Page 21
or downloading images to a personal computer. Ⅵ Power Battery Holder Set 1 The optional Power Battery Holder Set (SHLD-2) allows you to use the camera for a long period. For details about attaching the battery holder to the camera, refer to the power battery holder manual. Attaching a lens to - Olympus E-1 | E-1 Reference Manual (English) - Page 22
mark (red) on the lens, then insert the lens into the camera's body. Rotate the lens clockwise until you hear it click. Rear cap Lens attachment mark (Red) Alignment mark (Red) 5 Remove the lens cap. Ⅵ Removing the lens from the camera 1 Make sure the power switch is set to OFF. 2 While pressing - Olympus E-1 | E-1 Reference Manual (English) - Page 23
manual refers to a recording medium. This camera can use a Compact Flash or Microdrive (optional). You can also use xD-Picture Card with a card adapter (optional). Ⅵ Compact Flash Ⅵ Microdrive A Compact Flash is a large-capacity A Microdrive is a medium that uses a solid state flash memory card - Olympus E-1 | E-1 Reference Manual (English) - Page 24
in the direction of the arrow and open the card cover. Card cover lock 1 Getting started 2 Insert the card fully with the ß mark side facing toward the monitor side (the camera's rear side) as illustrated. Card cover ß Mark 3 Close the card cover. ● When the eject button is projecting, push it - Olympus E-1 | E-1 Reference Manual (English) - Page 25
lamp is not illuminated. 2 Open the card cover. Inserting a card Card access lamp 1 3 Raise the eject button. 4 Press the eject button gently. ● The card comes out. ● If you press the eject button too hard, the card may jump out of the camera. ● Pull out the card. 5 Place the eject button on its - Olympus E-1 | E-1 Reference Manual (English) - Page 26
When the power switch is set to ON, the battery check indication appears on the control panel. ~ "Battery check indication" (P. 14) Control panel Battery check Dust reduction function operation The dust reduction function is automatically activated when the camera is turned on. Ultrasonic - Olympus E-1 | E-1 Reference Manual (English) - Page 27
to see the viewfinder clearly. The camera is equipped with a standard eyecup. Remove this eyecup from the camera to attach the optional eycup. To remove the eyecup, turn it as illustrated. Focusing screen You can replace the focusing screen with the optional grid screen. When doing this, use the - Olympus E-1 | E-1 Reference Manual (English) - Page 28
Holding the camera 1 Hold the camera's grip with your right hand and keep your elbow at your side. 2 Rest your elbow gently against your body and hold the lens section firmly from underneath with your left hand. 1 3 Take a picture. ● Putting one leg a little forward helps stabilize your upper body. - Olympus E-1 | E-1 Reference Manual (English) - Page 29
started Charge the battery. Attach the lens. 2 Insert the battery and card into the camera. 2 Shooting function setting Turn on the power. Set the date and time. Set the exposure mode. Menus & buttons Exposure mode Focus mode Drive mode Record mode (RAW, TIFF, SHQ, HQ, SQ) ISO sensitivity - Olympus E-1 | E-1 Reference Manual (English) - Page 30
Shooting and playback basics 3 Shooting Press the shutter button halfway. ● The camera focuses on the subject and the AF cofirmation mark lights. Press the shutter button all the way (fully) to release the shutter. ● A picture is taken. The card access lamp blinks while the picture is being stored - Olympus E-1 | E-1 Reference Manual (English) - Page 31
Shooting and playback basics 5 Image transfer to a computer Connect the camera to a computer using the provided USB cable or IEEE1394 cable (Windows 98/98SE/2000/Me/XP, Mac OS 9.0 - 9.2/X). Turn on the camera's power. Transfer images to the computer. 2 IEEE 1394 PC MODE USB (P. 133) 31 - Olympus E-1 | E-1 Reference Manual (English) - Page 32
dial or sub dial, while referring to the control panel. This allows for fast camera setting changes without having to use the monitor menus. Functions available using the : Change camera settings with the monitor menus monitor menus while referring to the monitor. 3 Functions available using - Olympus E-1 | E-1 Reference Manual (English) - Page 33
Functions available using the buttons and menus 2 While holding down the button, turn the main dial or sub dial. ● The settings will change. Control panel Sub dial When changing image quality button button When changing (exposure compensation) 3 When changing ISO ISO button Main dial - Olympus E-1 | E-1 Reference Manual (English) - Page 34
ISO BOOST allows you to add 1600 and 3200 to the ISO value options. 2 (Exposure compensation) button Sets the exposure compensation value. ~P. 65 Exposure compensation value: -1.0 -0.7 -0.3 0.0 0.3 0.7 1.0 ● The exposure can be adjusted within a range of ±5.0 EV. Available EV steps are: 1/3EV - Olympus E-1 | E-1 Reference Manual (English) - Page 35
, registered white balance. (auto) - 4 (Record mode) button Selects image quality. ~P. 81 3 RAW TIFF SHQ HQ SQ You can select the compression and number of pixels in the SQ mode. ~ "Setting the SQ mode" (P. 81) 5 (Flash mode) button ~P. 103 Selects a flash mode from auto-flash, red - Olympus E-1 | E-1 Reference Manual (English) - Page 36
Functions available using the buttons and menus 7 (Metering) button Selects the metering mode. ~P. 68 Control panel Viewfinder No indication 8 DRIVE button 3 Selects the drive mode. ~P. 73 Buttons and menus No indication (single-frame shooting) 9 (AF frame selection) button ~P. 50 - Olympus E-1 | E-1 Reference Manual (English) - Page 37
illumination) button Sets the illumination on the control panel to ON/OFF. (Playback mode) button Plays back images on the monitor. ~P. 89 ~P. 69 ~P. 107 3 (Erase) button ~P. 77, 115 Erases unwanted pictures. Pressing this button also allows you to playback pictures even while the camera is in - Olympus E-1 | E-1 Reference Manual (English) - Page 38
Lo Hi 1 SHARPNESS Lo Hi 3 2 COLOR SPACE CANCEL SELECT sRGB GO Buttons and menus OK Buttons required for function settings are displayed in the menu screen. tab CARD SETUP SATURATION Lo Hi CONTRAST Lo Hi å 1 SHARPNESS Lo Hi ß 2 COLOR SPACE sRGB CANCEL SELECT GO ˙ ¥ tab Press to - Olympus E-1 | E-1 Reference Manual (English) - Page 39
˙ ¥ CARD SETUP SATURATION CONTRAST 1 SHARPNESS 2 COLOR SPACE CANCEL SELECT sRGB Adobe RGB GO Note ● Some settings may not be available depending on the status of the camera and other current settings. ● Saved settings will be retained even after the camera is turned off. ~ "CUSTOM RESET SETTING - Olympus E-1 | E-1 Reference Manual (English) - Page 40
Menus List of menu functions Menu screen CARD SETUP ALL ERASE FORMAT Function CARD SETUP Formats the card or erases all pictures. Ref. page P. 130 CANCEL SELECT GO SATURATION P. 94 CARD SETUP CS: RGB Sets the color tint of images. CS0 - CS4 set the SATURATION CM1: saturation level, while - Olympus E-1 | E-1 Reference Manual (English) - Page 41
SELECT OFF ON GO AF ILLUMINATOR ANTI-SHOCK PIXEL MAPPING 1 2 CANCEL SELECT OFF ON GO AF ILLUMINATOR ANTI-SHOCK PIXEL MAPPING 1 2 CANCEL SELECT OFF GO Function RAW • JPEG Records images in both the RAW data format and JPEG format when using the SHQ, HQ, or SQ mode. Ref. page P. 82 NOISE - Olympus E-1 | E-1 Reference Manual (English) - Page 42
R T GO -2 -1 0 +1 +2 Function PIXEL MAPPING Checks and adjusts the CCD and image processing functions. Dust and dirt are also blown off at the same time. Ref. page P. 170 Adjusts the amount of light emitted when using the flash unit specified for use with this camera. You can set the intensity - Olympus E-1 | E-1 Reference Manual (English) - Page 43
COUNT COMPRESSION SQ Sets the number of pixels and compression for the SQ record mode. P. 81 1280 x 960 1/8 CANCEL SELECT GO EV STEP ISO BOOST 1 SQ 2 AEL/AFL CANCEL SELECT S-AF CF MF GO DIAL P FOCUS RING A S-AF+MF S 1 RELEASE PRIORITY S 2 RELEASE PRIORITY C CANCEL SELECT GO AEL - Olympus E-1 | E-1 Reference Manual (English) - Page 44
RESET SETTING CANCEL SELECT OFF ON GO RESET LENS Resets the focus of the lens when the power is turned off. P. 127 RESET LENS PC MODE ERASE SETTING 1 CLEANING MODE 2 CUSTOM RESET SETTING CANCEL SELECT STORAGE CONTROL GO PC MODE Selects how the camera is to be operated when it is connected - Olympus E-1 | E-1 Reference Manual (English) - Page 45
screen for erasing pictures, canceling recording or formatting. Ref. page P. 127 CLEANING MODE When the shutter button is pressed all the way in the cleaning mode, the mirror rises and the shutter curtain opens. P. 171 CUSTOM RESET SETTING Up to 4 reset settings can be saved for when the camera - Olympus E-1 | E-1 Reference Manual (English) - Page 46
129 Setup menu Buttons and menus 3 CANCEL SELECT GO SLEEP 1 VIDEO OUT 2 OFF 1 min 3 min 5 min 10 min SLEEP Sets the time before the sleep mode (idle mode) begins. When OFF is selected, the camera does not enter the sleep mode. P. 130 CANCEL SELECT GO CANCEL ENGLISH FRANCAIS DEUTSCH ESPAÑOL - Olympus E-1 | E-1 Reference Manual (English) - Page 47
Focus Auto focus (AF) 4 Focus The camera automatically focuses on the subject. 1 Position the AF target mark on the subject you want to focus on. Press the shutter button halfway. ● The focus is locked and the AF confirmation mark lights up (focus lock). ● A beep sound is output when the subject - Olympus E-1 | E-1 Reference Manual (English) - Page 48
on Under the following conditions, AF may not work properly. Take a picture using focus lock (P. 49), manual focus (P. 54), or by selecting an AF frame (P. 50). The AF confirmation mark blinks. The subject cannot be brought into focus. The AF mark stays lit, but the subject cannot be brought into - Olympus E-1 | E-1 Reference Manual (English) - Page 49
brought into focus, you can lock the focus (focus lock) as shown below. 1 When shooting a hard-to-focus subject or a fast-moving subject, point the camera at another object about the same distance away as the subject. Position the AF target mark on the subject you want to focus on. Shutter button - Olympus E-1 | E-1 Reference Manual (English) - Page 50
Normally, the camera measures the distance to the subject using the 3 AF frames in the viewfinder and selects the most appropriate point. This function allows you to select only one AF frame. No indication : Focuses using the 3 AF frames. (Factory default setting) : Focuses using the left - Olympus E-1 | E-1 Reference Manual (English) - Page 51
AF) shooting" (refer to the instruction below), "C-AF (continuous AF) shooting" (P. 53), "Manual focus (MF)" (P. 54) Control panel AF mode Focus mode lever Set to C-AF Set to S-AF Set to MF 4 S-AF (single AF) shooting Focusing is performed one time when the shutter button is pressed halfway. If - Olympus E-1 | E-1 Reference Manual (English) - Page 52
shutter button all the way allows you to take pictures while adjusting the focus. ~ "RELEASE PRIORITY S & RELEASE PRIORITY C" (P. 54) To adjust focus manually while using AF: T Focus can also be adjusted manually after using AF. ~ "Simultaneous use of S-AF mode and MF mode" (refer to the instruction - Olympus E-1 | E-1 Reference Manual (English) - Page 53
if the subject moves or you change the composition of the picture, the camera continues trying to focus. AF mode Control panel 1 Press the shutter button halfway and keep it in this position. ● When the subject is in focus and exposure is locked, the AF confirmation mark lights in the viewfinder - Olympus E-1 | E-1 Reference Manual (English) - Page 54
performed, the shutter is released. Focus Focus mode lever Manual focus (MF) This function allows you to manually focus on any subject while looking through the viewfinder. 1 Set the focus mode lever to MF. 2 Adjust the focus using the focus ring. 3 Take a picture. Focus mode lever Focus ring 54 - Olympus E-1 | E-1 Reference Manual (English) - Page 55
suit your preference for how the lens adjusts to the focusing point. ~ "FOCUS RING" (P. 127) Focus aid When you focus the lens on a subject manually (by turning the focus ring), the AF confirmation mark lights. When 3 AF frames are selected, the camera performs focusing in the center AF frame. AF - Olympus E-1 | E-1 Reference Manual (English) - Page 56
, which can be switched using the mode dial. Rotate the mode dial while holding down the mode dial lock to change the setting. Mode dial lock Mode dial 5 A Aperture priority shooting (P. 59) S Shutter priority shooting (P. 61) Exposure P Program shooting (P. 57) M Manual shooting (P. 63) 56 - Olympus E-1 | E-1 Reference Manual (English) - Page 57
to P. Mode dial Exposure 5 2 Press the shutter button halfway. ● Focusing is performed and the AF confirmation Halfway down mark lights on the viewfinder. ● The shutter speed and aperture value that Control panel have been set automatically by the camera are displayed on the control panel - Olympus E-1 | E-1 Reference Manual (English) - Page 58
according to the subject brightness as shown below. The below diagram depends on the lens. ED 50mm F2 MACRO Example: When EV is 7, the aperture value is set to F2 and the shutter speed to 1/30. 5 6 7 8 9 10 11 12 13 14 15 16 17 18 19 20 EV F22 4 F16 3 F11 2 F8 1 F5.6 0 F4 -1 F2 - Olympus E-1 | E-1 Reference Manual (English) - Page 59
Exposure mode A : Aperture priority shooting The camera sets the optimum shutter speed automatically for the aperture value you have selected. When you decrease the aperture value (F-number), the camera will focus within a shorter range (shallow depth of field) and produce a picture with a blurred - Olympus E-1 | E-1 Reference Manual (English) - Page 60
3 Press the shutter button halfway. ● Focusing is performed and the AF confirmation mark lights on the viewfinder. ● The shutter speed that has been set automatically by the camera is displayed on the control panel and viewfinder. Control panel Aperture value Shutter speed Shutter speed Halfway - Olympus E-1 | E-1 Reference Manual (English) - Page 61
priority shooting The camera sets the optimum aperture value automatically for the shutter speed you have selected. Set the shutter speed depending on the type of effect you want: a higher speed shutter allows you to capture a fast-moving subject without blur, and a slower shutter speed blurs - Olympus E-1 | E-1 Reference Manual (English) - Page 62
the shutter button halfway. ● Focusing is performed and the AF confirmation mark lights on the viewfinder. ● The aperture value that has been set automatically by the camera is displayed on the control panel and viewfinder. Control panel Halfway down Control panel Shutter speed Shutter speed - Olympus E-1 | E-1 Reference Manual (English) - Page 63
Manual shooting You can set both aperture value and shutter speed manually, while referring to the exposure level indicator. This mode gives you more creative control, allowing you to make whatever settings and shutter speed compared to the exposure value considered optimum by the camera. Decrease - Olympus E-1 | E-1 Reference Manual (English) - Page 64
level indicator. Exposure 3 Take a picture. 5 Noise in images During shooting at slow shutter speeds of 30 or more seconds, noise may appear on-screen or the image may be overly bright in the top left part of the screen. These phenomena are caused when current is generated in those sections of the - Olympus E-1 | E-1 Reference Manual (English) - Page 65
" focus) in a picture, with the selected aperture value. Note ● The metering values cannot be changed in the preview mode. Preview button Exposure compensation In some situations, you may get better results if you manually compensate (adjust) the exposure value set automatically by the camera - Olympus E-1 | E-1 Reference Manual (English) - Page 66
the button. Rotate the main dial or sub dial while holding down . Control panel Adjust toward - 5 When you finish setting, release . The exposure compensation indicator disappears if the exposure is compensated by 0. Viewfinder Control panel Exposure compensation indicator Exposure compensation - Olympus E-1 | E-1 Reference Manual (English) - Page 67
only You can assign exposure compensation to the main dial or sub dial by setting DIAL in the menu. This makes it possible to adjust exposure simply by rotating to press down . TIPS To change the EV step interval: T In the menu, set the EV step interval to 1/3EV, 1/2EV or 1EV. ~ "EV STEP" (P. 125 - Olympus E-1 | E-1 Reference Manual (English) - Page 68
metering) Ⅵ Digital ESP metering ESP Exposure The camera meters and calculates the light levels or light level differences in the center and other areas of the image separately. Recommended for shooting under conditions where there is high contrast between the center of the screen and the - Olympus E-1 | E-1 Reference Manual (English) - Page 69
. Normally, pressing the shutter button halfway locks both AF (auto focus) and AE (automatic exposure), but you can lock the exposure alone by pressing AEL. The AE and AF lock functions can be customized on this camera. ~ "AEL/AFL" (P. 122) 1 While holding down the mode dial lock, set the mode dial - Olympus E-1 | E-1 Reference Manual (English) - Page 70
bracketing", P.72). Useful when you are not sure what exposure or white balance settings are appropriate and you don't have time to take several test shots at different settings. AE bracketing The camera automatically shoots a number of pictures at different exposure values for each frame. Even in - Olympus E-1 | E-1 Reference Manual (English) - Page 71
different exposure. Sequential shooting : Hold down the shutter button until the selected number of frames are taken. The camera shoots each frame at a different exposure. ● only the part within the scale is displayed. Exposure Exposure compensation value you have adjusted When set to exposure - Olympus E-1 | E-1 Reference Manual (English) - Page 72
memory in the camera and card for storing more than the selected number of frames. ● During sequential shooting, if the battery check blinks due to low battery, the camera stops shooting and starts saving the pictures you have taken on the card. The camera shutter manually, then use the - Olympus E-1 | E-1 Reference Manual (English) - Page 73
3 frames/sec. for as long as the shutter button pressed.Focus and exposure are locked at the first frame. : Triggers the shutter after a set time, either 12 sec. or 2 sec. 2 Start shooting. ● Press the shutter button fully and keep it pressed. The camera will take pictures in sequence until you - Olympus E-1 | E-1 Reference Manual (English) - Page 74
saving the pictures you have taken on the card. The camera may not save all of the pictures depending on how much battery power remains. Self-timer shooting This function lets you take pictures using the self-timer. You can set the camera to trigger the shutter after either 12 or 2 seconds. Fix the - Olympus E-1 | E-1 Reference Manual (English) - Page 75
out of focus since focusing is performed when the shutter button is pressed halfway. Remote control shooting (with optional remote control) By using the optional remote control (RM-1), you can take a picture with yourself in it or a night scene without touching the camera. The camera can be set to - Olympus E-1 | E-1 Reference Manual (English) - Page 76
the remote control is too far from the camera. Move the remote control closer to the camera and press the shutter button on the remote control again. T There is signal interference. Change the channel as described in the remote control's instruction manual. To cancel the remote control shooting mode - Olympus E-1 | E-1 Reference Manual (English) - Page 77
the remote control, set RELEASE PRIORITY S or RELEASE PRIORITY C to OFF. ● The shutter will not be released if the subject is not in focus. ● Under bright recording of all the shots stored in the camera's memory. ● The YES/NO selection screen is displayed, giving you the choice of performing - Olympus E-1 | E-1 Reference Manual (English) - Page 78
recorded cannot be erased. 5 ANTI-SHOCK Exposure This diminishes camera shake caused by vibrations when the mirror moves. You can select the interval from the time the mirror is raised until the shutter is released. 1 In the menu, select Press . T ANTI-SHOCK. ~ "How - Olympus E-1 | E-1 Reference Manual (English) - Page 79
record mode that's best for your purpose (printing, editing on a PC, website editing, etc.). For details about record modes and number of pixels, refer to compression quality Standard quality Number of pixels 1/1 1/2.7 1/8 ˙ Select for the 2560 x 1920 TIFF SHQ HQ print size 1600 x 1200 - Olympus E-1 | E-1 Reference Manual (English) - Page 80
if the monitor setting is over 1024 x 768 (such as 1280 x 1024), the picture only takes up part of the screen. Record mode and the number of storable pictures The approximate number of pictures that can be stored is determined by dividing the memory capacity Control panel of the card by the file - Olympus E-1 | E-1 Reference Manual (English) - Page 81
select is displayed on the control panel. Record mode RAW TIFF SHQ HQ SQ Control panel Record mode button Sub dial Main dial TIPS To check in the camera's monitor. ~ "Information display" (P. 109) 6 Setting the SQ mode You can select the number of pixels (PIXEL COUNT) and compression - Olympus E-1 | E-1 Reference Manual (English) - Page 82
to select the desired compression. Press the OK button. SQ PIXEL COUNT COMPRESSION 1280 x 960 1/8 CANCEL SELECT GO TIPS After selecting RAW record mode (RAW • JPEG) RAW data can be recorded on a card at the same time as images in the SHQ, HQ and SQ modes. 1 In the menu, select T ON. T RAW - Olympus E-1 | E-1 Reference Manual (English) - Page 83
ISO sensitivity The higher the ISO value, the greater the camera's light sensitivity and the better its ability to shoot in low light conditions. However, higher values may give pictures a grainy appearance. Setting the ISO sensitivity to ISO BOOST using the menu beforehand allows you to select the - Olympus E-1 | E-1 Reference Manual (English) - Page 84
far away for the flash illumination, the sensitivity is automatically increased. ISO BOOST This allows you to make ISO 1600 and 3200 available for ISO setting. 1 In the menu, select T ISO BOOST T ON, then press the OK button. ~ "How to use the menus" (P. 38) OK button 6 84 Image, image quality and - Olympus E-1 | E-1 Reference Manual (English) - Page 85
can be adjusted to reproduce more natural white with a digital processor. This adjusting mechanism is called white balance. There are three options for setting the WB with this camera. Auto white balance This function lets the camera automatically determine the amount of white light and adjust the - Olympus E-1 | E-1 Reference Manual (English) - Page 86
temperature. The 4000K, 4500K and 6600K preset settings in this camera are correlated color temperatures, and should not be considered pictures and check the color on the screen. Various conditions affect color temperature and how color is reproduced on the screen. Note ● The color temperatures for each - Olympus E-1 | E-1 Reference Manual (English) - Page 87
button 6 Viewfinder [- -] displayed for correlative color temperature. When WB settings except auto are selected, WB is displayed. Monitor WB 4000K 0 STEP the image: T In the auto WB setting, if there is no near-white color in the image framed in the screen, the white balance will not be correctly - Olympus E-1 | E-1 Reference Manual (English) - Page 88
outdoors on a cloudy day (when using the flash) For shooting under a daylight fluorescent lamp For shooting outdoors in the shadows on a clear day Color temperature set by one-touch WB. When the value has not been set, it is set to 5300K. ~ "Setting the one-touch white balance" (P. 89) 88 - Olympus E-1 | E-1 Reference Manual (English) - Page 89
shutter is released, and the WB data is saved. ● Once the appropriate white balance has been determined, the CUSTOM WB screen for registering one-touch WB settings will be stored in the camera as a preset WB setting. Turning the power off does not reset the data. ~ "Setting the white balance" (P. - Olympus E-1 | E-1 Reference Manual (English) - Page 90
use the menus" (P. 38) 6 2 Press to select the whie balance mode in which you want to make WB compensation, then press . ● The setting screen for WB compensation is displayed. OK button AUTO 0 STEP 3000K 0 STEP 3300K 0 STEP 3600K 0 STEP CANCEL SELECT GO Image, image quality and color - Olympus E-1 | E-1 Reference Manual (English) - Page 91
be made in 7 steps in both the RED and BLUE directions. 4 Point the camera at the subject to take test shots. White balance AUTO RED 0 BLUE SAMPLE OK to exit the setting screen for WB compensation. ● is displayed on the control panel. WB is displayed with the WB settings except auto. WB - Olympus E-1 | E-1 Reference Manual (English) - Page 92
SHARPNESS This function adjusts the sharpness of the image. 1 In the menu, select T SHARPNESS, and press . ● The setting screen is displayed. ~ "How to use the menus" (P. 38) OK button 2 Press to move ࡗ. To increase the sharpness (Hi): Press . The image contours are emphasized, making - Olympus E-1 | E-1 Reference Manual (English) - Page 93
marked differences in light and shadow softer, and those with less differences more vivid. 1 In the menu, select T CONTRAST, and press . ● The setting screen is displayed. ~ "How to use the menus" (P. 38) OK button 2 Press to move ࡗ. To increase the contrast (Hi): CONTRAST Press . The light - Olympus E-1 | E-1 Reference Manual (English) - Page 94
sets 2 Press to select either. When selecting CS: Press . ● The SATURATION LEVEL screen is displayed. 6 When selecting CM1 - CM4: Go to Step 4. 3 Press to is displayed on the control panel. Control panel OK button CARD SETUP SATURATION CONTRAST 1 SHARPNESS 2 COLOR SPACE CANCEL SELECT - Olympus E-1 | E-1 Reference Manual (English) - Page 95
button Adjusting image Note ● This function is not activated when the record mode is set to RAW mode or RAW record mode (RAW • JPEG). NOISE REDUCTION 6 This scenes, shutter speeds are slower and noise tends to appear in images. When NOISE REDUCTION is set to ON, the camera automatically reduces - Olympus E-1 | E-1 Reference Manual (English) - Page 96
each stage of the noise-reduction process. Control panel Viewfinder Note ● You cannot take any more pictures until the card access lamp goes out. ● When NOISE REDUCTION is set to ON, sequential shooting is not available. ● This function may not work effectively with some shooting conditions or - Olympus E-1 | E-1 Reference Manual (English) - Page 97
or inner tube extension is attached to the camera. ● At higher ISO settings, noise in image edges may be conspicuous. Control panel sRGB : Standardized color space for Windows Adobe RGB : Color space that can be set by Adobe Photoshop 1 In the menu, select T COLOR SPACE T sRGB or Adobe RGB, - Olympus E-1 | E-1 Reference Manual (English) - Page 98
camera's hot shoe. You can also mount the flash on the specified flash bracket using the bracket cable (optional). Functions available with optional flash units Optional flash FL-50 Flash control mode TTL-AUTO (Super FP flash), TTL-AUTO, AUTO, MANUAL, MANUAL (Super FP flash) GN (guide number - Olympus E-1 | E-1 Reference Manual (English) - Page 99
following instructions describe how to connect and use the FL-50 electronic flash (optional). Be sure to attach the flash to the camera before shutter button on the camera halfway. ● Shooting information such as ISO sensitivity, aperture value, and shutter speed is communicated between the camera - Olympus E-1 | E-1 Reference Manual (English) - Page 100
set the flash mode even when no flash is attached to the camera. Types of flash modes Ⅵ Auto-flash (no indication) The flash fires pre-flashes, it takes about 1 second before the shutter is released. Hold the camera firmly to avoid camera movement. ● Effectiveness may be limited if the - Olympus E-1 | E-1 Reference Manual (English) - Page 101
slowest possible shutter speed depends on the shooting mode. 7 P mode : 2 sec. A/S/M mode (Bulb is also available) : 60 sec. When the shutter speed is set to 2 sec. 2 sec. 2nd curtain 2 sec. 2nd curtain flash fires Shutter closes 0 1st curtain 1st curtain flash fires Shutter fully opens - Olympus E-1 | E-1 Reference Manual (English) - Page 102
a backlight situation, or for correcting the color shift produced by artificial lighting (especially fluorescent light). Note ● When the flash fires, the shutter speed is set to 1/180 sec. or less. When shooting a subject against a bright background with the flash, the background may be overexposed - Olympus E-1 | E-1 Reference Manual (English) - Page 103
used to display on the control panel. Flash mode Control panel button Flash mode Sub dial Main dial Ⅵ When the exposure mode is set to P/A mode No indication ß å ß å SLOW (Auto-flash) (Red-eye reduction flash) (Slow synchronization + 7 ˙ Red-eye reduction flash) ˙ ¥ ß (Fill-in flash - Olympus E-1 | E-1 Reference Manual (English) - Page 104
portrait shooting is also possible with Super FP flash. For details, refer to the FL-50 manual menus" (P. 38) ● The setting screen is displayed. 2 To increase After setting is complete, is displayed on the control panel. set to ؓ0. set to MANUAL. ● If light emission is adjusted on the electronic - Olympus E-1 | E-1 Reference Manual (English) - Page 105
flashes, refer to the next page. 1 Remove the hot shoe cover to connect the flash unit to the camera. 2 Set the exposure mode to M mode, then set the aperture value and shutter speed. ~"Manual shooting" (P. 63) ● A slower shutter speed may produce blurred images. 3 Turn on the flash. ● Be sure to - Olympus E-1 | E-1 Reference Manual (English) - Page 106
is connected, it will not fire. Contact in the manual mode. (Exposure compensation on the camera cannot be lens. The focal length of the lens for 35 mm film is approximately twice as long as the focal length of the lenses designed for this camera. (6) Do not use a flash unit or other accessory - Olympus E-1 | E-1 Reference Manual (English) - Page 107
you want to display. ● Detailed information about the picture and histogram can be displayed. ~ "Information display" (P. 109) Arrow pad : Displays the frame that is stored 10 frames back. button : Displays the previous frame. : Displays the next frame. : Displays the frame that is stored - Olympus E-1 | E-1 Reference Manual (English) - Page 108
in the currently displayed index. Main dial Rotating the dial toward returns to single-frame playback. 1 2 3 4 5 6 7 8 9 10 11 12 1 2 3 4 5 6 1 2 13 14 15 16 7 8 9 3 4 1 8 Playback 2x Rotating the dial toward returns to single-frame playback. 3x Each time you - Olympus E-1 | E-1 Reference Manual (English) - Page 109
. Main dial INFO button 3 While holding down INFO, rotate the dial to change the display type. ● The screen switches between highlight, histogram or shooting information displays. ● This setting is stored and will be shown the next time the information display is called up. 4 Press INFO. ● The - Olympus E-1 | E-1 Reference Manual (English) - Page 110
1 x10 Frame number, print reservation and protect. Ⅵ Information 2 Print reservation, protect, record mode, number of pixels, compression, date and time and file number. 453 x10 SQ [1024x768 , 1/8] Ⅵ Highlight The overexposed parts of the recorded image blink. '03.01.01 00:00 FILE:123-3456 SQ - Olympus E-1 | E-1 Reference Manual (English) - Page 111
mode) button to stop the slideshow. Note ● If the camera is running on battery power during slideshow operation, the battery will run out in about one hour. Sub dial button counterclockwise. ● The rotated picture will be recorded on the card. '03.09.12 12:30 30 '03.09.12 12:30 30 '03. - Olympus E-1 | E-1 Reference Manual (English) - Page 112
's monitor turns off automatically when the video cable is connected to the 8 camera. ● Be sure to use the provided video cable to connect the camera to the TV. Playback ● The picture may appear off-center on the TV screen. ● Pictures will be compressed in order to fit the entire image on - Olympus E-1 | E-1 Reference Manual (English) - Page 113
liking. 1 Image processing is performed based on the current camera settings. Set the items available for editing (refer to the items listed below bar is displayed on the screen. After the bar disappears, image processing is complete. ● The data will be recorded to the card as a new file. 4 - Olympus E-1 | E-1 Reference Manual (English) - Page 114
Display the picture you want to protect. 2 Press the (protect) button. ● is displayed on the screen. To cancel the protection: Display the pictures that are protected and press . Note ● Formatting the card erases all pictures even if they have been protected. ● Picture rotation cannot be applied to - Olympus E-1 | E-1 Reference Manual (English) - Page 115
is displayed. 3 Press to select YES, then press the OK button. ERASE SETTING In the ERASE SETTING screens in the (custom) menu, you can set the screen cursor setting to YES. ~ "ERASE SETTING" (P. 127) Note ● You cannot erase protected pictures. OK button button ERASE YES N O CANCEL SELECT - Olympus E-1 | E-1 Reference Manual (English) - Page 116
select YES, then press OK button button ERASE SETTING In the ERASE SETTING screens in the (custom) menu, you can set the screen cursor setting to YES. ~ "ERASE SETTING" (P. 127) Note ● You cannot erase protected pictures. 8 Index display screen ERASE SELECTED YES N O Playback CANCEL SELECT GO - Olympus E-1 | E-1 Reference Manual (English) - Page 117
to select YES, then press ● All frames will be erased. ERASE SETTING In the ERASE SETTING screens in the (custom) menu, you can set the screen cursor setting to YES. ~ "ERASE SETTING" (P. 127) Note ● You cannot erase protected pictures. CARD SETUP OK button ALL ERASE FORMAT CANCEL SELECT GO - Olympus E-1 | E-1 Reference Manual (English) - Page 118
, refer to "How to use reset settings" (P. 119). CUSTOM RESET SETTING allows you to customize and register up to 4 different reset settings for later use. How to register reset settings 1 In the menu, select T CUSTOM RESET SETTING. Press . ● The CUSTOM RESET SETTING screen appears. ~"How to use the - Olympus E-1 | E-1 Reference Manual (English) - Page 119
in RESET 2. : Resets to the settings registered in RESET 3. : Resets to the settings registered in RESET 4. ● If no settings are registered with a RESET number, it will not be displayed. Control panel Viewfinder 9 3 When the desired RESET number is displayed, release the buttons. ● The camera - Olympus E-1 | E-1 Reference Manual (English) - Page 120
mode1/mode6 - DIAL*2 (P. 126) Ps/F.No./SHUTTER - FOCUS RING (P. 127) - S-AF+MF (P. 52) OFF - RELEASE PRIORITY S (P. 54) OFF - RELEASE PRIORITY C (P. 54) OFF - RESET LENS (P. 127) ON - PC MODE (P. 133) STORAGE - ERASE SETTING (P. 127) NO - 9 FILE NAME (P. 128) AUTO - Olympus E-1 | E-1 Reference Manual (English) - Page 121
mode Drive mode AF frame selection Shutter speed*2 Aperture value*3 (P. 83) (P. 65) (P. 85) (P. 79) (P. 100) (P. 70) (P. 68) (P 73) (P. 50) (P. 61) (P. 59) Playback mode (P. 107,109) Information display (P. 109) Factory default settings ( ) Auto 0.0 Auto HQ Auto/Fill-in flash Off ESP - Olympus E-1 | E-1 Reference Manual (English) - Page 122
Select mode 6 or mode 7. MF : Select one from mode 1- mode 5. OK button Function/setting customizing Ⅵ Modes available in the S-AF mode S-AF AEL/AFL mode 1 Shutter button function: Pressing the shutter button mode 1 halfway locks focus and exposure value. Pressing it all the way releases the - Olympus E-1 | E-1 Reference Manual (English) - Page 123
to take the picture. AEL button function: The focus is locked when the AEL button is pressed (AE memory). When AEL is pressed again, AF memory is canceled. • The focus stored in AF memory has priority over the focus locked when the shutter button is pressed halfway. S-AF AEL/AFL mode 4 HALF WAY - Olympus E-1 | E-1 Reference Manual (English) - Page 124
function: The exposure value is locked when the AEL button is pressed (AE memory). When AEL is pressed again, AE memory is canceled. • The exposure value stored in AE memory has priority over the exposure value locked when the shutter button is pressed all the way. Function/setting customizing 124 - Olympus E-1 | E-1 Reference Manual (English) - Page 125
EV STEP This allows you to change the EV step for exposure parameter setting, such as shutter speed, aperture value or exposure compensation value, etc. 1 In the menu, select T EV STEP T 1/3EV, 1/2EV or 1EV. Press the OK button. ~ "How to use - Olympus E-1 | E-1 Reference Manual (English) - Page 126
menu, select T DIAL T P, A, or S. Press . ● The DIAL screen appears. ~"How to use the menus" (P. 38) 2 The following functions can be assigned. P Ps, A F.No., S SHUTTER, : Exposure compensation, F.No.: Aperture setting, SHUTTER: Shutter speed setting OK button Press to select the combination of - Olympus E-1 | E-1 Reference Manual (English) - Page 127
This allows you to reset the focus of the lens when the power is turned off. 1 In the menu, select T RESET LENS T OFF or ON. Press the OK button. ~ "How to use the menus" (P. 38) OK button FOCUS RING This allows you to select the rotational direction of the focus ring to suit your preference of - Olympus E-1 | E-1 Reference Manual (English) - Page 128
.jpg P2030004.jpg File number (0001 - 9999) After taking 9999 pictures, the counter is reset Day (01 - 31) to 0001 for the next picture, the folder number increments by even if the card is not full. No more pictures can be taken. Replace the card with a new one. Function/setting customizing 128 - Olympus E-1 | E-1 Reference Manual (English) - Page 129
shutter button halfway during REC VIEW lets you resume shooting immediately. OFF : The picture being recorded to the card is not displayed. AUTO : The picture being recorded to the card is displayed. The display duration is automatically set by the camera . Press . ● The screen is displayed. ~ "How - Olympus E-1 | E-1 Reference Manual (English) - Page 130
of time elapses with no operations being performed, the camera enters the sleep mode (stand-by) to save battery power. SLEEP lets you select sleep timer. OFF cancels the sleep mode. The camera activates again as soon as you touch any button (the shutter button, arrow pad, etc.) 1 In the menu, select - Olympus E-1 | E-1 Reference Manual (English) - Page 131
display. This reference manual shows the English on-screen display in illustrations and explanations. Available languages vary depending on the area where you purchased this camera. 1 In the menu, select T . Press . ~ "How to use the menus" (P. 38) 2 Press to select the language you want - Olympus E-1 | E-1 Reference Manual (English) - Page 132
for approximately 5 months using the built-in battery. Depending on how the camera is used, the date/time setting may be erased earlier. Date/time settings will also be lost if the camera is left for a long period with no battery loaded. The internal battery will be fully recharged in about one day - Olympus E-1 | E-1 Reference Manual (English) - Page 133
is connected to a PC (via the provided USB cable), the PC automatically recognizes the camera as an external memory device (such as a hard-disk or CD-R, etc.). With the camera's PC MODE set to CONTROL, the provided OLYMPUS Studio software (trial version) allows you to control the camera's shutter - Olympus E-1 | E-1 Reference Manual (English) - Page 134
on the card. This enables printing pictures on a DPOF-compatible printer or at a photo lab that supports DPOF. Print reservation allows you to save printing data with the pictures. DPOF refers to the print data recording standard used on digital cameras. This enables desired print settings (number - Olympus E-1 | E-1 Reference Manual (English) - Page 135
possible, connect the optional AC adapter. When selecting pictures for printing, never switch the camera off or open the memory card cover. card, the RESET/KEEP selection screen appears, giving you the choice of resetting the data or keeping it. ~ "Resetting print reservation data" (P. 139) 10 - Olympus E-1 | E-1 Reference Manual (English) - Page 136
shooting date is printed on all pictures. TIME : The shooting time is printed on all pictures. CANCEL SELECT GO x 2 HQ CANCEL SELECT 20 GO CANCEL N O DATE TIME SELECT GO Print reservation 10 6 Press OK. ● The to select SET, then press menu is restored. SET CANCEL EXIT SELECT GO 136 - Olympus E-1 | E-1 Reference Manual (English) - Page 137
stored on the card, the RESET/KEEP selection screen appears, giving you the choice of resetting the data or keeping it. ~ "Resetting print reservation data" (P. 139) 2 Press to select , then press the OK button. ● The screen is displayed. OK button 3 Press to set the date/time printing - Olympus E-1 | E-1 Reference Manual (English) - Page 138
4 Press OK. ● The to select SET, then press menu is restored. SET CANCEL EXIT SELECT GO TIPS Single-frame reservation on the card, the RESET/KEEP selection screen appears, giving you the choice of resetting the data or keeping it. ~ "Resetting print reservation data" (P. 139) 10 2 Press - Olympus E-1 | E-1 Reference Manual (English) - Page 139
-frame print reservation data 1 In the menu, select T . Press . ~ "How to use the menus" (P. 38) ● If print reservation data is already stored on 10 the card, the RESET/KEEP selection screen appears, giving you the choice of resetting the data or keeping it. Print reservation OK button 139 - Olympus E-1 | E-1 Reference Manual (English) - Page 140
/KEEP selection screen appears, giving you the choice of resetting the data or keeping it. Print reservation 2 Press OK. 3 Press OK. to select KEEP, then press to select , then press 10 4 Press to display the frame whose print reservation data you want to reset, then press to set the number - Olympus E-1 | E-1 Reference Manual (English) - Page 141
you are finished. ● The screen is displayed. 6 Press to select NO, DATE or TIME. Press OK. ● This setting is applied to all frames with print reservation data. 7 Press OK. to select SET, then press ● The setting is saved. ● The menu is restored. Resetting print reservation data CANCEL - Olympus E-1 | E-1 Reference Manual (English) - Page 142
data is already stored on the card, the RESET/KEEP selection screen appears, giving you the choice of resetting the data or keeping it. RESET KEEP SELECT GO 4 Select RESET, then press OK. ● Only the index-printing reservation is canceled, and the menu is restored. 10 CANCEL SELECT GO SET RESET - Olympus E-1 | E-1 Reference Manual (English) - Page 143
, refer to their manuals. ● If you want to process images, be sure to download them to your computer first. Depending on the software, image files may be destroyed if the images are processed (rotated, etc.) while they are on the card. Connecting cable (provided) When connecting the camera to your - Olympus E-1 | E-1 Reference Manual (English) - Page 144
the USB driver (P. 146) ¥ Connecting the camera to the computer using the USB cable or IEEE1394 cable *3 ¥ Connecting the USB cable to the computer (P. 148) ¥ ¥ Confirming the computer has recognized the camera (P. 149) ¥ ¥ Downloading image files (P. 150) Transferring images to a computer - Olympus E-1 | E-1 Reference Manual (English) - Page 145
data (file) being transmitted may be lost. Use the optional AC adapter when downloading files. ● To avoid computer malfunctions, do not turn off the camera when the camera is connected to a computer. ● If the camera is connected to the computer via an IEEE1394 or USB hub, operation may not be stable - Olympus E-1 | E-1 Reference Manual (English) - Page 146
instruction below) Users running Windows Me/2000/XP and users running Mac OS 9/X ~ "Connecting the camera to your computer using the cable" (P. 148) Users running other OS need to use a PC card drive letter of the CD-ROM varies depending Screen illustrations may differ to those displayed on your - Olympus E-1 | E-1 Reference Manual (English) - Page 147
4 Click [OK] to restart your computer and the installation is complete. 5 When the computer has restarted, installation is complete. If the Olympus Windows Installer screen appears, click [Close] and remove the CD-ROM from the CD-ROM drive. Identifying the OS Transferring images to a computer 11 - Olympus E-1 | E-1 Reference Manual (English) - Page 148
on your computer. Look for this mark. Terminal Terminal USB port USB IEEE1394 (FireWire) port IEEE1394 Note ● Do not connect both the USB cable and IEEE1394 cable to the camera at the same time. 2 Make sure that the power switch is set to OFF, then insert the cable into the connector on the - Olympus E-1 | E-1 Reference Manual (English) - Page 149
. You may then use the image-management software provided. For detailed instructions on downloading, refer to the software user's manual. ● Mac OS 9 The [Untitled] icon appears on the desktop. If you cannot find this icon, turn off the camera and connect again. ● Mac OS X The Apple Image Capture - Olympus E-1 | E-1 Reference Manual (English) - Page 150
image files to your computer Download image files to your computer using the software provided with your computer's OS. Windows 98/98 SE/Me/2000/XP 1 Double-click the [My Computer] icon on the desktop. ● For users running Windows XP, click [My Computer] from the [Start] menu. 2 Double-click - Olympus E-1 | E-1 Reference Manual (English) - Page 151
(in My Documents folder). Viewing the image files When the image file has been downloaded to the computer, you can copy the image to any valid drive or folder on graphics application that supports JPEG or TIFF images files, such as Paint Shop Pro, Photoshop. 11 151 Transferring images to a computer - Olympus E-1 | E-1 Reference Manual (English) - Page 152
's PC MODE has been set to CONTROL. Disconnect the camera from the computer, and check the PC mode. Note ● The card access lamp on the camera blinks while the image is being downloaded. Never open the card cover on the camera, load or remove the battery, or connect or disconnect the AC adapter while - Olympus E-1 | E-1 Reference Manual (English) - Page 153
Downloading image files to your computer ● Image file (JPEG files) with files names such as [P1010001.jpg] are displayed. 4 Double-click the [Macintosh HD] icon on - Olympus E-1 | E-1 Reference Manual (English) - Page 154
There is no card in the camera or there is a problem with the card. Check that you can playback pictures on the monitor of the camera. T The USB cable is not properly connected between the camera and the computer. Note ● The card access lamp blinks while the image is being downloaded. Never open the - Olympus E-1 | E-1 Reference Manual (English) - Page 155
exit the Apple Image Capture software. At this time, the camera is indicated as [NO_NAME]. Note ● If you use the Apple Image Capture software, images downloaded to your computer and transferred back to a card may not playback on the camera or may have other problems. 11 155 Transferring images to - Olympus E-1 | E-1 Reference Manual (English) - Page 156
the menu. 2 Click [Eject] on the menu. Card access lamp Transferring images to a computer Windows Me/2000/XP: 1 In the System Tray, single-click the Remove Hardware icon. 2 Single-click on the message [Stop USB Mass Storage Device]. (with USB connection) 3 Click [OK] on the window [USB Mass - Olympus E-1 | E-1 Reference Manual (English) - Page 157
the window may return the following message. In such case, make sure that no image data is being downloaded from the camera, and that there are no applications open that were accessing the camera image files. Close any such applications and click [Unplug or Eject Hardware] again and then remove the - Olympus E-1 | E-1 Reference Manual (English) - Page 158
Insert the card again. If the problem persists, format the card. If the card cannot be formatted, it cannot be used. The card has been set to read-only setting with the computer. Reset the card with the computer. Replace the card or erase unwanted pictures. Before erasing, download important images - Olympus E-1 | E-1 Reference Manual (English) - Page 159
due to a problem with this picture. Or the picture cannot be used for playback on this camera. Use image processing software to view the picture on a PC. If that cannot be done, the image file is damaged. The card cover is open. Close the card cover. CARD-COVER OPEN CARD ERROR The card is not - Olympus E-1 | E-1 Reference Manual (English) - Page 160
action The battery is low. Charge the battery. Subjects are difficult to focus on (AF do not work properly). Take a picture using MF (manual focus) or focus lock. Pictures are being recorded to the card. During sequential shooting, no pictures can be taken when the camera's memory is full - Olympus E-1 | E-1 Reference Manual (English) - Page 161
Troubleshooting No picture is taken when the shutter button is pressed. Possible cause Corrective action The battery ran out of power Charge the battery. (If images are being during shooting or while the recorded, wait until charging is complete.) images were being written to the card. (Only the - Olympus E-1 | E-1 Reference Manual (English) - Page 162
Troubleshooting The picture is out of focus. Possible cause Corrective action The subject is too close. Move back to the closest focusing distance for the lens and take the picture. Ref. Page - Subjects are difficult to Take the picture using MF (manual focus) or focus focus on (AF does not - Olympus E-1 | E-1 Reference Manual (English) - Page 163
Troubleshooting is set in Increase the aperture value. Or set the exposure the A (M) mode. mode to the P mode. A slow shutter speed is set Increase the shutter speed. Or set the the one-touch white balance. The white balance setting Set the appropriate white balance for the lighting is wrong - Olympus E-1 | E-1 Reference Manual (English) - Page 164
158 No picture is displayed on the TV when connected to the camera. Possible cause Corrective action The video cable is not connected correctly. Connect the cable properly according to the instructions. The camera's video output Set the video signal according to the region signal is incorrect - Olympus E-1 | E-1 Reference Manual (English) - Page 165
when you want to check picture details. Ref. Page P. 129 - P. 27 ⅷ Connecting the camera to a PC The computer does not recognize the camera correctly. Possible cause Corrective action The camera's power is turned off. Set the power switch to ON. The USB driver was not successfully installed - Olympus E-1 | E-1 Reference Manual (English) - Page 166
ⅷ Shooting Menu Menu Function CARD SETUP SATURATION CONTRAST SHARPNESS COLOR SPACE WB BKT RAW•JPEG NOISE FILTER NOISE REDUCTION SHADING COMP. AF ILLUMINATOR ANTI-SHOCK PIXEL MAPPING ⅷ Playback Menu Menu Function RAW DATA EDIT : Factory default setting Setting Ref. Page ALL ERASE - Olympus E-1 | E-1 Reference Manual (English) - Page 167
Function EV STEP ISO BOOST SQ AEL/AFL DIAL : Factory default setting Menu directory Setting 1/3EV, 1/2EV, 1EV OFF, ON AUTO BLUE7 - ±0 - P Ps Ps Ps Ps A F.No. F.No. F.No. F.No. S SHUTTER SHUTTER SHUTTER SHUTTER Ref. Page P. 125 P. 84 P. 90 P. 81 P. 122 P. 126 Miscellaneous 12 - Olympus E-1 | E-1 Reference Manual (English) - Page 168
directory ⅷ Custom Menu Menu Function Setting FOCUS RING S-AF+MF RELEASE PRIORITY S RELEASE PRIORITY C RESET LENS PC MODE ERASE SETTING CLEANING MODE CUSTOM RESET SETTING , OFF, ON OFF, ON OFF, ON OFF, ON STORAGE , CONTROL YES, NO RESET 1 RESET 2 RESET 3 RESET 4 SET, CLEAR Ref. Page P. 127 - Olympus E-1 | E-1 Reference Manual (English) - Page 169
bottled blower. If high-pressure gas is sprayed onto the lens, mirror, or focusing screen by nonauthorized service persons, the camera will be damaged. Ⅵ Camera maintenance If you have not used the camera for a long time, remove the battery and store it in a well-ventilated, cool and dry place - Olympus E-1 | E-1 Reference Manual (English) - Page 170
The busy bar is displayed during PIXEL MAPPING. When PIXEL MAPPING is finished, the menu is restored. Note ● If you accidentally turn the camera off during PIXEL MAPPING, start again from Step 1. ON ANTI-SHOCK OFF PIXEL MAPPING 1 -2 -1 0 +1 +2 2 CANCEL SELECT GO Miscellaneous BUSY 12 170 - Olympus E-1 | E-1 Reference Manual (English) - Page 171
Olympus Authorized Service instructions below. When cleaning the CCD, the specified AC adapter should be used (P. 21). If a battery is used and power runs out during cleaning, the shutter will close, which may cause the shutter curtain and mirror to break. 1 Remove the lens from the camera. 2 Set - Olympus E-1 | E-1 Reference Manual (English) - Page 172
be checked with the preview button Focusing screen : Interchangeable Eyecup : Interchangeable Ⅵ Monitor Product type Total no. of pixels : 1.8" TFT color LCD : Approx. 134,000 pixels Ⅵ Shutter Product type Shutter : Computerized focal-plane shutter : 1/4000 - 60 sec. (1/3, 1/2, or 1 EV step - Olympus E-1 | E-1 Reference Manual (English) - Page 173
a range of ± 5 EV. Ⅵ White balance Product type Mode setting : CCD and white balance sensor : Auto, Preset WB (12 settings), One-touch WB (4 settings can be registered) Ⅵ Recording Memory Recording format Recording mode : CF card (Compatible with Type I and II) Microdrive compatible (Compatible - Olympus E-1 | E-1 Reference Manual (English) - Page 174
wave filter (dust reduction function included as standard) Ⅵ Power supply Battery AC power supply Others : BLM-1 Lithium-ion Battery : AC-1 AC adapter (optional) : BLL-1 Lithium-ion Battery for Power Battery Holder Set (optional) Ⅵ Dimensions/weight Dimensions : 141 mm (W) x 104 mm (H) x 81 mm - Olympus E-1 | E-1 Reference Manual (English) - Page 175
mode, in which the user selects the aperture and the camera sets the shutter speed, and S mode, in which the user selects the shutter speed and the camera sets the aperture. In M mode, the user selects both the aperture and the shutter speed. Aperture The adjustable lens opening which controls the - Olympus E-1 | E-1 Reference Manual (English) - Page 176
saving desired print settings on digital cameras. By entering which images to print and the number of copies of each, the user can easily have the desired images printed by a printer or print lab that supports the DPOF format. Eclipsing (Vignetting) This refers to when an object obscures part of the - Olympus E-1 | E-1 Reference Manual (English) - Page 177
onto the card in JPEG format when the Record mode is set to SHQ, HQ, SQ. By downloading these images to a personal computer, users can edit them using graphics application software or view the images using an Internet web browser. M (Manual) Mode The user sets both the aperture and shutter speed - Olympus E-1 | E-1 Reference Manual (English) - Page 178
spot metering for backlit subjects, or sports and stage performers. See also digital ESP metering and center weighted averaging metering. Synchro Terminals Terminals on an external flash unit for connecting it to the camera. TIFF (Tagged Image File Format) A format used for saving highly detailed - Olympus E-1 | E-1 Reference Manual (English) - Page 179
CONTROL 133 Control panel 9, 11 CUSTOM RESET SETTING 45, 118 D Date/time setting 132 DC-IN jack 10 DIAL 126 Digital ESP metering 68 Diopter adjustment dial 10, 27 DPOF 134 DRIVE button 10, 36, 73 Drive mode DRIVE 73 Dust reduction 170 E Eject button 24 ERASE SELECTED 116 - Olympus E-1 | E-1 Reference Manual (English) - Page 180
pictures 11, 12, 73 Number of storable still pictures 11 O OK button 10, 38 One-touch white balance CUSTOM WB 89 OS 144 P PAL 131, 177 PC MODE 133 Picture rotation 111 PIXEL MAPPING 170 Power switch 9, 26 Preset white balance ..........87 Preview 65 Preview button 9, 65 - Olympus E-1 | E-1 Reference Manual (English) - Page 181
receiver 9, 76 RESET LENS 44, 127 S S (S-AF 51 S-AF+MF 52 SATURATION 94 2nd curtain 101 Self-timer shooting 74 Self-timer/Remote control lamp, AF illuminator 9, 55 Sequential shooting 73 SHADING COMP 97 SHARPNESS 92 SHQ 80 Shutter button 9, 49 Shutter priority shooting - Olympus E-1 | E-1 Reference Manual (English) - Page 182
(USA) 24/7 online automated help: http://www.olympusamerica.com/E1 Phone customer support: Tel. 1-800-260-1625 (Toll-free) Our phone customer support is available from 8 am to 10 pm (Monday to Friday) ET E-Mail: [email protected] OLYMPUS OPTICAL CO. (EUROPA) GMBH. Premises/Goods delivery
-
 1
1 -
 2
2 -
 3
3 -
 4
4 -
 5
5 -
 6
6 -
 7
7 -
8
-
9
-
10
-
11
-
12
-
13
-
14
-
15
-
16
-
17
-
18
-
19
-
20
-
21
-
22
-
23
-
24
-
25
-
26
-
27
-
28
-
29
-
30
-
31
-
32
-
33
-
34
-
35
-
36
-
37
-
38
-
39
-
40
-
41
-
42
-
43
-
44
-
45
-
46
-
47
-
48
-
49
-
50
-
51
-
52
-
53
-
54
-
55
-
56
-
57
-
58
-
59
-
60
-
61
-
62
-
63
-
64
-
65
-
66
-
67
-
68
-
69
-
70
-
71
-
72
-
73
-
74
-
75
-
76
-
77
-
78
-
79
-
80
-
81
-
82
-
83
-
84
-
85
-
86
-
87
-
88
-
89
-
90
-
91
-
92
-
93
-
94
-
95
-
96
-
97
-
98
-
99
-
100
-
101
-
102
-
103
-
104
-
105
-
106
-
107
-
108
-
109
-
110
-
111
-
112
-
113
-
114
-
115
-
116
-
117
-
118
-
119
-
120
-
121
-
122
-
123
-
124
-
125
-
126
-
127
-
128
-
129
-
130
-
131
-
132
-
133
-
134
-
135
-
136
-
137
-
138
-
139
-
140
-
141
-
142
-
143
-
144
-
145
-
146
-
147
-
148
-
149
-
150
-
151
-
152
-
153
-
154
-
155
-
156
-
157
-
158
-
159
-
160
-
161
-
162
-
163
-
164
-
165
-
166
-
167
-
168
-
169
-
170
-
171
-
172
-
173
-
174
-
175
-
176
-
177
-
178
-
179
-
180
-
181
-
182
 |
 |
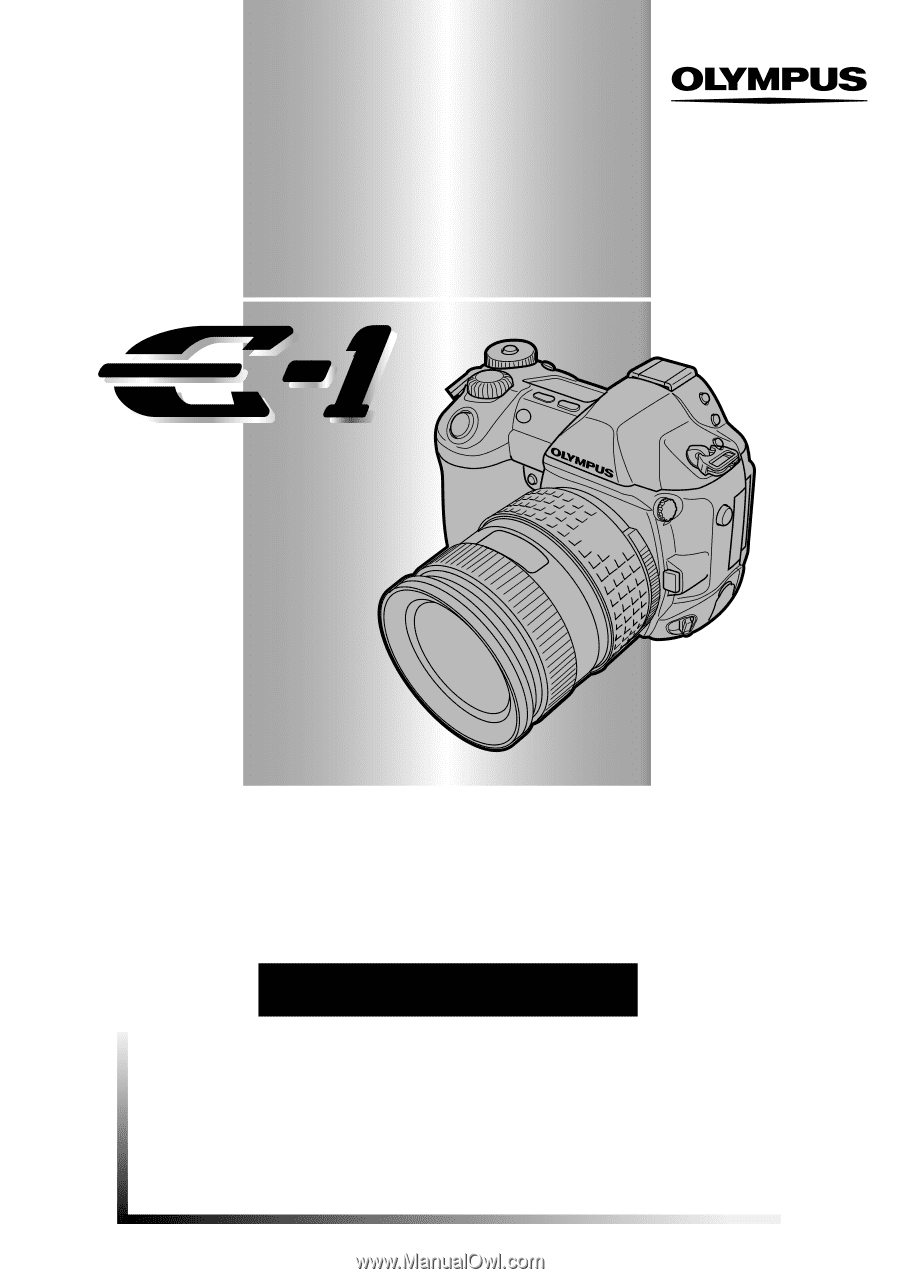
DIGITAL CAMERA
REFERENCE MANUAL
●
Thank you for purchasing an Olympus digital camera. Before you start to use
your new camera, please read these instructions carefully to enjoy optimum
performance and a longer service life. Keep this manual in a safe place for future
reference.
●
We recommend that you take test shots to get accustomed to your camera
before taking important photographs.
●
In the interest of continually improving products, Olympus reserves the right to
update or modify information contained in this manual.