Panasonic AG-HPX370 Studio System 300 Installation Guide - Page 21
Optional - Power Tap 28, Pin Lemo 12V 1.5A DC Out on the camera body. Do to
 |
View all Panasonic AG-HPX370 manuals
Add to My Manuals
Save this manual to your list of manuals |
Page 21 highlights
Panasonic Solutions Company Section 2 - Cable Identification Optional - Power Tap 28" (Part # PowerTap28) This cable Provides 12 Volt DC Power for the On Board Monitor. Connect the P-Tap Plug to the P-Tap Jack on the Camera. Connect the 4 Pin XLR to the Monitor DC In. Note: Power Tap-28 = 28" Power Tap-20 =20" IMPORTANT NOTE: Do Not Power the BT-LH910 Monitor from the 4 Pin Lemo 12V 1.5A DC Out on the camera body. Do to the current requirement on the BT-LH910, only use the P-Tap or external source to power the monitor. 21
-
 1
1 -
2
-
3
-
4
-
5
-
6
-
7
-
8
-
9
-
10
-
11
-
12
-
13
-
14
-
15
-
 16
16 -
 17
17 -
 18
18 -
 19
19 -
 20
20 -
 21
21 -
 22
22 -
 23
23 -
 24
24 -
 25
25 -
 26
26 -
27
-
28
-
29
-
30
-
31
-
32
-
33
-
34
-
35
-
36
-
37
-
38
-
39
-
40
-
41
-
42
-
43
-
44
-
45
-
46
-
47
-
48
-
49
-
50
 |
 |
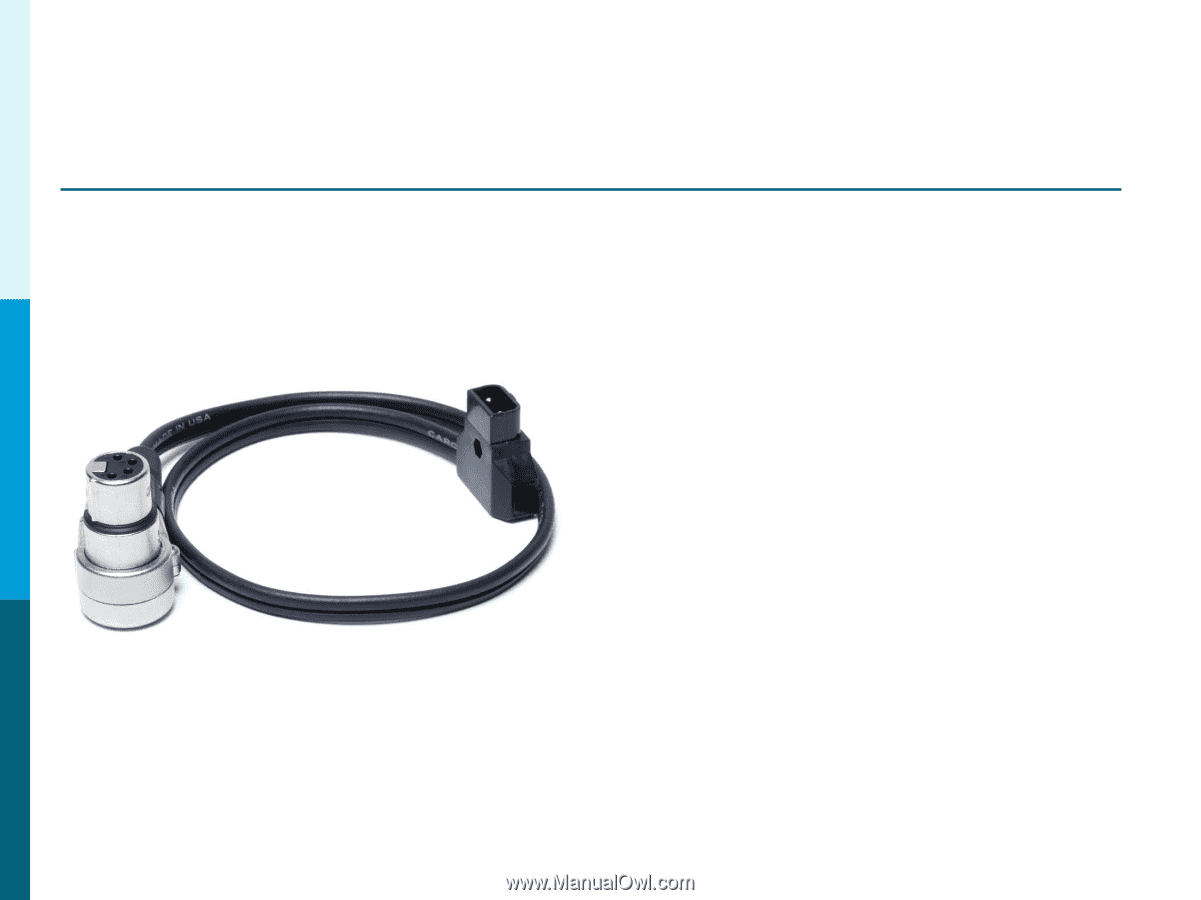
Section 2 – Cable Identification
21
Optional – Power Tap 28”
(Part # PowerTap28)
This cable Provides 12 Volt DC Power
for the On Board Monitor.
Connect the P-Tap Plug to the
P-Tap Jack on the Camera.
Connect
the 4 Pin XLR to the Monitor DC In.
Note: Power Tap-28 = 28”
Power Tap-20
=20”
IMPORTANT NOTE: Do Not Power the BT-LH910 Monitor from the
4 Pin Lemo 12V 1.5A DC Out on the camera body. Do to the
current requirement on the BT-LH910, only use the P-Tap
or external source to power the monitor.
Panasonic Solutions Company