Panasonic AW-HS50 Basic Operating Instructions - Page 23
Displaying the OSD menus on, an SDI monitor, Changing the video format, SDI OUT 2 connector.
 |
View all Panasonic AW-HS50 manuals
Add to My Manuals
Save this manual to your list of manuals |
Page 23 highlights
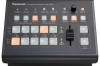
2. Preparations 2-4-2. Displaying the OSD menus on an SDI monitor 1 Connect the SDI monitor to the unit's SDI OUT 2 connector. 2 Turn on the power of the SDI monitor. 3 Turn on the power of the unit. 4 Hold down the OSD ON button. The OSD ON button indicator lights, and the OSD menus are displayed on the SDI monitor. If the OSD menus do not appear on the monitor, refer to "2-5-2. How to forcibly display the OSD menus". Notes The OSD menus cannot be output from the SDI OUT 1 connector. If the OSD menu fails to appear on the SDI monitor even after the above steps have been taken, it may mean that the video format which has been set in the unit is not the correct one. Take the steps in the next section to change the unit's video format. Refer to "Changing the video format". Changing the video format If the OSD menus cannot be displayed even when the SDI monitor has been connected to the unit, the video format must be changed. Follow the steps below to change the video format. If the OSD menus can be displayed using a PC monitor, change the video format by following the steps in "4-1-1. Setting the video format" ( Operating Instructions). 1 Turn off the power of the unit. 2 Turn on the unit's power while at the same time holding down the button that corresponds to the video format supported by the SDI monitor. Button to press at the same time [OSD ON] + A bus crosspoint [1] [OSD ON] + A bus crosspoint [2] [OSD ON] + A bus crosspoint [3] [OSD ON] + A bus crosspoint [4] [OSD ON] + A bus crosspoint [5] [OSD ON] + B bus crosspoint [1] [OSD ON] + B bus crosspoint [2] [OSD ON] + B bus crosspoint [3] Video format 1080/59.94i 1080/50i 720/59.94p 720/50p 1080/24PsF 1080/23.98PsF 480/59.94i 576/50i 3 Hold down the OSD ON button. The OSD ON button indicator lights, and the OSD menus are displayed on the SDI monitor. Note If the OSD menu fails to appear on the SDI monitor even after the above steps have been taken, it may mean that the SDI monitor does not support the unit's SDI output format. Check the input specifications of the SDI monitor. 23
-
 1
1 -
2
-
3
-
4
-
5
-
6
-
7
-
8
-
9
-
10
-
11
-
12
-
13
-
14
-
15
-
16
-
17
-
 18
18 -
 19
19 -
 20
20 -
 21
21 -
 22
22 -
 23
23 -
 24
24 -
 25
25 -
 26
26 -
 27
27 -
 28
28 -
29
-
30
-
31
-
32
-
33
-
34
 |
 |
