Panasonic BT-LH1710 User Manual
Panasonic BT-LH1710 - Professional - LCD Production Monitor Manual
 |
UPC - 092281890852
View all Panasonic BT-LH1710 manuals
Add to My Manuals
Save this manual to your list of manuals |
Panasonic BT-LH1710 manual content summary:
- Panasonic BT-LH1710 | User Manual - Page 1
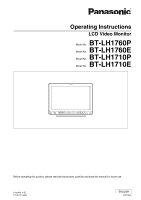
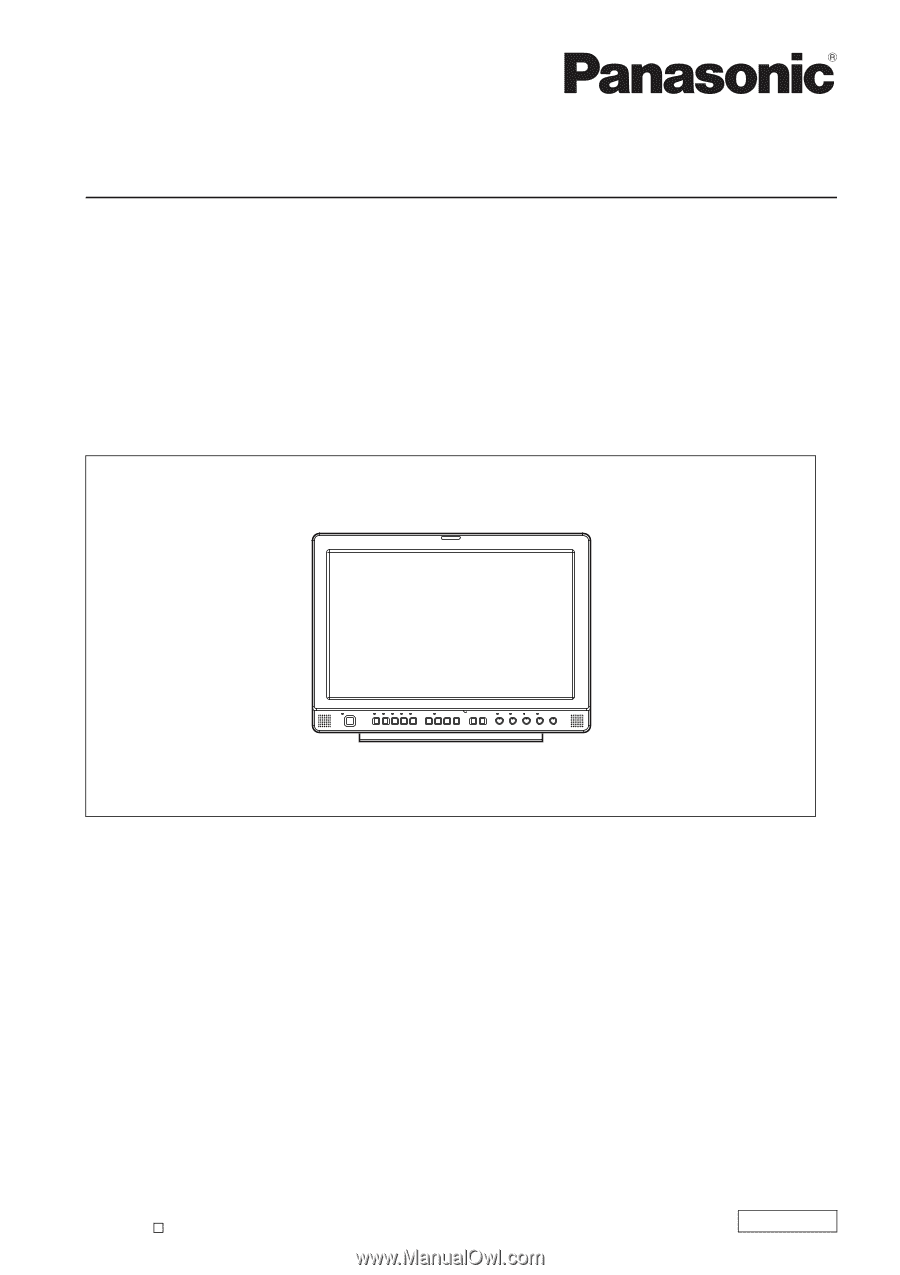
Operating Instructions LCD Video Monitor Model No. BT-LH1760P Model No. BT-LH1760E Model No. BT-LH1710P Model No. BT-LH1710E Before operating this product, please read the instructions carefully and save this manual for future use. F1008T0 -P D Printed in Japan ENGLISH VQT1Z04 - Panasonic BT-LH1710 | User Manual - Page 2
service center for assistance in selecting an alternate AC plug. CAUTION: • Keep the temperature inside the rack to between 41°F to 95°F (5°C to 35°C). • Bolt the rack securely to the floor so that it will not topple over. CAUTION: This Monitor is for use only with Panasonic Wall Mount Adaptor, BT - Panasonic BT-LH1710 | User Manual - Page 3
) (continued) FCC NOTICE (USA) Declaration of Conformity Model Number: BT-LH1760P/1710P Trade Name: PANASONIC Responsible Party: Panasonic Corporation of North America One Panasonic Way, Secaucus, NJ07094 Support contact: Panasonic Broadcast & Television Systems Company 1-800-524-1448 - Panasonic BT-LH1710 | User Manual - Page 4
shock, do not remove covers. No user serviceable parts inside. Refer servicing to qualified service personnel. CAUTION: THE MAINS PLUG OF THE . CAUTION: This Monitor is for use only with Panasonic Wall Mount Adaptor, BT-WMA17G, or Panasonic Rack Mount Adaptor, BT-MA1710G. Use with other Wall - Panasonic BT-LH1710 | User Manual - Page 5
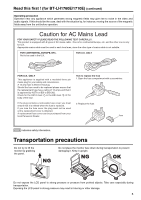
BT-LH1760E . This product is equipped used until a replacement cover is obtained. A replacement fuse cover can be purchased from your local Panasonic monitor by grabbing the panel. Do not place the monitor face down during transportation to prevent damaging it. Keep it upright. Do not expose the LCD - Panasonic BT-LH1710 | User Manual - Page 6
41 Maintenance 41 Specifications 42 Standard accessories Power cord × 1 Power cord hook × 1 Screw × 1 AC mains lead × 2 AC mains lead hook × 1 Screw × 1 Optional units Rack Mount Adaptor BT-MA1710G (Installation instructions J page 40) Wall - Panasonic BT-LH1710 | User Manual - Page 7
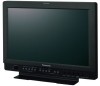
Outline The BT-LH1760/1710 LCD monitor was designed especially for broadcasting service and business use. It is equipped with a high performance 17.0-inch wide LCD display panel. ■ High performance LCD panel This monitor achieves outstanding color reproduction, a wide viewing angle, and high-speed - Panasonic BT-LH1710 | User Manual - Page 8
Controls and Their Functions Video monitor unit Front view Tally (J page 29, 36) Front panel (J page 9) Rear view Rear panel (J page 10) Power supply [you can switch between AC and DC (J page 11)] 8 - Panasonic BT-LH1710 | User Manual - Page 9
digital interface input (HD/SD compatible) YPBPR/RGB : Analog component (YPBPR) or RGB input. Also compatible with PC input RGB. * When using PC Input, select LED above the knob (amber) lights. Settings are loaded when the monitor is turned on. The settings are saved when the knob is pressed - Panasonic BT-LH1710 | User Manual - Page 10
than SDI is selected. This terminal supports embedded audio. When multiple monitors are connected in a daisy chain* pattern using the SDI active through-out, flicker to the SYNC/HD terminal. When using a PC RGB signal, connect the horizontal synchronizing signal to the SYNC/HD terminal, and the - Panasonic BT-LH1710 | User Manual - Page 11
power outlet. Please note the followings • If the power cover has been removed or opened, do not use the monitor with the power supply connected to both the AC input and external DC input terminals. • Use a shielded DC cable that is not longer than 2 m. A cable that is 2 m or longer may cause noise - Panasonic BT-LH1710 | User Manual - Page 12
How to Use the On Screen Menu The screen displays eight types of information: input page 9, ) • VIDEO, SDI1, SDI2, YPBPR/RGB-VIDEO/RGB-COMP. DVI-VIDEO/DVI-COMP. 2. Signal format • Use "STATUS DISPLAY" in the "SYSTEM CONFIG" menu to set the display status (J page 22). • "UNSUPPORT SIGNAL" appears - Panasonic BT-LH1710 | User Manual - Page 13
• You can switch the level display on/off and set the 6 8 number of displayed channels using the menu. • The 0 dB line and channel display can be switched on/off from the menu. can change position of the display (J page 22, "MENU POSITION"). Displays instructions on menu button operations. 13 - Panasonic BT-LH1710 | User Manual - Page 14
On Screen Menu (continued) Time code (TC) display • Use the menu to display the time code for HD-SDI signal input. It also allows you to switch display mode (VITC, LTC, VUB, LUB). In VITC and LTC display mode: • Displays the time code - Panasonic BT-LH1710 | User Manual - Page 15
How to Use the On Screen Menu (continued) Menu operations 1. Press [MENU] to display the MAIN menu. 3. Press [ , ] to select a sub menu and Press [ENTER]. The settings in - Panasonic BT-LH1710 | User Manual - Page 16
except "SETUP LOAD/SAVE" (including button function settings on the monitor front panel) • Screen adjustments made with the picture adjusting knob press [ENTER]. This saves the user data. *1 Only displayed on the BT-LH1760. To return to the previous screen Push [MENU]. 16 5. Select "YES" and press - Panasonic BT-LH1710 | User Manual - Page 17
/VECTOR COLOR TEMP. POSITION GAIN RED CONTROL LOCAL ENABLE VECTOR MODE VECTOR SCALE TIME CODE *[WHITE BALANCE VAR1-3] GAIN GREEN GAIN BLUE BIAS RED OPERATION LCD MODE SELECT CLOSED CAPTION MODE SELECT BIAS GREEN BIAS BLUE RESET *1 Only displayed on the BT-LH1760. 17 - Panasonic BT-LH1710 | User Manual - Page 18
monitor or camera recorder marker size. Conventional monitor marker size Marker size compliant with the camera recorder (Panasonic (J page 36) is used to control the marker setting. They are also disabled in split screen mode. *3 This setting is enabled only for HD and SD signal input - Panasonic BT-LH1710 | User Manual - Page 19
14:9 marker VISTA marker, CNSCO marker This marker is displayed as a horizontal dotted line. 90% Area marker 88% Area marker 80% Area marker (Displayed for HD input and SD input in 16:9 ratio mode.) This marker is displayed as a dotted line. VISTA marker CNSCO marker The marker is displayed as - Panasonic BT-LH1710 | User Manual - Page 20
"FILM" is selected. Selects type of FILM gamma mode. For VARICAM use Other Selects color temperature. Adjustable settings 0 the factory defaults are SHARPNESS MODE: LOW and SHARPNESS H/V: 0) 2) HD for any other input (the factory defaults are SHARPNESS MODE: HIGH - Panasonic BT-LH1710 | User Manual - Page 21
. Conventional inter-frame interpolation involved 1-frame or greater delay, but this monitor suppresses the delay to within 1 field. The factory default is "MODE1". "MODE2" performs IP conversion using inter-field interpolation. Since interpolation is performed inside each field, this mode - Panasonic BT-LH1710 | User Manual - Page 22
Adjusts LCD backlight used when the power was last turned off. Starts up using the factory defaults. Starts up using LCD panel.*3 Double speed (120 Hz/100 Hz) Standard speed (60 Hz/50 Hz) *1 When the monitor ITU-709 is an ITU-R BT.709 standard. *5 Factory preset settings - Panasonic BT-LH1710 | User Manual - Page 23
DELAY OFF J V DELAY J H DELAY J HV DELAY J DELAY OFF Performs auto setup for PC display. Cuts the red and green signals. Use this function to check phase and chroma. This button toggles between ON and OFF. *1 Displays the gamma curve. The display changes in the - Panasonic BT-LH1710 | User Manual - Page 24
disabled. SD ASPECT When GPI is set, "INVALID FUNCTION" appears to indicate that operation is disabled. During SUB WINDOW (still image) and HD display (including PIXEL TO PIXEL), "INVALID FUNCTION" appears to indicate that operation is disabled. SCAN When GPI is set, "INVALID FUNCTION" appears - Panasonic BT-LH1710 | User Manual - Page 25
" Opening the "SUB WINDOW" function splits the screen (main window) in two as shown below to enable comparison of a recorded still image with live video. Use the "SUB WINDOW" setting (FULL, PART) in the "SYSTEM CONFIG" menu (J page 22) to set up the function as shown below. Press the button - Panasonic BT-LH1710 | User Manual - Page 26
terminal during still image acquisition will display correctly. ■ "WFM/VECTOR" The "WFM/VECTOR" function enables display of the waveform and vector display. Use "DISPLAY SETUP" in the main menu to select "WFM" and "VECTOR" display. (J page 33) Press the button ([FUNCTION1] to [FUNCTION5] (J page 23 - Panasonic BT-LH1710 | User Manual - Page 27
Main Menu (continued) ■ "PIXEL TO PIXEL" and "PIXEL POSITION" The "PIXEL TO PIXEL" function allows you to check images at their actual pixel resolution (1080I/P signals only). Press the button ([FUNCTION1] to [FUNCTION5] (J page 23)) to which the "PIXEL TO PIXEL" function has been assigned to turn - Panasonic BT-LH1710 | User Manual - Page 28
turns the function on and off. Each press of the FUNCTION button to which the "CROSS HATCH" function is assigned changes the display as shown. HD/SD (16:9) mode SD (4:3) mode 1st press 2nd press Light cross hatch Dense cross hatch 3rd press (back to original image without cross hatch) 28 - Panasonic BT-LH1710 | User Manual - Page 29
Menu (continued) GPI "GPI CONTROL" is used to enable and disable GPI functions and assign (J page 36). Note: This function is not available when, • "SD ASPECT" operation when input signal is HD or PC • "SCAN" operation when the input signal is PC • "GAMMA SELECT" operation when the input signal - Panasonic BT-LH1710 | User Manual - Page 30
NTSC setup level. Select this function when using 7.5% setup signals. (Adjusts the interior of the monitor to the 7.5% setup level to suit the black level *1 "AUTO" is the factory default, but select a specific format when there is risk that the input signal may be contaminated by outside noise. - Panasonic BT-LH1710 | User Manual - Page 31
" appears when setup completes. "INCOMPLETE" is displayed if setup could not be completed. AUTOSETUP may not provide adequate adjustment for some video input. Use H POSITION, V POSITION, PHASE and CLOCK to adjust. *2 Each input format can be adjusted but not when user data is loaded ("SETUP LOAD - Panasonic BT-LH1710 | User Manual - Page 32
Main Menu (continued) AUDIO Sets speaker and headphones output. Underlined values indicate factory defaults. Sub menu INPUT SELECT Settings AUTO ANALOG Description Selects speaker and headphones output. When an SDI input line is selected with the [INPUT SELECT] button on the front panel: - Panasonic BT-LH1710 | User Manual - Page 33
LTC. Displays user bits included in VITC. Turns closed caption display on and off.*2 Selects the cross caption display mode.*2 *1 Available during HD-SDI input signals. *2 Available during VIDEO (NTSC) input. Closed captions appear as bright lines on line 21 when closed caption is set to - Panasonic BT-LH1710 | User Manual - Page 34
setting determines operations in lock mode. The volume knob (J page 9, used during lock engagement. The key mark is displayed during lock engagement. " is selected under "CONTROL." HOURMETER Sub menu OPERATION LCD Settings XXXXXXH*3 XXXXXXH*3 Underlined values indicate factory defaults. - Panasonic BT-LH1710 | User Manual - Page 35
SDI 1/2 SD HD *2 YPBPR SD HD × × × × × × × × × × × × × × × × × × × × × *1 *1*2 × × × × × × × × × × × × RGB-VIDEO SD HD × × × × , 25P, 29P and 30P input. RGB-COMP. × × × × × DVI-VIDEO SD HD × × × × × × × × × × × × × × × × × - Panasonic BT-LH1710 | User Manual - Page 36
Specifications This monitor permits remote operation via GPI/RS-232C terminal. GPI terminal GPI screen items correspond to the following terminals. Use to DVI-D. Sets the aspect ratio for SD signal input. (Disabled during HD and PC signal input) Switches the scan mode between "UNDER" and "NORMAL - Panasonic BT-LH1710 | User Manual - Page 37
REMOTE Specifications (continued) ■ Priority of assigned functions • When both "MARKER1" and "MARKER2" using RS-232C, be sure to consult your dealer. RS-232C terminals (9P) PC Side Pin number Signal 1 N.C. 2 RXD 3 TXD 4 DTR 5 GND 6 DSR 7 RTS 8 CTS 9 N.C. (Straight) BT-LH1760/ - Panasonic BT-LH1710 | User Manual - Page 38
REMOTE Specifications (continued) ■ Setting command No Command Description 1 IIS Input switch VPC 2 Image quality adjustment 3 DVI-D mode Marker settings 11 12 MGM MCT 13 VPC 14 15 MIP 16 OMO 17 MAS 18 MSC 19 MCO 20 MLE Gamma selection Color temperature settings Sharpness settings IP mode - Panasonic BT-LH1710 | User Manual - Page 39
REMOTE Specifications (continued) ■ Query 16 QDV QFR 17 18 QID Sharpness IP mode Monochrome Aspect Scan Analog mode SELECT sync DVI-D mode Format Model SHP : Sharpness UNSUPORT SIGNAL BT-LH1760 or BT-LH1710 *1 When both 16:9 and 4:3 markers are displayed, the 16:9 marker state is returned. 39 - Panasonic BT-LH1710 | User Manual - Page 40
are essential to keep the monitor in optimum condition and ensure safe operation. Be sure to conduct the following maintenance inspections to enable long-term, full use of all its functions. Necessity of periodic maintenance service The backlight in the LCD panel is a consumable component that - Panasonic BT-LH1710 | User Manual - Page 41
the power and then turn it back on. If the problem still persists, consult your dealer. • If you use a battery pack as an external DC power supply, replace wipe with a dry cloth. Any moisture entering the monitor could damage it. • Do not use benzene, thinner and similar solvents for cleaning. They - Panasonic BT-LH1710 | User Manual - Page 42
Specifications ■ General Input power Power supply: AC: 100 V - 240 V, 50/60 Hz DC: 12 V (11 V - 17 Vp-p to 4.0 Vp-p HD/VD signal level: TTL BT-LH1760P/1710P> Operationg instructions × 1 Warranty (Card) × 1 Power cord × 1 Power cord hook × 1 Screw × 1 Operationg instructions - Panasonic BT-LH1710 | User Manual - Page 43
/59.94I. Other various marker displays will use the 1080/ 59.94I marker. *2 When 1035/60I signal is input, displayed as 1080/60I. Other various marker displays will use the 1080/60I marker. Weight and dimensions when shown are approximately. Specifications are subject to change without notice. 43 - Panasonic BT-LH1710 | User Manual - Page 44
symbol on the products and/or accompanying documents means that used electrical and electronic products should not be mixed 4881 e-mail: [email protected] TECHNICAL SUPPORT: Emergency 24 Hour Service Tel: 800-222-0741 e-mail: [email protected] Panasonic Canada Inc. 5770 Ambler
-
 1
1 -
 2
2 -
 3
3 -
 4
4 -
 5
5 -
 6
6 -
 7
7 -
8
-
9
-
10
-
11
-
12
-
13
-
14
-
15
-
16
-
17
-
18
-
19
-
20
-
21
-
22
-
23
-
24
-
25
-
26
-
27
-
28
-
29
-
30
-
31
-
32
-
33
-
34
-
35
-
36
-
37
-
38
-
39
-
40
-
41
-
42
-
43
-
44
 |
 |
Operating Instructions
LCD Video Monitor
F1008T0 -P
Printed in Japan
VQT1Z04
ENGLISH
D
Model No.
BT-LH1760P
Model No.
BT-LH1760E
Model No.
BT-LH1710P
Model No.
BT-LH1710E
Before operating this product, please read the instructions carefully and save this manual for future use.