Panasonic KX-P1131E Operating Instructions - Page 19
Position, Used for, rotate the knob
 |
View all Panasonic KX-P1131E manuals
Add to My Manuals
Save this manual to your list of manuals |
Page 19 highlights
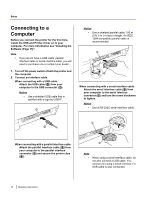
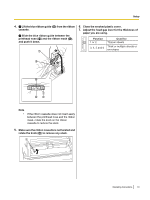
Setup 4. A Lift the blue ribbon guide (A) from the ribbon cassette. B Slide the blue ribbon guide between the printhead nose (B) and the ribbon mask (C), and push it down. A A 6. Close the smoked plastic cover. 7. Adjust the head gap lever for the thickness of paper you are using. HEAD GAP Position 1 or 2 3, 4, 5 and 6 Used for Thinner sheets Thick or multiple sheets or envelopes B B C BA Note • If the ribbon cassette does not insert easily between the printhead nose and the ribbon mask, rotate the knob on the ribbon cassette to reduce the slack. 5. Make sure the ribbon cassette is not twisted and rotate the knob (A) to remove any slack. A Operating Instructions 19
-
 1
1 -
2
-
3
-
4
-
5
-
6
-
7
-
8
-
9
-
10
-
11
-
12
-
13
-
 14
14 -
 15
15 -
 16
16 -
 17
17 -
 18
18 -
 19
19 -
 20
20 -
 21
21 -
 22
22 -
 23
23 -
 24
24 -
25
-
26
-
27
-
28
-
29
-
30
-
31
-
32
-
33
-
34
-
35
-
36
-
37
-
38
-
39
-
40
-
41
-
42
-
43
-
44
-
45
-
46
-
47
-
48
-
49
 |
 |
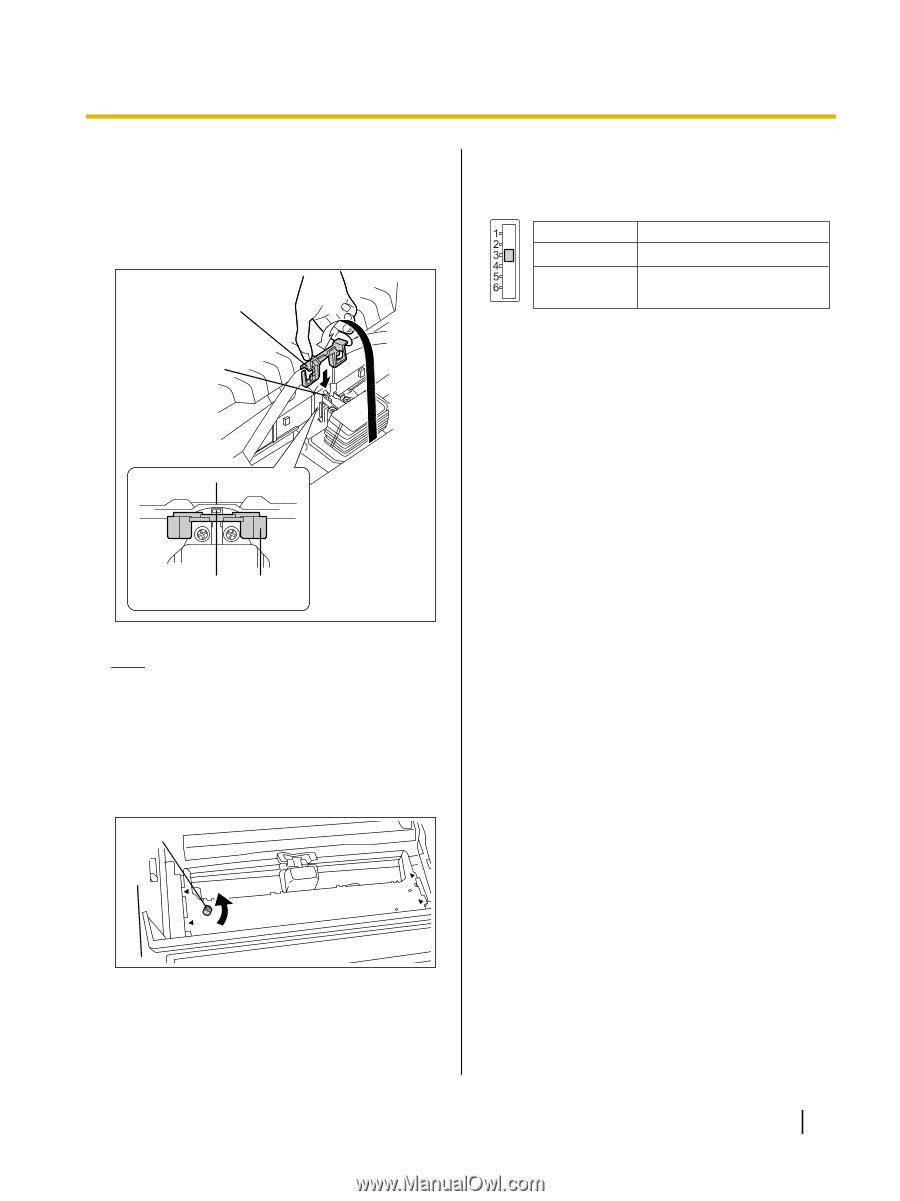
4.
A
Lift the blue ribbon guide (
A
) from the ribbon
cassette.
B
Slide the blue ribbon guide between the
printhead nose (
B
) and the ribbon mask (
C
),
and push it down.
A
A
B
A
B
A
B
C
B
Note
•
If the ribbon cassette does not insert easily
between the printhead nose and the ribbon
mask, rotate the knob on the ribbon
cassette to reduce the slack.
5.
Make sure the ribbon cassette is not twisted and
rotate the knob (
A
) to remove any slack.
A
6.
Close the smoked plastic cover.
7.
Adjust the head gap lever for the thickness of
paper you are using.
HEAD GAP
Position
Used for
1 or 2
Thinner sheets
3, 4, 5 and 6
Thick or multiple sheets or
envelopes
Operating Instructions
19
Setup