Panasonic KX-P1131E Operating Instructions - Page 22
Single Sheets and Envelopes (Friction Mode), ON LINE
 |
View all Panasonic KX-P1131E manuals
Add to My Manuals
Save this manual to your list of manuals |
Page 22 highlights
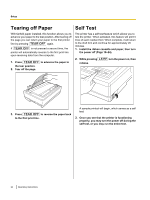
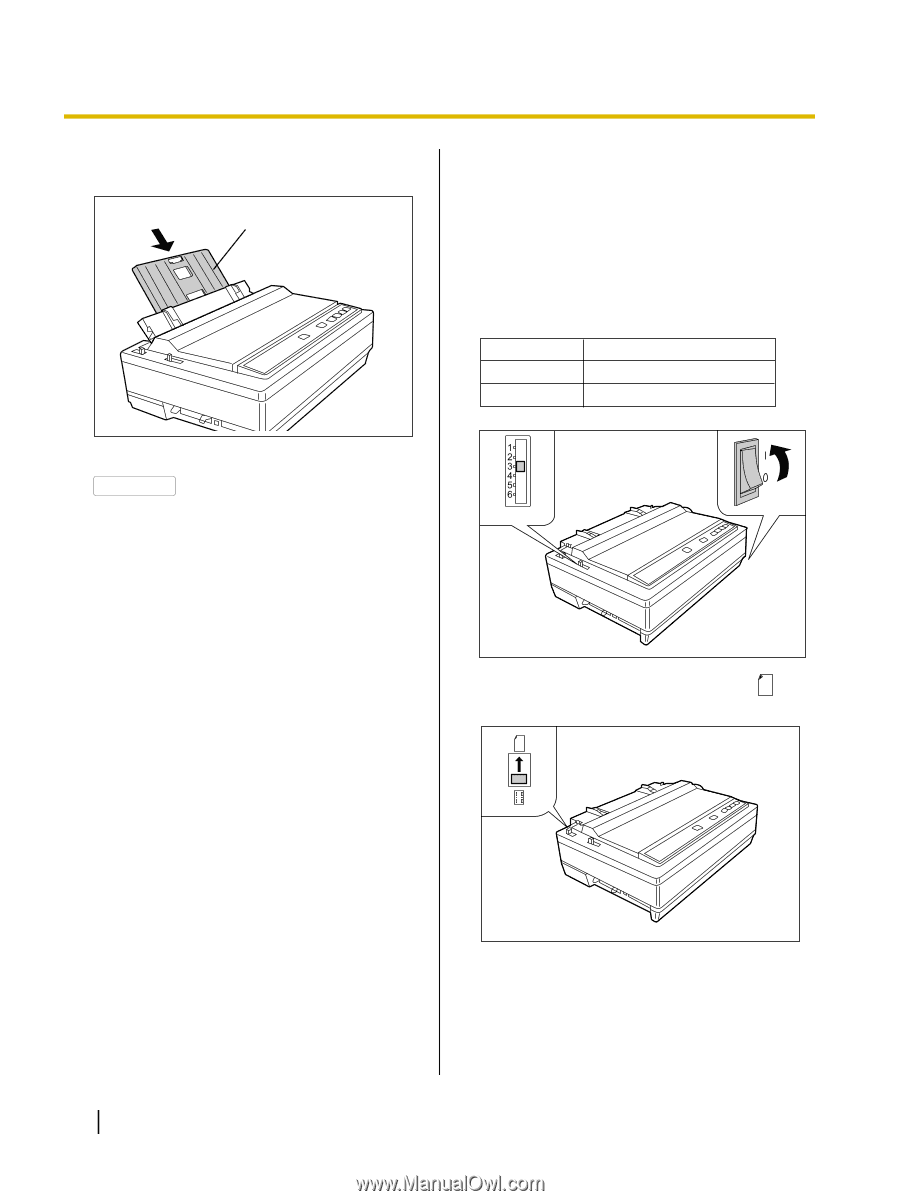
Setup 11. Insert the paper support into the slot of the extension plate (A) until it stops. A Single Sheets and Envelopes (Friction Mode) 1. A Turn the power on. The PAPER OUT indicator will flash indicating that no paper is installed in the printer. B Adjust the head gap lever for the thickness of paper you are using. Position 1 or 2 3, 4, 5 and 6 Used for Thinner sheets Thick sheets or envelopes 12. If the ON LINE indicator is not lit, press ON LINE to get ready to print. HEAD GAP A B 2. Set the paper feed selector (A) to the " " position. A 22 Operating Instructions
-
 1
1 -
2
-
3
-
4
-
5
-
6
-
7
-
8
-
9
-
10
-
11
-
12
-
13
-
14
-
15
-
16
-
 17
17 -
 18
18 -
 19
19 -
 20
20 -
 21
21 -
 22
22 -
 23
23 -
 24
24 -
 25
25 -
 26
26 -
 27
27 -
28
-
29
-
30
-
31
-
32
-
33
-
34
-
35
-
36
-
37
-
38
-
39
-
40
-
41
-
42
-
43
-
44
-
45
-
46
-
47
-
48
-
49
 |
 |
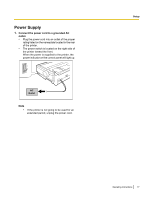
11.
Insert the paper support into the slot of the
extension plate (
A
) until it stops.
A
12.
If the ON LINE indicator is not lit, press
ON LINE
to get ready to print.
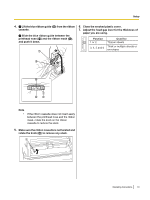
Single Sheets and Envelopes
(Friction Mode)
1.
A
Turn the power on.
The PAPER OUT indicator will flash indicating that
no paper is installed in the printer.
B
Adjust the head gap lever for the thickness
of paper you are using.
Position
Used for
1 or 2
Thinner sheets
3, 4, 5 and 6
Thick sheets or envelopes
A
B
HEAD GAP
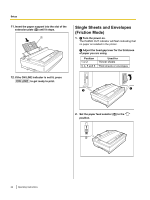
2.
Set the paper feed selector (
A
) to the "
"
position.
A
22
Operating Instructions
Setup