Pfaff 75 Owner's Manual - Page 32
Pfaff 75 Manual
 |
View all Pfaff 75 manuals
Add to My Manuals
Save this manual to your list of manuals |
Page 32 highlights
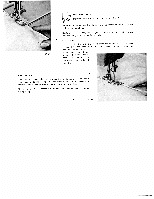
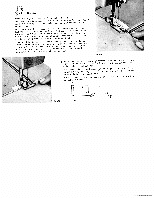
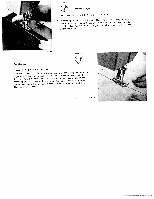
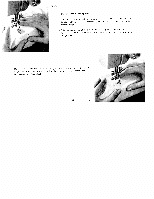
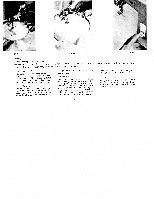
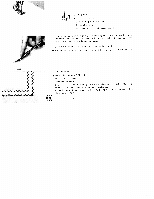
887 551 Hemming Machine Setting: A = 0 or 2 to 3 (optional) B The hemmer foot is indispensable if you want to sew a can hem with straight or zigzag stitches, depending on uniform hem. You the type of fabric 41 you are using. Fold over edge of foot. Place fabric material about 1/2" Sew backwards as machine by pulling fabric under about 'Is" to hemmer foot facilitate insertion into the hemmer so that the needle stitches in the short of its rear edge and close to the folded edge. far as the rear fabric edge. Take the work out of the it forward. Don't trim the threads (sketch 1). wDtrkhiegraeaehrwdptlsef.fstrthcoIremenodslflgeatrbehwtreieinoclglfbiefnttighhltlioeeendnthfhiwnaeebgmitr.shimccFrfeoaerilbneltrdsoicocrfftoaahtlbthel.raeilcslDchtorseiomnoml'ltemtshlceia(rkrtoseewbteyhtdheiiplslf,uhaleabwlmitrinlitlgcoepebdi)nno.gtstoeuhrteithsheraiensancdlerisnoaeltlb, ahwebcimtukht DR 073 44 Avoid ugly against the ends by slowing down feeding. To do this, needle plate on the left side of the foot before press the you come fabric to the end of the hem (see ill, at bottom). If you want to hem several edges, hem first corner, cut away remaining portion of hem, as edge to within about '/2" of shown in sketch 2. Then hem the second edge, as instructed above. Before you hem the last edge. cut away about 1/4" of the hem sewn first, as illustrated in sketch 3 32 DR 074
-
 1
1 -
2
-
3
-
4
-
5
-
6
-
7
-
8
-
9
-
10
-
11
-
12
-
13
-
14
-
15
-
16
-
17
-
18
-
19
-
20
-
21
-
22
-
23
-
24
-
25
-
26
-
 27
27 -
 28
28 -
 29
29 -
 30
30 -
 31
31 -
 32
32 -
 33
33 -
 34
34 -
 35
35 -
 36
36 -
 37
37 -
38
-
39
-
40
-
41
-
42
-
43
-
44
-
45
-
46
-
47
-
48
-
49
-
50
-
51
-
52
 |
 |
