Philips 32PFL4907/F7 User Manual - Page 34
Installation, Language, Channel installation, Autoprogram
 |
View all Philips 32PFL4907/F7 manuals
Add to My Manuals
Save this manual to your list of manuals |
Page 34 highlights
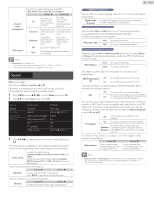
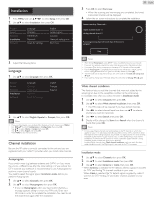
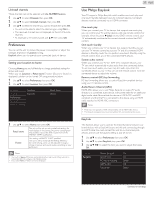
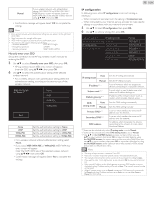
Installation 1 Press MENU and use to select Setup, then press OK. 2 Use ▲▼ to select Installation, then press OK. Picture Sound Features Installation Software Language Channels Preferences Network Reset AV settings English Autoprogram Location Network settings assi Start now 3 Adjust the following items. Language 1 Use ▲▼ to select Language, then press OK. Picture Sound Features Installation Software Language Channels Preferences Network Reset AV settings English Français Español 2 Use ▲▼ to select English, Español or Français, then press OK. Note • If you need the English menu instead of the Spanish or French menu's, press MENU. Use to select Configuración or Configuration, then press OK. Use ▲▼ to select Idioma or Langue, then press OK. Use ▲▼ to select English, then press OK. Press MENU to exit the home menu. Channel installation Be sure the RF cable is correctly connected to this unit and you are registered with your cable TV provider when you install cable channels. Autoprogram If you switch wires (e.g. between antenna and CATV) or if you move the unit to a different area after the initial setting, or if you restore the DTV channels you deleted, it is recommended to use Autoprogram to perform a new channel search. You need to select the signal type in Installation mode before you perform Autoprogram. 1 Use ▲▼ to select Channels, then press OK. 2 Use ▲▼ to select Autoprogram, then press OK. • If you run Autoprogram when you have locked channels, a message appears asking to enter your PIN code. Enter your PIN code in order to complete the installation.You need to set the channel lock again after the installation. 34 English 3 Press OK to select Start now. • When the scanning and memorizing are completed, the lowest memorized channel will be displayed. 4 Follow the on-screen instructions to complete the installation. System searching. Please wait... Digital channels found: 0 Analog channels found: 0 Auto programming may take more than 20 minutes to complete. Stop Note • After setting Autoprogram, using CH +/− skips unavailable programs automatically. • If you are not receiving a signal from your cable service, contact the cable provider. • If you press or during autoprogram, the setup of TV channels will be canceled. • Even if Autoprogram is completed, the channel setting will be lost if the AC power cord is unplugged before the unit goes into Standby mode by pressing . • The PIN code will be required once you set a PIN code in the Child and ratings lock. ➠ p.32 • If you want to change your PIN code, follow the instruction of Change PIN. ➠ p.33 Weak channel installation This function lets you add the channels that were not added by the autoprogram due to the receptible condition at the initial setup. It is available only when you select Antenna in Installation mode. 1 Use ▲▼ to select Channels, then press OK. 2 Use ▲▼ to select Weak channel installation, then press OK. • The PIN code will be required if you have locked channels. 3 Use ◄► to select channel Input box, then use ▲▼ to select a channel you want to memorize. 4 Use ◄► to select Search, then press OK. 5 Display will be changed to Store from Search when the channel is found, then press OK. Note • In most cases, Digital channels are not broadcast on the RF channel on which they appear on your TV.To add Digital channels you need to know the RF channel on which the Digital channel is being broadcast. (e.g. If there is a Digital channel 9.1 which is being broadcast on RF channel 25, you need to enter 25 while performing a weak channel installation.) To find out the RF channel on which a particular Digital channel is being broadcast, please contact your local service provider. Installing Digital channels using Weak channel installation might not work for direct cable connections and if the Digital signal is too weak for the TV to process. Installation mode 1 Use ▲▼ to select Channels, then press OK. 2 Use ▲▼ to select Installation mode, then press OK. 3 Use ▲▼ to select Antenna or Cable, then press OK. - When Antenna is selected, the TV detects antenna signals. It searches for DTV and Analog TV channels available in your area. - When Cable is selected, the TV detects signals supplied by cable. It searches for DTV Analog TV and Cable channels available in your area.
-
 1
1 -
2
-
3
-
4
-
5
-
6
-
7
-
8
-
9
-
10
-
11
-
12
-
13
-
14
-
15
-
16
-
17
-
18
-
19
-
20
-
21
-
22
-
23
-
24
-
25
-
26
-
27
-
28
-
 29
29 -
 30
30 -
 31
31 -
 32
32 -
 33
33 -
 34
34 -
 35
35 -
 36
36 -
 37
37 -
 38
38 -
 39
39 -
40
-
41
-
42
-
43
-
44
-
45
-
46
-
47
-
48
-
49
-
50
-
51
-
52
-
53
-
54
-
55
-
56
-
57
-
58
-
59
-
60
-
61
-
62
-
63
-
64
 |
 |
