Pioneer BDP 320 Owner's Manual - Page 20
Operating the TV with, the player's remote, control
 |
UPC - 012562955124
View all Pioneer BDP 320 manuals
Add to My Manuals
Save this manual to your list of manuals |
Page 20 highlights
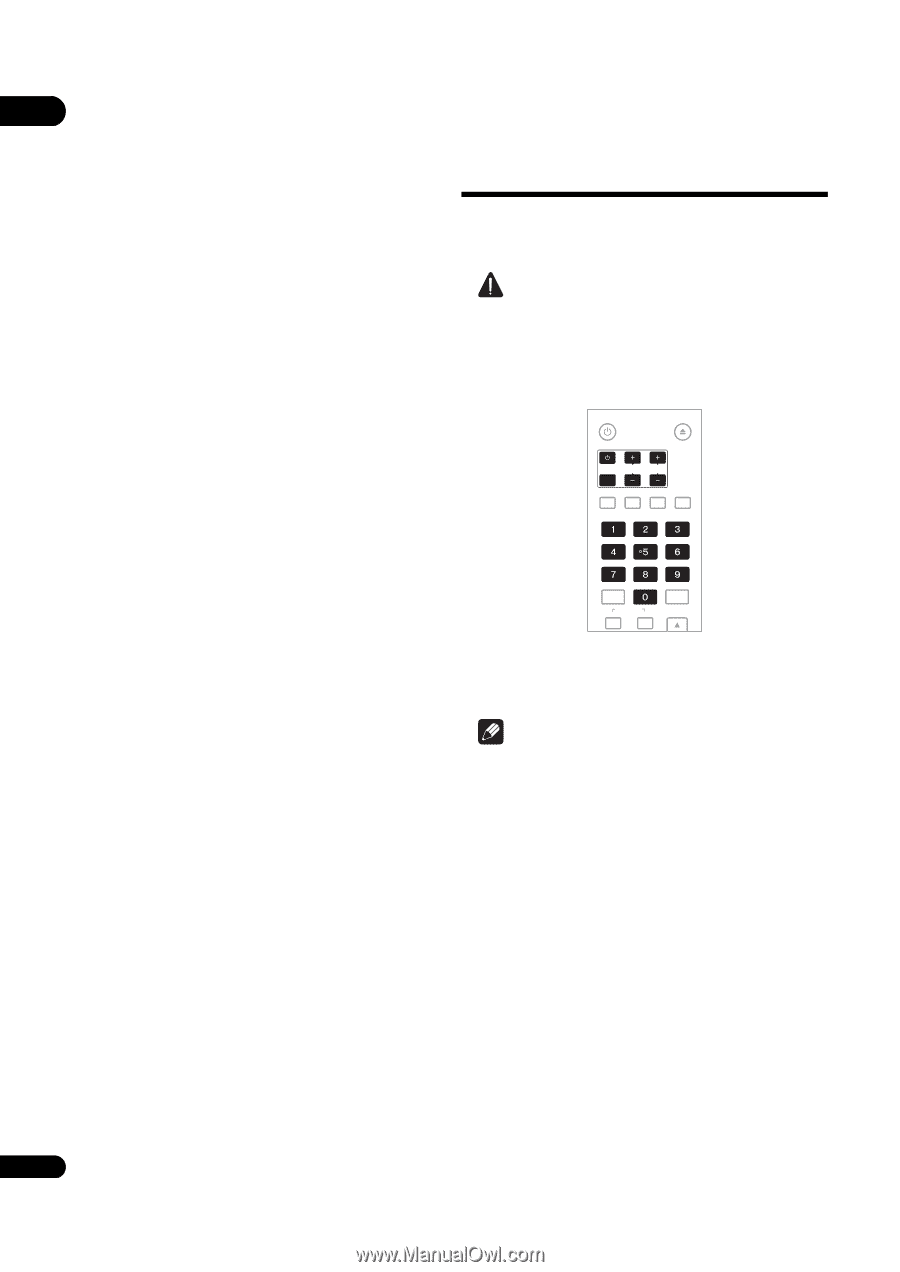
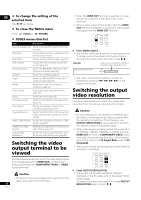
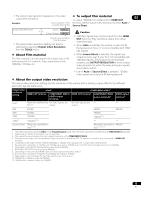
03 Operating the TV with - To listen to audio with the player connected to an AV receiver or amplifier with an HDMI cable, the player's remote connect the TV to the AV receiver or amplifier using an HDMI cable (page 16). control • When HDMI or DIGITAL AUDIO is selected at Audio, linear PCM audio signals (2 channels) are output from all terminals other than the ones selected at When the manufacturer code for your brand of TV is set Audio. on the player's remote control, the TV can be operated • When ANALOG AUDIO is selected at Audio, no using the player's remote control. audio signals are output from the HDMI OUT or DIGITAL OUT terminals. Caution For steps 5 to 7, the step to which you should proceed depends on the combination of the Video and Audio settings. 5 Select and set the HDMI High Speed Transmission setting for the HDMI OUT terminal. Use / to select, then press ENTER. • For some models it may not be possible to operate the TV with the player's remote control, even for TVs of brands listed on the manufacturer code list. • The setting may be restored to the default after the batteries are replaced. If this happens, reset it. STANDBY/ON OPEN/CLOSE When HDMI High Speed Transmission for the HDMI OUT terminal is set to On, use a High Speed HDMI™ cable. The picture and sound may not be output properly if any other HDMI cable (for example a standard HDMI™ cable) or an HDMI cable with built-in equalizer is used. TV CONTROL INPUT SELECT CH VOL AUDIO SUBTITLE ANGLE FL DIMMER 6 Select the output video resolution from the COMPONENT VIDEO output terminals. Use / to select, then press ENTER. For details on the resolution settings, see Switching the output video resolution on page 22. CLEAR AUDIO VIDEO ENTER OUTPUT RESOLUTION 7 Select the aspect ratio of your TV. Use / to select, then press ENTER. 8 Check the settings. Select Proceed, then press ENTER. 1 Input the 2-digit manufacturer code. Press the number buttons (0 to 9) to input the code while pressing TV CONTROL . 9 Output test tones. Use / to select Yes, then press ENTER. 10 Finish the Setup Navigator menu. Use / to select Finish, then press ENTER. To redo the settings from the start, select Go Back. Depending on the output terminal setting of step 4 or the HDMI cable being used, it may happen that no picture and/or sound is output. If this happens, the setup returns to step 4 if there is no operation for over 30 seconds. Once the setup returns to step 4, redo the settings according to the connected devices and the HDMI cable being used. 11 Checking the picture quality settings or setting the picture quality If a Pioneer Flat Panel TV or projector is connected to the player and HDMI is selected for Video in step 4, the player sets the picture quality automatically. The automatic picture quality setting screen appears. Press ENTER. When the automatic picture quality setting screen does not appear, the manual picture quality setting screen appears. Use / to select the connected component, then press ENTER. Note • The factory setting is 00 (PIONEER). • If you make a mistake when inputting the code, release TV CONTROL then start over from the beginning. • When there are multiple codes for a manufacturer, try inputting them in the indicated order until the TV can be operated. 2 Check that the TV can be operated. Operate the TV using TV CONTROL. - Press to turn the TV's power on and off. INPUT SELECT - Press to switch the TV's input. CH +/- - Press to select the TV channel. VOL +/- - Press to adjust the volume. 20 En
-
 1
1 -
2
-
3
-
4
-
5
-
6
-
7
-
8
-
9
-
10
-
11
-
12
-
13
-
14
-
 15
15 -
 16
16 -
 17
17 -
 18
18 -
 19
19 -
 20
20 -
 21
21 -
 22
22 -
 23
23 -
 24
24 -
 25
25 -
26
-
27
-
28
-
29
-
30
-
31
-
32
-
33
-
34
-
35
-
36
-
37
-
38
-
39
-
40
-
41
-
42
-
43
-
44
-
45
-
46
-
47
-
48
-
49
-
50
-
51
-
52
-
53
-
54
-
55
-
56
-
57
-
58
-
59
-
60
-
61
-
62
-
63
-
64
-
65
-
66
 |
 |