Pioneer DEH-6400BT Operation Manual - Page 7
Menu operations identical, for function settings/audio, adjustments/initial, settings/lists, - iphone
 |
View all Pioneer DEH-6400BT manuals
Add to My Manuals
Save this manual to your list of manuals |
Page 7 highlights
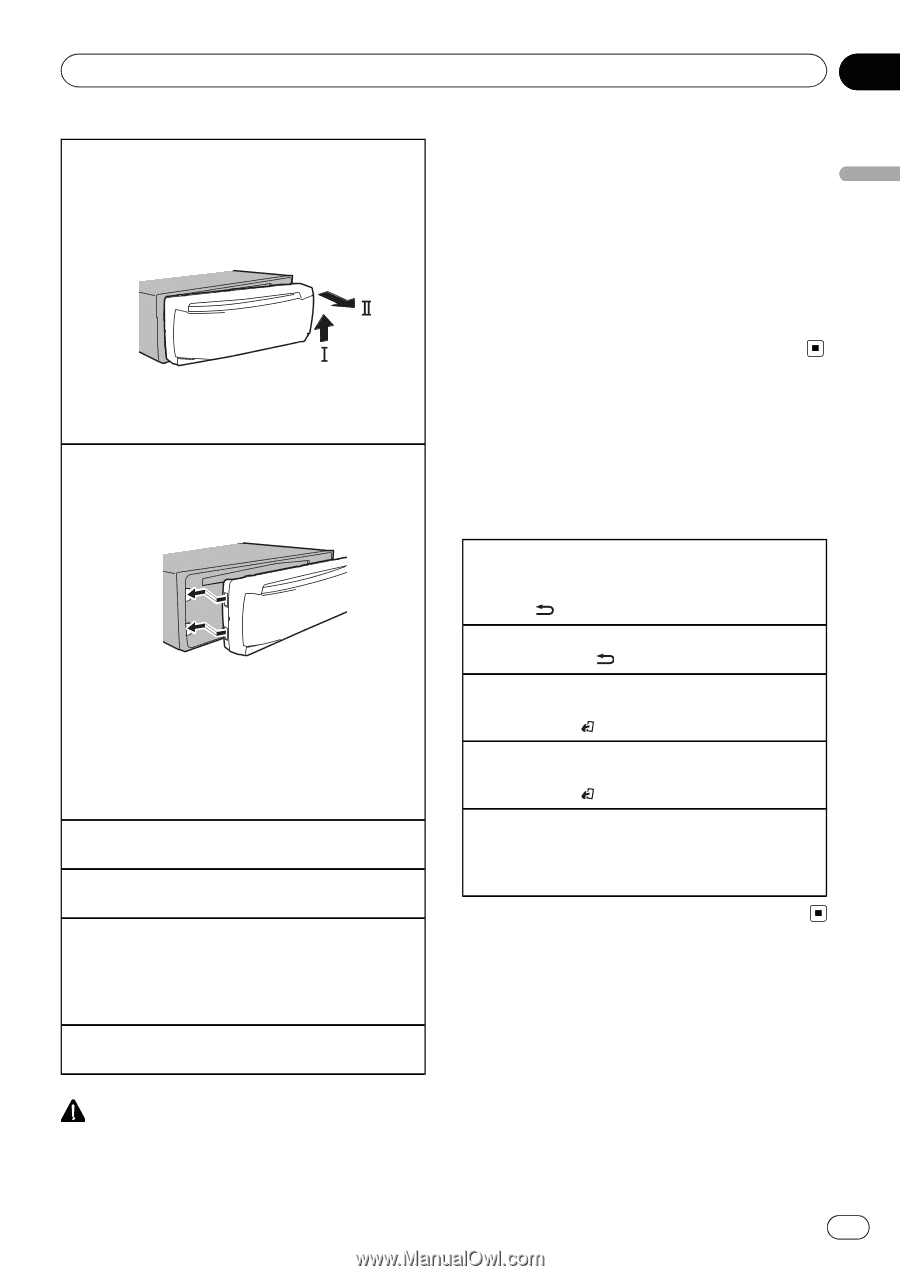
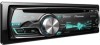
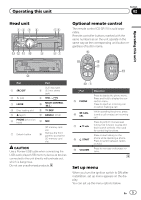
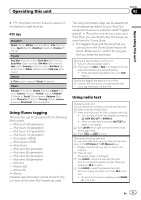
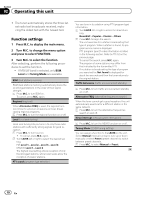
Operating this unit Section 02 Operating this unit Removing the front panel to protect your unit from theft 1 Press the detach button to release the front panel. 2 Push the front panel upward (M) and then pull it toward (N) you. Notes ! When this unit's blue/white lead is connected to the vehicle's auto-antenna relay control terminal, the vehicle's antenna extends when this unit's source is turned on. To retract the antenna, turn the source off. ! If plug and play is on and either an iPhone or iPod touch is connected, it may take time for your source to switch. Refer to USB plug&play (plug and play) on page 20. 3 Always keep the detached front panel in a protection device such as a protection case. Re-attaching the front panel 1 Slide the front panel to the left. Make sure to insert the tabs on the left side of the head unit into the slots on the front panel. 2 Press the right side of the front panel until it is firmly seated. If you cannot attach the front panel to the head unit successfully, make sure that you are placing the front panel onto the head unit correctly. Forcing the front panel into place may result in damage to the front panel or head unit. Turning the unit on 1 Press SRC/OFF to turn the unit on. Turning the unit off 1 Press and hold SRC/OFF until the unit turns off. Selecting a source 1 Press SRC/OFF to cycle between: TUNER (tuner)-CD (CD player)-USB (USB)/ iPod (iPod)-SD (SD memory card)-AUX (AUX) -BT Audio (BT audio) Adjusting the volume 1 Turn M.C. to adjust the volume. Menu operations identical for function settings/audio adjustments/initial settings/lists Returning to the previous display Returning to the previous list/category. (the folder/category one level higher.) 1 Press /DISP. Turning the demo display on or off 1 Press and hold /DISP. Returning to the ordinary display Canceling the initial setting menu 1 Press BAND/ . Returning to the ordinary display from the list/category 1 Press BAND/ . Selecting a function or list 1 Turn M.C. or LEVER. ! In this manual, "Turn M.C." is used to describe the operation used to select a function or list. CAUTION For safety reasons, park your vehicle when removing the front panel. En 7
-
 1
1 -
 2
2 -
 3
3 -
 4
4 -
 5
5 -
 6
6 -
 7
7 -
 8
8 -
 9
9 -
 10
10 -
 11
11 -
 12
12 -
13
-
14
-
15
-
16
-
17
-
18
-
19
-
20
-
21
-
22
-
23
-
24
-
25
-
26
-
27
-
28
-
29
-
30
-
31
-
32
-
33
-
34
-
35
-
36
 |
 |