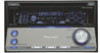
Pioneer FH-P5000MP Installation Manual - Page 47
Switching the RCA output, setting, Selecting the digital, attenuator, Switching the telephone, - cd cassette
 |
View all Pioneer FH-P5000MP manuals
Add to My Manuals
Save this manual to your list of manuals |
-
 1
1 -
2
-
3
-
4
-
5
-
6
-
7
-
8
-
9
-
10
-
11
-
12
-
13
-
14
-
15
-
16
-
17
-
18
-
19
-
20
-
21
-
22
-
23
-
24
-
25
-
26
-
27
-
28
-
29
-
30
-
31
-
32
-
33
-
34
-
35
-
36
-
37
-
38
-
39
-
40
-
41
-
 42
42 -
 43
43 -
 44
44 -
 45
45 -
 46
46 -
 47
47 -
 48
48 -
 49
49 -
 50
50 -
 51
51 -
 52
52 -
53
-
54
-
55
-
56
-
57
-
58
-
59
-
60
-
61
-
62
-
63
-
64
-
65
-
66
-
67
-
68
-
69
-
70
-
71
-
72
-
73
-
74
-
75
-
76
-
77
-
78
-
79
-
80
-
81
-
82
-
83
-
84
-
85
-
86
-
87
-
88
-
89
-
90
-
91
-
92
-
93
-
94
-
95
-
96
-
97
-
98
-
99
-
100
-
101
-
102
-
103
-
104
-
105
-
106
-
107
-
108
-
109
-
110
-
111
-
112
-
113
-
114
-
115
-
116
-
117
-
118
-
119
-
120
-
121
-
122
-
123
-
124
-
125
-
126
-
127
-
128
-
129
-
130
-
131
-
132
-
133
-
134
-
135
-
136
-
137
-
138
-
139
-
140
-
141
-
142
-
143
-
144
-
145
-
146
-
147
-
148
-
149
-
150
-
151
-
152
-
153
-
154
-
155
-
156
-
157
-
158
-
159
-
160
-
161
-
162
-
163
-
164
-
165
-
166
-
167
-
168
-
169
-
170
-
171
-
172
 |
 |

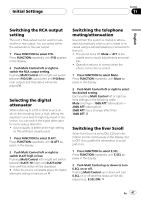
Switching the RCA output
setting
This unit
²
s RCA output can be used for sub-
woofer or rear output. You can select either
the subwoofer or the rear output.
1
Press FUNCTION to select P/O.
Press
FUNCTION
repeatedly until
P/O
appears
in the display.
2
Push Multi Control left or right to
switch the RCA output setting.
Pushing
Multi Control
left or right will switch
between
P/O:S/W
(subwoofer) and
P/O:Rear
(rear output) and that status will be dis-
played.
Selecting the digital
attenuator
When listening to a CD or other source on
which the recording level is high, setting the
equalizer curve level to high may result in dis-
tortion. You can switch the digital attenuator
to low to reduce distortion.
!
Sound quality is better at the high setting
so this setting is usually used.
1
Press FUNCTION to select D.ATT.
Press
FUNCTION
repeatedly until
D.ATT
ap-
pears in the display.
2
Push Multi Control left or right to
switch D.ATT high or low.
Pushing
Multi Control
left or right will switch
between
D.ATT: HI
(high) and
D.ATT:LOW
(low) and that status will be displayed.
#
When the source is Cassette player, the digital
attenuator setting is fixed at Low.
Switching the telephone
muting/attenuation
Sound from this system is muted or attenu-
ated automatically when a call is made or re-
ceived using a cellular telephone connected to
this unit.
!
The sound turns off,
Mute
or
ATT
is dis-
played and no audio adjustments are possi-
ble.
!
Operation returns to normal when the
phone connection is ended.
1
Press FUNCTION to select Mute.
Press
FUNCTION
repeatedly until
Mute
ap-
pears in the display.
2
Push Multi Control left or right to select
the desired setting.
Each pushing
Multi Control
left or right se-
lects settings in the following order:
Mute
(muting)
³
10dB ATT
(attenuation)
³
20dB ATT
(attenuation)
20dB ATT
has a stronger effect than
10dB ATT
.
Switching the Ever Scroll
When Ever Scroll is set to ON, CD text infor-
mation scrolls continuously in the display. Set
to OFF if you prefer the information to scroll
just once.
1
Press FUNCTION to select E.SCL.
Press
FUNCTION
repeatedly until
E.SCL
ap-
pears in the display.
2
Push Multi Control up or down to turn
E.SCL on or off.
Pushing
Multi Control
up or down will turn
E.SCL
on or off and that status will be dis-
played (e.g.,
E.SCL:ON
).
Initial Settings
En
47
English
Section
11