Polaroid XS100i User Guide - Page 3
Polaroid - black friday
 |
View all Polaroid XS100i manuals
Add to My Manuals
Save this manual to your list of manuals |
Page 3 highlights
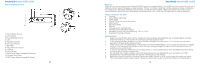
POLAROID XS100i USER GUIDE where, in the event of an accident, you subject yourself to bodily contact with the camera. Charging the Battery 1. Connect the USB cable's mini USB plug into the camera's mini USB port. 2. Connect the cable's USB plug into a USB port of any computer. Verify that the computer is on. 3. The Red LED remains on while the battery is charging. 4. The Red LED will turn off when the battery is fully charged. 5. Charge the battery before using the camera for the very first time. 6. It takes about 3 hours to initially charge the camera. Subsequent charges will take 3 hours or less. Additional Information When the battery power is low, the camera will vibrate three times to indicate a low battery. The camera will vibrate two seconds to indicate it's out of power. If the camera is recording, it will automatically save the file and then shut down. DO NOT attempt to remove the internal battery. Doing so will void the warranty coverage and can possibly damage the camera. Insert Micro SD Card The XS100i supports MicroSD cards up to 32GB. At the rate of 4GB per half-hour, a 32GB card will record full high definition (FHD) video for approximately 4-hours (1080p@30 fps or 720p@60 fps). If there is no MicroSD card in the camera, the Red and Green LED @will flash alternately and continuously. Check that the camera power is turned OFF. Insert a MicroSD card (with the printed side up) into the MicroSD Card Slot with enough finger pressure to keep the edge of the card flush with the card slot opening. To remove the Micro-SD card, press the card inward and release. Grasp the card with two fingers and pull it out. Never insert a MicroSD card with the printed side down. Forcing the card inward in that position will likely damage the card and/or camera. 4 POLAROID XS100i USER GUIDE A new MicroSD card should be formatted before using. For instructions on how to format the card, refer to the Section "Connecting the Camera to a Computer/TV/HDTV." Setting Date & Time You can set the camera's clock by activating the XS100i's software which resides in the camera's internal memory. To set up the camera clock 1. Insert a MicroSD card with at least 2MB free space into the camera. 2. Connect the camera to a PC via the USB to mini USB cable. 3. Press the Power Button to turn the camera ON. 4. Using the computer's file manager, open the MicroSD card folder. There will be 2 files visible, one for Windows "Polaroid XS100I_win.exe" and one for Mac "Polaroid XS100I _mac.app". Double click the appropriate file to open it. 5. Find the "Date and Time" and click "SET." 6. Enter the date and time manually or click "Sync with PC" to set with your PC clock (Check that your PC time and date are accurate.). 7. Click "Ok" to save the settings. 8. Then disconnect your camera from your PC immediately to save date and time Attaching the Camera Panel Cover The waterproof housing allows the camera to operate as deep as 30 feet under water. In order to protect the camera when using it in wet conditions, you must seal the camera's operation panel with the Panel Cover. 1. Attach the Panel Cover (Figure 1) to the back of the camera by positioning the Panel Cover Lock in the 12 o'clock position and rotate the outer ring of the Panel Cover clockwise (in the direction of arrow No.1) until the two black circles are lined up (Figure 2). 2. Using a fingernail, slide the Panel Cover Lock upward in the direction of the arrow No. 2. 5
-
 1
1 -
 2
2 -
 3
3 -
 4
4 -
 5
5 -
 6
6 -
 7
7 -
 8
8 -
 9
9 -
10
-
11
-
12
-
13
-
14
-
15
-
16
-
17
-
18
-
19
-
20
-
21
-
22
-
23
-
24
-
25
-
26
-
27
-
28
-
29
-
30
-
31
-
32
-
33
-
34
-
35
-
36
-
37
-
38
-
39
-
40
-
41
-
42
-
43
-
44
-
45
-
46
-
47
-
48
-
49
-
50
-
51
-
52
-
53
-
54
-
55
-
56
-
57
-
58
-
59
-
60
-
61
-
62
-
63
-
64
-
65
-
66
-
67
-
68
-
69
-
70
-
71
-
72
-
73
 |
 |
