Ryobi WS720 Operation Manual - Page 7
Electrical, Features - wet tile saw
 |
View all Ryobi WS720 manuals
Add to My Manuals
Save this manual to your list of manuals |
Page 7 highlights
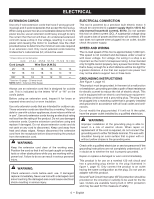
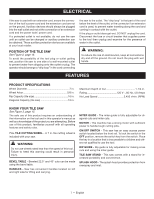
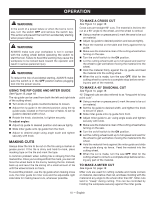
ELECTRICAL If the saw is used with an extension cord, ensure the connection of the tool's power cord and the extension cord are not on the ground. Auxiliary devices should always be plugged into the wall outlet and not at the connection of an extension cord and the power tools' power cord. If a protected outlet is not available, do not use the saw until an outlet can be changed or auxiliary protection can be obtained. These auxiliary protection devices are available at your local retailer. POSITION OF THE TILE saw See Figure 2, page 15. To avoid the possibility of the tool plug or outlet getting wet, position tile saw to one side of a wall-mounted outlet to prevent water from dripping onto the outlet or plug. The operator should arrange a "drip loop" in the cord connecting the saw to the outlet. The "drip loop" is that part of the cord below the level of the outlet, or the connector if an extension cord is used, to prevent water traveling along the cord and coming in contact with the outlet. If the plug or outlet does get wet, DO NOT unplug the cord. Disconnect the fuse or circuit breaker that supplies power to the tool then unplug and examine for the presence of water in the outlet. WARNING: To reduce the risk of electrocution, keep all connections dry and off the ground. Do not touch the plug with wet hands. FEATURES PRODUCT SPECIFICATIONS Wheel Diameter 7 in. Wheel Arbor 5/8 in. Rip Capacity (tile size 16 in. Diagonal Capacity (tile size 12 in. Maximum Depth of Cut 1-1/4 in. Rating 120 V~, 60 Hz, 4.8 Amps No Load Speed 3,450 r/min. (RPM) KNOW YOUR tILE saw See Figure 3, page 15. The safe use of this product requires an understanding of the information on the tool and in this operator's manual as well as a knowledge of the project you are attempting. Before use of this product, familiarize yourself with all operating features and safety rules. 7 in. Tile CUTTING wheel - A 7 in. tile cutting wheel is included with your saw. WARNING: Do not use wheels rated less than the speed of this tool. Failure to heed this warning could result in personal injury. BEVEL TABLE - Beveled 22.5° and 45° cuts can be made using the bevel table. HANDLES - Saw has convenient handles located on left and right side for lifting and carrying. MITER GUIDE - The miter guide is fully adjustable for diagonal cuts and miter cuts. MOTOR - This machine has a strong motor with sufficient power to handle tough cutting jobs. ON/OFF SWITCH - This saw has an easy access power switch located below the front rail. To lock the switch in the OFF position, remove the switch key from the switch. Place the key in a location that is inaccessible to children and others not qualified to use the tool. RIP GUIDE - Rip guide is fully adjustable for making cross cuts and using the miter guide. TILE SAW STAND - This saw comes with a stand for increased portability and convenience. SPLASH HOOD - The splash hood provides protection from overspray and mist. 7 - English
-
 1
1 -
 2
2 -
 3
3 -
 4
4 -
 5
5 -
 6
6 -
 7
7 -
 8
8 -
 9
9 -
 10
10 -
 11
11 -
 12
12 -
13
-
14
-
15
-
16
-
17
-
18
-
19
-
20
-
21
-
22
-
23
-
24
-
25
-
26
-
27
-
28
-
29
-
30
-
31
-
32
-
33
-
34
-
35
-
36
-
37
-
38
-
39
-
40
-
41
-
42
-
43
-
44
 |
 |
