Samsung 710T-BLACK User Manual (user Manual) (ver.1.0) (English) - Page 15
Connecting a Client Monitor
 |
View all Samsung 710T-BLACK manuals
Add to My Manuals
Save this manual to your list of manuals |
Page 15 highlights
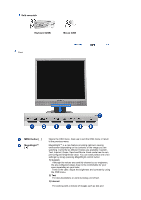
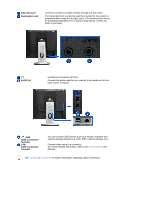
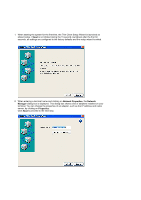
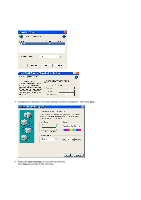
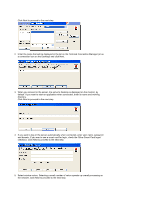
Connecting a Client Monitor 1) Connect to the host PC using a LAN cable Host PC Hub LAN Cable Client Monitor 1. Connect the power cord to the power terminal at the back of the monitor. 2. Connect the mouse and the keyboard to the USB ports. 3. Connect the LAN port on the back of the monitor and the hub. 4. Connect the hub and the LAN port of the host PC. z The host PC must have an IP address. z After connecting the LAN and setting the IP address, you can view the host PC screen on the monitor. z Use the VGA IN port to directly connect the monitor to a PC. z Connect to the VGA OUT port to display the same picture on another monitor such as the projector. (For presentation purposes) z Use the USB port to connect an external storage device (e.g. DSC, MP3, external storage, etc.). 2) Setup Client Monitor The Thin Client Setup Wizard is executed when a thin client is installed for the first time, data are not backed up after update, or the Reset the terminal to factory default settings check box is checked on Control Panel -> System. The Thin Client Setup Wizard helps configure basic settings. The procedure for this is as follows:
-
 1
1 -
2
-
3
-
4
-
5
-
6
-
7
-
8
-
9
-
 10
10 -
 11
11 -
 12
12 -
 13
13 -
 14
14 -
 15
15 -
 16
16 -
 17
17 -
 18
18 -
 19
19 -
 20
20 -
21
-
22
-
23
-
24
-
25
-
26
-
27
-
28
-
29
-
30
-
31
-
32
-
33
-
34
-
35
-
36
-
37
-
38
-
39
-
40
-
41
-
42
-
43
-
44
-
45
-
46
-
47
-
48
-
49
-
50
-
51
-
52
-
53
-
54
-
55
-
56
-
57
-
58
-
59
-
60
-
61
-
62
-
63
-
64
-
65
-
66
-
67
-
68
-
69
-
70
-
71
-
72
-
73
-
74
-
75
-
76
-
77
-
78
-
79
-
80
-
81
-
82
-
83
-
84
-
85
-
86
-
87
-
88
-
89
-
90
-
91
-
92
-
93
-
94
-
95
-
96
-
97
-
98
-
99
-
100
-
101
-
102
 |
 |
