Samsung LNS4695DX User Manual (ENGLISH) - Page 31
Option 2: Setting the Clock Automatically, button to select DSTDaylight Saving Time, then
 |
View all Samsung LNS4695DX manuals
Add to My Manuals
Save this manual to your list of manuals |
Page 31 highlights
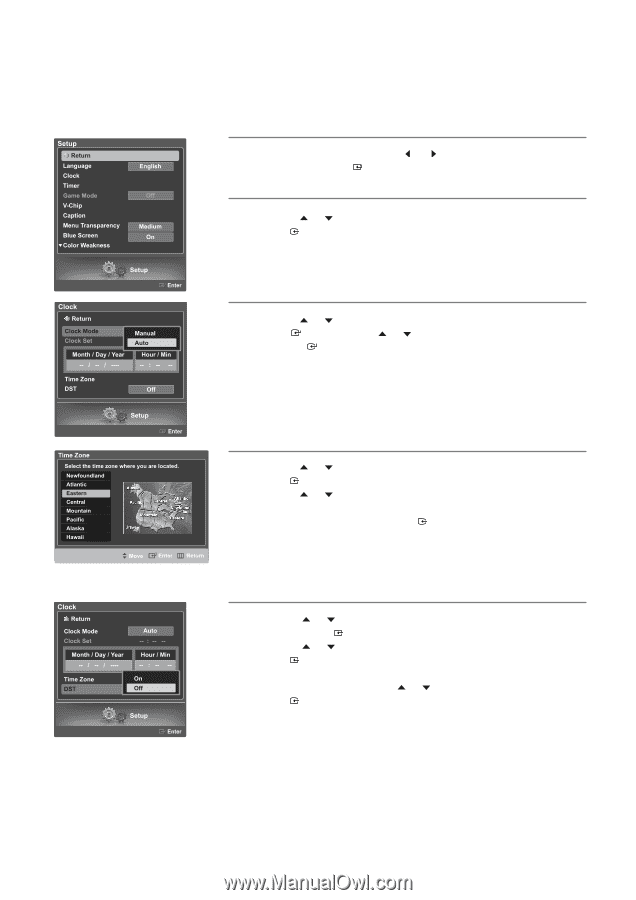
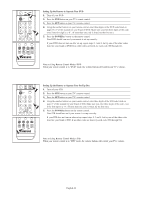
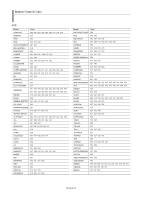
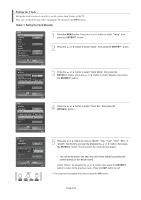
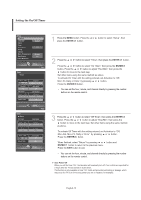
Option 2: Setting the Clock Automatically The Clock can be set automatically if you are receiving a digital signal. 1 Press the MENU button. Press the then press the ENTER button. or button to select "Setup", 2 Press the or button to select "Clock", then press the ENTER button. 3 Press the or button to select "Clock Mode", then press the ENTER button Press the or button to select "Auto", then press the ENTER button. 4 Press the or button to select "Time Zone", then press the ENTER button. Press the or button to highlight the time zone for your local area (and to move the highlight to the appropriate time zone on the map of the United States), then press the ENTER button. • When you set up Auto Time, the set time may not be correct depending on the broadcasting station and signal. If there is a difference between the real time and set time, please set the time manually. 5 Press the or button to select "DST"(Daylight Saving Time), then press the ENTER button. Press the or button to select "On" or "Off", then press the ENTER button. Select "Return" by pressing the or button, then press the ENTER button to return to the previous menu. Press the EXIT button to exit. English-29
-
 1
1 -
2
-
3
-
4
-
5
-
6
-
7
-
8
-
9
-
10
-
11
-
12
-
13
-
14
-
15
-
16
-
17
-
18
-
19
-
20
-
21
-
22
-
23
-
24
-
25
-
 26
26 -
 27
27 -
 28
28 -
 29
29 -
 30
30 -
 31
31 -
 32
32 -
 33
33 -
 34
34 -
 35
35 -
 36
36 -
37
-
38
-
39
-
40
-
41
-
42
-
43
-
44
-
45
-
46
-
47
-
48
-
49
-
50
-
51
-
52
-
53
-
54
-
55
-
56
-
57
-
58
-
59
-
60
-
61
-
62
-
63
-
64
-
65
-
66
-
67
-
68
-
69
-
70
-
71
-
72
-
73
-
74
-
75
-
76
-
77
-
78
-
79
-
80
-
81
-
82
-
83
-
84
-
85
-
86
-
87
-
88
-
89
-
90
-
91
-
92
-
93
-
94
-
95
-
96
-
97
-
98
-
99
-
100
-
101
-
102
-
103
-
104
-
105
-
106
-
107
-
108
-
109
-
110
-
111
-
112
-
113
-
114
-
115
-
116
-
117
-
118
-
119
-
120
-
121
-
122
-
123
-
124
-
125
-
126
-
127
-
128
-
129
-
130
-
131
-
132
-
133
-
134
-
135
-
136
-
137
-
138
-
139
-
140
-
141
-
142
-
143
-
144
-
145
-
146
-
147
-
148
-
149
-
150
-
151
-
152
-
153
-
154
-
155
-
156
-
157
-
158
-
159
-
160
-
161
-
162
-
163
-
164
-
165
-
166
-
167
-
168
-
169
-
170
-
171
-
172
-
173
-
174
-
175
-
176
-
177
-
178
-
179
-
180
-
181
-
182
-
183
-
184
-
185
-
186
-
187
-
188
-
189
-
190
-
191
-
192
-
193
-
194
-
195
-
196
-
197
-
198
-
199
-
200
-
201
-
202
-
203
-
204
-
205
-
206
-
207
-
208
-
209
-
210
-
211
-
212
-
213
-
214
-
215
-
216
-
217
-
218
-
219
-
220
-
221
-
222
-
223
-
224
-
225
-
226
-
227
-
228
-
229
-
230
-
231
-
232
-
233
-
234
-
235
-
236
-
237
-
238
-
239
-
240
-
241
-
242
-
243
-
244
-
245
-
246
-
247
-
248
-
249
-
250
-
251
-
252
-
253
-
254
-
255
-
256
-
257
-
258
-
259
-
260
-
261
-
262
-
263
-
264
-
265
-
266
-
267
-
268
-
269
-
270
-
271
-
272
-
273
-
274
-
275
 |
 |