Samsung SF-650 Quick Guide (easy Manual) (ver.1.0) (English) - Page 31
Setting the paper size and type, Using the output support, Letterhead/ Preprinted paper
 |
UPC - 635753613803
View all Samsung SF-650 manuals
Add to My Manuals
Save this manual to your list of manuals |
Page 31 highlights
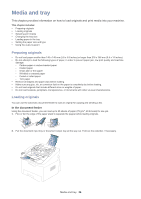
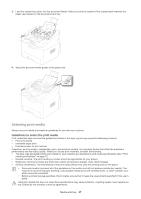
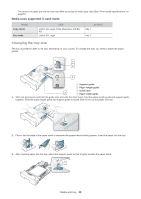
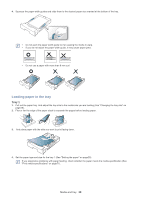
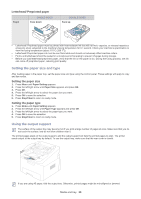
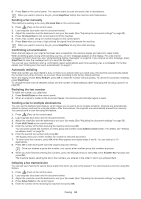
Letterhead/ Preprinted paper Tray1 SINGLE-SIDED Face down DOUBLE-SIDED Face up • Letterhead/ Preprinted paper must be printed with heat-resistant ink that will not melt, vaporize, or release hazardous emissions when subjected to the machine's fusing temperature for 0.1 second. Check your machine's specification to view the fusing temperature (about 170°C (338 °F)). • Letterhead/ Preprinted paper ink must be non-flammable and should not adversely affect machine rollers. • Forms and letterhead should be sealed in a moisture-proof wrapping to prevent changes during storage. • Before you load letterhead/preprinted paper, verify that the ink on the paper is dry. During the fusing process, wet ink can come off preprinted paper, reducing print quality. Setting the paper size and type After loading paper in the paper tray, set the paper size and type using the control panel. These settings will apply to copy and fax modes. Setting the paper size 1. Press Menu until Paper Setting appears. 2. Press the left/right arrow until Paper Size appears and press OK. 3. Press OK. 4. Press the left/right arrow to select the paper size you want. 5. Press OK to save the selection. 6. Press Stop/Clear to return to ready mode. Setting the paper type 1. Press Menu until Paper Setting appears. 2. Press the left/right arrow until Paper Type appears and press OK. 3. Press the left/right arrow to select the paper type you want. 4. Press OK to save the selection. 5. Press Stop/Clear to return to ready mode. Using the output support The surface of the output tray may become hot if you print a large number of pages at once. Make sure that you do not touch the surface, and do not allow children near it. The printed pages stack on the output support, and the output support will help the printed pages to align. The printer sends output to the output tray by default. To use the output tray, make sure that the rear cover is closed. If you are using A5 paper, fold the output tray. Otherwise, printed pages might be mis-alligned or jammed. Media and tray_ 30
-
 1
1 -
2
-
3
-
4
-
5
-
6
-
7
-
8
-
9
-
10
-
11
-
12
-
13
-
14
-
15
-
16
-
17
-
18
-
19
-
20
-
21
-
22
-
23
-
24
-
25
-
 26
26 -
 27
27 -
 28
28 -
 29
29 -
 30
30 -
 31
31 -
 32
32 -
 33
33 -
 34
34 -
 35
35 -
 36
36 -
37
-
38
-
39
-
40
-
41
-
42
-
43
-
44
-
45
-
46
-
47
-
48
-
49
-
50
-
51
-
52
-
53
-
54
-
55
-
56
-
57
-
58
-
59
-
60
-
61
-
62
-
63
-
64
-
65
-
66
-
67
-
68
-
69
-
70
-
71
-
72
-
73
-
74
-
75
-
76
-
77
-
78
-
79
-
80
-
81
-
82
-
83
-
84
 |
 |
