Sanyo DP26746 Owners Manual - Page 6
Getting Started Required Initial Setup - settings
 |
UPC - 086483058660
View all Sanyo DP26746 manuals
Add to My Manuals
Save this manual to your list of manuals |
Page 6 highlights
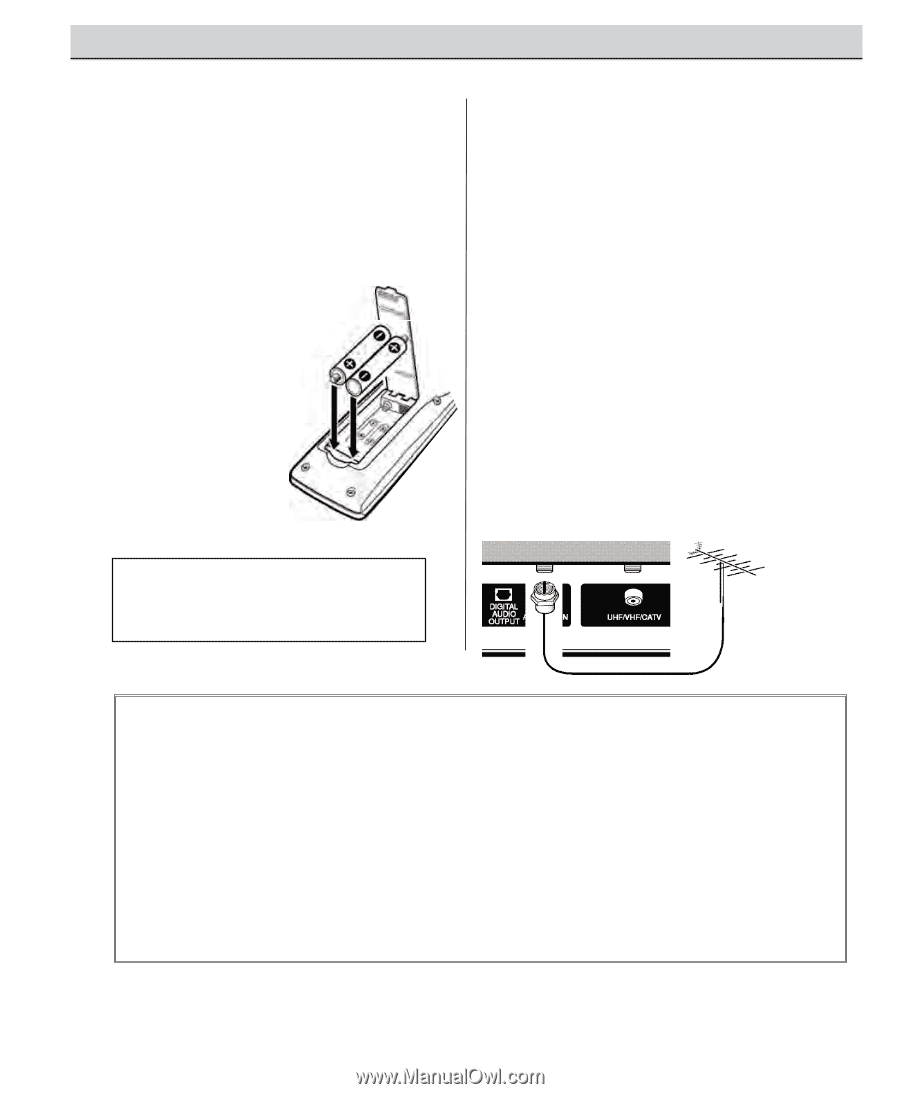
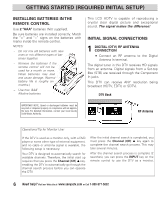
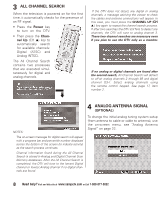
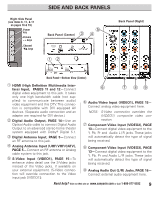
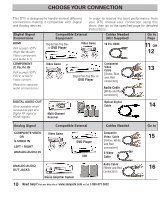
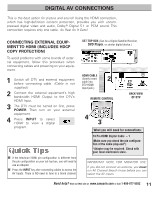
GETTING STARTED (REQUIRED INITIAL SETUP) INSTALLING BAT TERIES IN THE REMOTE CONTROL Use 2 "AAA" batteries (Not supplied). Be sure batteries are installed correctly. Match the "+" and "-" signs on the batteries with marks inside the remote control. NOTES: - Do not mix old batteries with new ones or mix different types of batteries together. - Remove the batteries if the remote control will not be used for a month or more. Weak batteries may leak and cause damage. (Normal battery life is roughly six months.) - Use two "AAA" Alkaline batteries. This LCD HDTV is capable of reproducing a crystal clear digital picture and exceptional sound. The signal makes the difference! INITIAL SIGNAL CONNECTIONS 1 DIGITAL (DTV) RF ANTENNA CONNECTION • Connect an RF antenna to the Digital Antenna In terminal. The digital tuner in this DTV receives HD signals from an antenna. Digital signals from a Set-top Box (STB) are received through the Component In jacks. This DTV can receive ANY resolution being broadcast (HDTV, EDTV, or SDTV). DTV Back IMPORTANT NOTE: Spent or discharged batteries must be recycled or disposed properly in compliance with all applicable laws. For detailed information, contact your local County Solid Waste Authority. RF Antenna Operational Tip for Monitor Use: If the DTV is used as a monitor only, with a DVD player or some other type of external equipment, and no cable or antenna signal is available, the following setup is necessary: Your DTV is designed to automatically search for available channels. Therefore, the initial start up requires that you press the Channel (CH) L key, enabling the DTV to automatically go through the channel search process before you can operate the DTV. After the initial channel search is completed, you must press the Channel (CH) L key again to complete the channel search process. This may take several minutes. After the channel search process is complete (2 searches), you can press the INPUT key on the remote control to use the DTV as a monitor. 6 Need help? Visit our Web site at www.sanyoctv.com or Call 1-800-877-5032
-
 1
1 -
 2
2 -
 3
3 -
 4
4 -
 5
5 -
 6
6 -
 7
7 -
 8
8 -
 9
9 -
 10
10 -
 11
11 -
 12
12 -
13
-
14
-
15
-
16
-
17
-
18
-
19
-
20
-
21
-
22
-
23
-
24
-
25
-
26
-
27
-
28
-
29
-
30
-
31
-
32
-
33
-
34
-
35
-
36
-
37
-
38
-
39
-
40
-
41
-
42
-
43
-
44
-
45
-
46
-
47
-
48
-
49
-
50
-
51
-
52
-
53
-
54
-
55
-
56
-
57
-
58
-
59
-
60
-
61
-
62
-
63
-
64
-
65
-
66
-
67
-
68
 |
 |