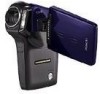
Sanyo VPC CG6 Owners Manual - Page 35
Charging The Battery Pack
 |
UPC - 683728123048
View all Sanyo VPC CG6 manuals
Add to My Manuals
Save this manual to your list of manuals |
Page 35 highlights
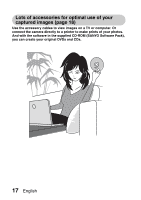
CHARGING THE BATTERY PACK Please charge the supplied battery pack before using it. 1 Insert the battery pack in the battery charger. h Insert it in the direction indicated by the [o] mark on the battery pack. 2 Connect the supplied power cord to the socket on the battery pack charger. h Insert the connector straight and securely. 3 Plug the power plug into a power outlet (AC 100 V to 240 V). h Recharging begins. h During recharge, the CHARGE indicator is lit red. h The recharge time is approx. 90 minutes. CHARGE indicator [o] mark Battery pack Socket To power outlet Power cord CHARGE indicator 4 When the CHARGE indicator turns off, unplug the power cord from the power outlet, and remove the battery pack from the charger. HINT Recharging when connected to the USB terminal (page 9 in the SANYO Software Pack INSTRUCTION MANUAL) i The battery can be recharged while the camera is connected to a computer. i Note, however, that the time it takes to recharge will differ depending on the camera's operating condition. i Connect the dedicated USB interface cable to the USB connector on your computer . Do not connect it to the USB connector on the monitor or the keyboard, or to the USB hub. i When the surrounding temperature is high, depending on the camera's operating condition and the battery pack temperature, in some cases the multi-indicator may slowly flash red and the battery pack cannot be charged. i If the camera is not going to be used for an extended period of time, please disconnect the dedicated USB interface cable from the camera. 21 English
-
 1
1 -
2
-
3
-
4
-
5
-
6
-
7
-
8
-
9
-
10
-
11
-
12
-
13
-
14
-
15
-
16
-
17
-
18
-
19
-
20
-
21
-
22
-
23
-
24
-
25
-
26
-
27
-
28
-
29
-
 30
30 -
 31
31 -
 32
32 -
 33
33 -
 34
34 -
 35
35 -
 36
36 -
 37
37 -
 38
38 -
 39
39 -
 40
40 -
41
-
42
-
43
-
44
-
45
-
46
-
47
-
48
-
49
-
50
-
51
-
52
-
53
-
54
-
55
-
56
-
57
-
58
-
59
-
60
-
61
-
62
-
63
-
64
-
65
-
66
-
67
-
68
-
69
-
70
-
71
-
72
-
73
-
74
-
75
-
76
-
77
-
78
-
79
-
80
-
81
-
82
-
83
-
84
-
85
-
86
-
87
-
88
-
89
-
90
-
91
-
92
-
93
-
94
-
95
-
96
-
97
-
98
-
99
-
100
-
101
-
102
-
103
-
104
-
105
-
106
-
107
-
108
-
109
-
110
-
111
-
112
-
113
-
114
-
115
-
116
-
117
-
118
-
119
-
120
-
121
-
122
-
123
-
124
-
125
-
126
-
127
-
128
-
129
-
130
-
131
-
132
-
133
-
134
-
135
-
136
-
137
-
138
-
139
-
140
-
141
-
142
-
143
-
144
-
145
-
146
-
147
-
148
-
149
-
150
-
151
-
152
-
153
-
154
-
155
-
156
-
157
-
158
-
159
-
160
-
161
-
162
-
163
-
164
-
165
-
166
-
167
-
168
-
169
-
170
-
171
-
172
-
173
-
174
-
175
-
176
-
177
-
178
-
179
-
180
-
181
-
182
-
183
-
184
-
185
-
186
-
187
-
188
-
189
-
190
-
191
-
192
-
193
-
194
-
195
-
196
-
197
-
198
-
199
-
200
-
201
-
202
 |
 |
