Sanyo VPC HD1 Instruction Manual, VPC-HD1010EX QSG - Page 18
×1408 [16:9], 1920×1080 [16:9]
 |
UPC - 086483059766
View all Sanyo VPC HD1 manuals
Add to My Manuals
Save this manual to your list of manuals |
Page 18 highlights
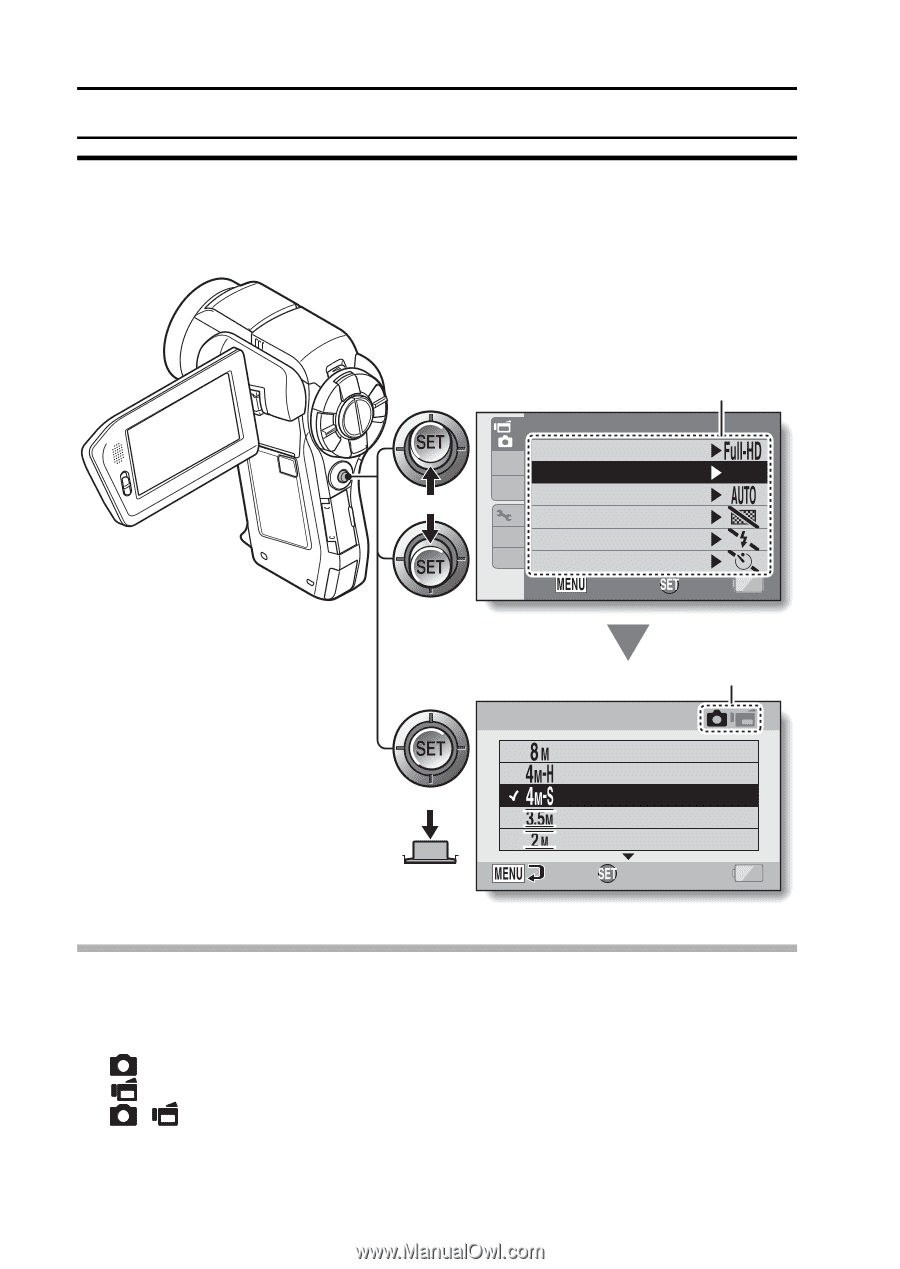
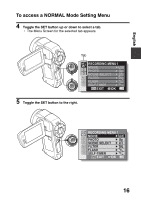
SIMPLE MODE/NORMAL MODE 6 Toggle the SET button up or down to select the item you wish to change, and press the SET button. h The Setting Screen for the selected item appears. h To return to the Menu Screen, press the MENU button. Select an item to change 1 RECORDING MENU 1 2 MOVIE PHOTO 3 SCENE SELECT 8M 1 FILTER 2 FLASH 3 SELF-TIMER EXIT OK Applicable mode PHOTO 3264×2448 2288×1712 2288×1712 2496×1408 [16:9] 1920×1080 [16:9] OK HINT About the applicable mode indicator i This indicator shows the shooting mode(s) for which the selected setting is effective. : This setting is effective during still image shooting. : This setting is effective during video clip recording. : This setting is effective during still image shooting and video clip recording. SIMPLE 17
-
 1
1 -
2
-
3
-
4
-
5
-
6
-
7
-
8
-
9
-
10
-
11
-
12
-
 13
13 -
 14
14 -
 15
15 -
 16
16 -
 17
17 -
 18
18 -
 19
19 -
 20
20 -
 21
21 -
 22
22 -
 23
23 -
24
-
25
-
26
 |
 |