Sanyo VPC HD1 Instruction Manual, VPC-HD1A - Page 66
Sequential Shots
 |
UPC - 086483059766
View all Sanyo VPC HD1 manuals
Add to My Manuals
Save this manual to your list of manuals |
Page 66 highlights
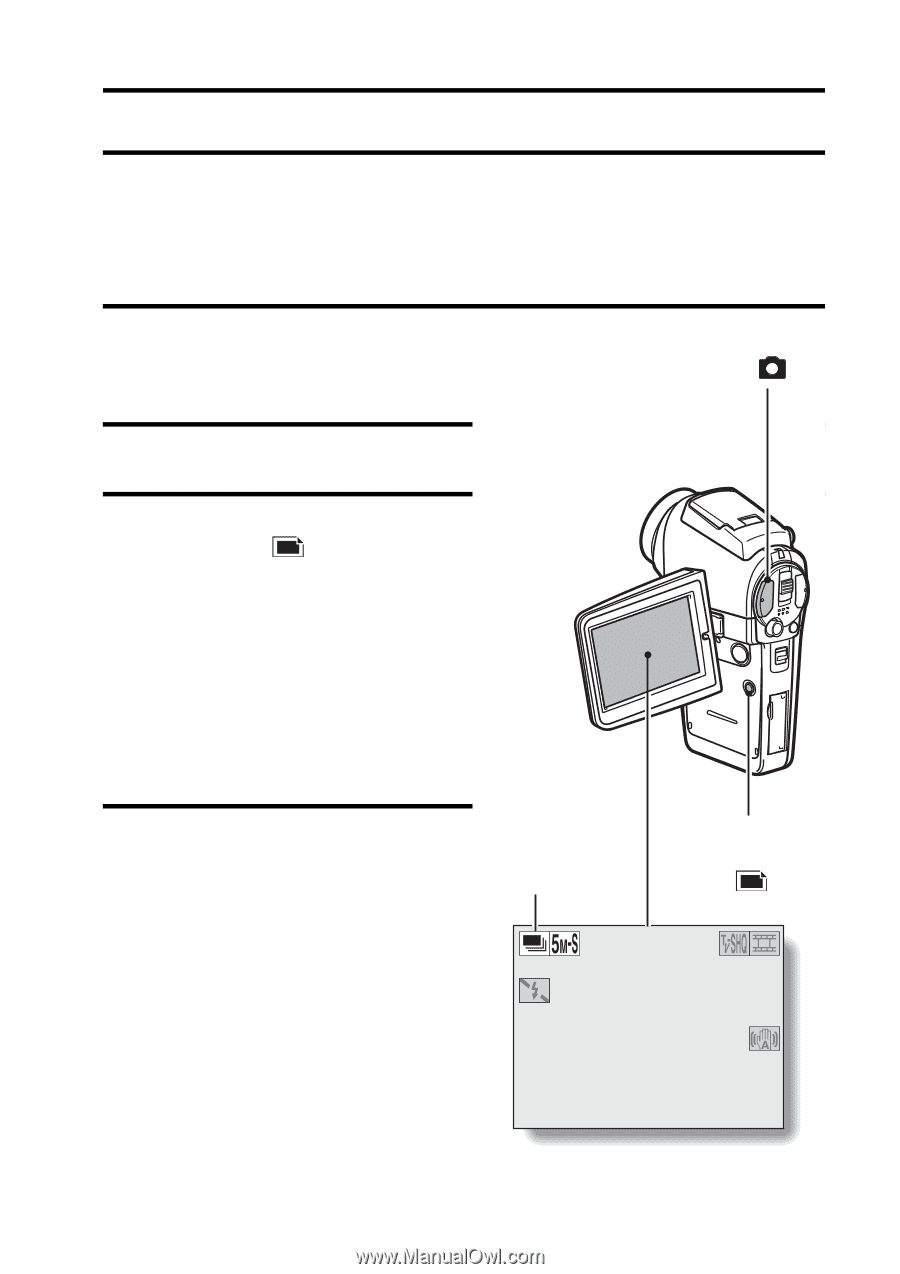
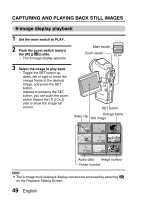
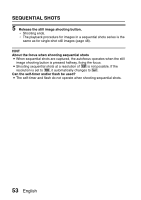
SEQUENTIAL SHOTS Your camera is capable of capturing both standard sequential shots and auto bracket shots (sequential images as the exposure changes). The procedure below explains how to take standard sequential shots. For information concerning auto bracket shots, please see page 87. 1 Press the ON/OFF button for at least 1 second to turn the camera on. 2 Set the main switch to REC. 3 Press the sequential/single button [O/ ]. h The camera switches to the sequential shots mode, and the sequential shots icon P appears on the monitor. h Each time the sequential/ single button is pressed, the camera switches between the single-shot mode and the sequential shots mode. 4 Press the still image shooting button. h Shooting begins. Shooting continues as long as the still image shooting button is kept pressed. h The maximum number of sequential shots is 10 frames when the still image resolution is set to A or [, and 6 frames at other resolution settings. Still image shooting button [] Sequential shots icon 00 108 Sequential/ single button [O/ ] 00:03:53 F3.5 1/18 English 52
-
 1
1 -
2
-
3
-
4
-
5
-
6
-
7
-
8
-
9
-
10
-
11
-
12
-
13
-
14
-
15
-
16
-
17
-
18
-
19
-
20
-
21
-
22
-
23
-
24
-
25
-
26
-
27
-
28
-
29
-
30
-
31
-
32
-
33
-
34
-
35
-
36
-
37
-
38
-
39
-
40
-
41
-
42
-
43
-
44
-
45
-
46
-
47
-
48
-
49
-
50
-
51
-
52
-
53
-
54
-
55
-
56
-
57
-
58
-
59
-
60
-
 61
61 -
 62
62 -
 63
63 -
 64
64 -
 65
65 -
 66
66 -
 67
67 -
 68
68 -
 69
69 -
 70
70 -
 71
71 -
72
-
73
-
74
-
75
-
76
-
77
-
78
-
79
-
80
-
81
-
82
-
83
-
84
-
85
-
86
-
87
-
88
-
89
-
90
-
91
-
92
-
93
-
94
-
95
-
96
-
97
-
98
-
99
-
100
-
101
-
102
-
103
-
104
-
105
-
106
-
107
-
108
-
109
-
110
-
111
-
112
-
113
-
114
-
115
-
116
-
117
-
118
-
119
-
120
-
121
-
122
-
123
-
124
-
125
-
126
-
127
-
128
-
129
-
130
-
131
-
132
-
133
-
134
-
135
-
136
-
137
-
138
-
139
-
140
-
141
-
142
-
143
-
144
-
145
-
146
-
147
-
148
-
149
-
150
-
151
-
152
-
153
-
154
-
155
-
156
-
157
-
158
-
159
-
160
-
161
-
162
-
163
-
164
-
165
-
166
-
167
-
168
-
169
-
170
-
171
-
172
-
173
-
174
-
175
-
176
-
177
-
178
-
179
-
180
-
181
-
182
-
183
-
184
-
185
-
186
-
187
-
188
-
189
-
190
-
191
-
192
-
193
-
194
-
195
-
196
-
197
-
198
-
199
-
200
-
201
-
202
-
203
-
204
-
205
-
206
-
207
-
208
-
209
-
210
-
211
-
212
 |
 |