Sharp CV-P10MX CV-P09LX , CV-P10LC , CV-P10MX , CV-P12LX Operation Manual - Page 16
Installation in a sliding sash window - the
 |
UPC - 074000662278
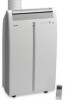
View all Sharp CV-P10MX manuals
Add to My Manuals
Save this manual to your list of manuals |
Page 16 highlights
INSTALL WINDOW PANEL Installation in a sliding sash window (See page 12 for installation in a double-hung window.) 1 Connect the rain guards to the insect guard net. Insert all three projections on each rain guard into the holes in the insect guard net. Side "A" will now be uppermost, as indicated in the diagram. Insect guard net Hole Projection "A" Rain guard 2 Attach the guard combined above to the window panel. Push the insect guard net firmly to ensure that its four projections fit into the holes in the window panel. Side "A" will now be at the top, as indicated in the diagram, when it is installed in the window. Projection Window panel "A" 3 Cut the foam seal A (adhesive type) to the proper length and attach it to the window frame. 4 Install the window panel into the window frame. If the inner height of the window is between 22" (559mm) and 24" (609mm) inclusive. The window panel cannot be installed in windows less than 22" (559mm) high, as you will be unable to shut the exhaust cover. (1) Remove the adjustment panel from the window panel, and cut the window panel to the same height as the window. (2) Open the window sash and place the window panel on the window frame. (3) Secure the window panel to the window frame with 2 screws. Foam seal A (adhesive type) Window panel Exhaust cover Cut Adjustment panel Window panel 22"~24" E-14
-
 1
1 -
2
-
3
-
4
-
5
-
6
-
7
-
8
-
9
-
10
-
 11
11 -
 12
12 -
 13
13 -
 14
14 -
 15
15 -
 16
16 -
 17
17 -
 18
18 -
 19
19 -
 20
20 -
 21
21 -
22
-
23
-
24
-
25
-
26
-
27
-
28
-
29
-
30
-
31
-
32
-
33
-
34
-
35
-
36
-
37
-
38
-
39
-
40
-
41
-
42
-
43
-
44
-
45
-
46
-
47
-
48
-
49
-
50
-
51
-
52
-
53
-
54
-
55
-
56
-
57
-
58
-
59
-
60
-
61
-
62
-
63
-
64
-
65
-
66
-
67
-
68
-
69
-
70
-
71
-
72
-
73
-
74
-
75
-
76
-
77
-
78
-
79
-
80
-
81
-
82
-
83
-
84
-
85
-
86
-
87
-
88
-
89
-
90
-
91
-
92
-
93
-
94
-
95
-
96
 |
 |
