Sharp CV10NH CV-10NH Operation Manual - Page 21
Dehumidification Mode - lights blinking
 |
UPC - 074000662377
View all Sharp CV10NH manuals
Add to My Manuals
Save this manual to your list of manuals |
Page 21 highlights
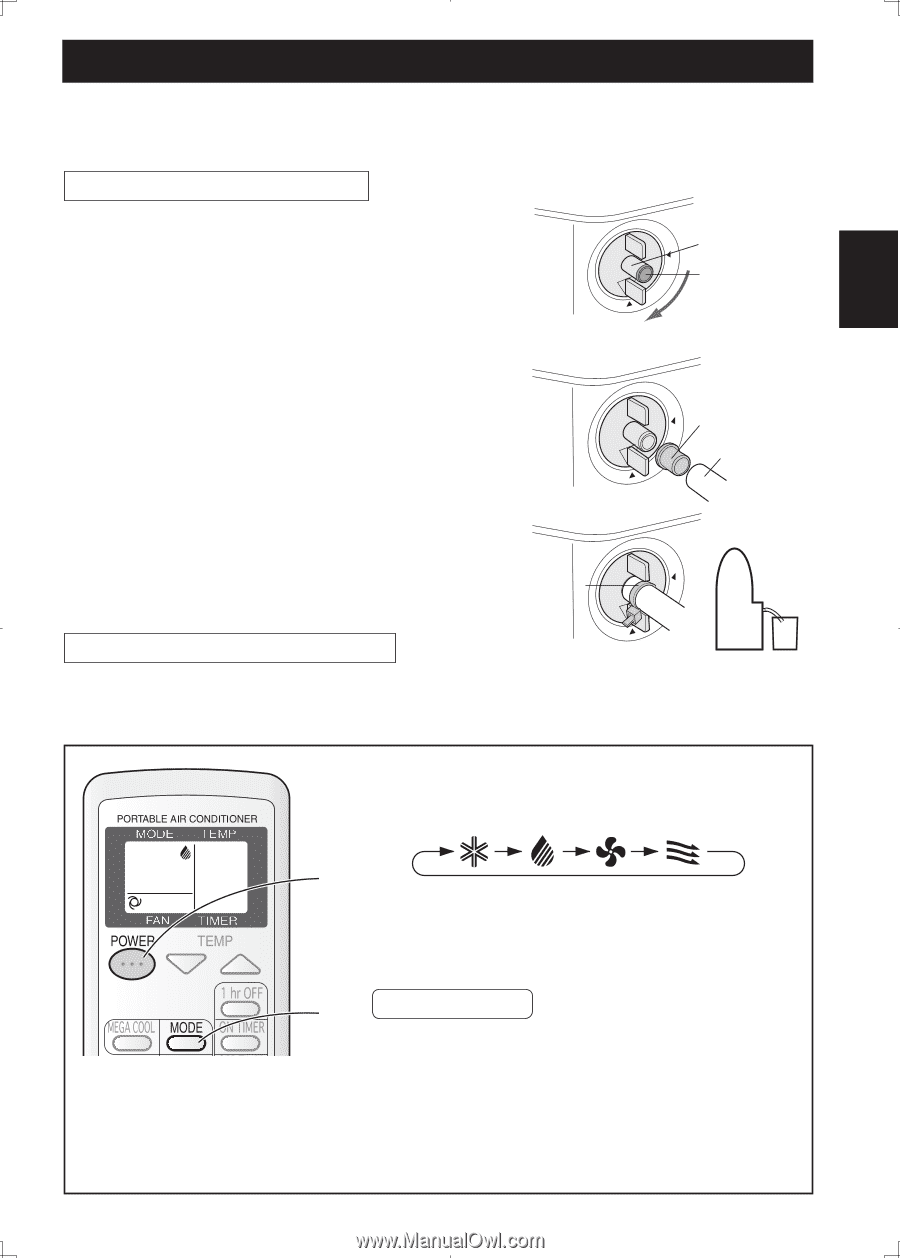
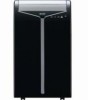
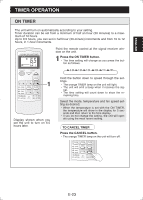
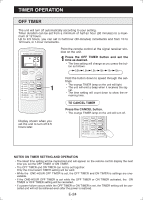
DEHUMIDIFICATION MODE ENGLISH In this mode, the air conditioner dehumidifies the room. Ensure that the stopcock is securely inserted into the lower drainpipe nozzle and that the nozzle has not been damaged. Dehumidification with container 1 Remove the exhaust hose (See Page 15) 2 Turn the drainage nozzle to the OPEN position. 3 Pull the stopcock out from the drainage nozzle. • When the stopcock is removed, a small amount of water may be discharged from the drainage nozzle. • Always perform this procedure with the unit turned off. Drain water will spout out if attempted during operation. Drainage nozzle Stopcock "OPEN" position 4 Attach the drain grommet to a standard commercially-available hose. (5/8" inner diameter, 7/8" outer diameter) 5 Attach the hose to the drainage nozzle, and secure it with the hose band. • Insert the hose securely into a container with a minimum capacity of 31/2 gallons. Be sure to monitor the water level in the container and empty as necessary. Do not operate in dehumidify mode for more than 8 hours at a time. Be sure to empty the water container whenever dehumidify mode is started. Failure to empty the water container can cause the container to overflow and cause damage to underlying materials. • Set the hose sloping downwards for easier drainage. Moreover, do not bend the hose at any point, nor allow the end to be submerged in water. Hose band Drain grommet Hose Dehumidification with no container If draining of the water is not desirable, install the exhaust hose (See Page 14), turn the drainage nozzle to the CLOSE position, and check that the drainage nozzle is covered with the stopcock. In this operation, the water tank inside the unit may become full, the unit will stop operating and the TIMER, OPERATION and MEGA COOL lamps will blink. In this case, drain out the water within the unit (See Page 26). 1 Press the MODE button to select DEHUMIDIFICATION mode. COOL DEHUM FAN VENT 2 2 Press the power button to start operation. • The red OPERATION lamp on the unit will light. • The temperature cannot be set. • The fan speed is preset to AUTO and cannot be changed. 1 TO TURN OFF Press the POWER button again. • The red OPERATION lamp on the unit will turn off. CAUTION When operating dehumidification with container, the unit generates heat during dehumidification mode and the room temperature will rise. Operate dehumidification with no container if you don't want the room temperature to rise. This will help to slightly drop the room temperature, but dehumidification performance will become less effective than when operating dehumidification with container. E-19
-
 1
1 -
2
-
3
-
4
-
5
-
6
-
7
-
8
-
9
-
10
-
11
-
12
-
13
-
14
-
15
-
 16
16 -
 17
17 -
 18
18 -
 19
19 -
 20
20 -
 21
21 -
 22
22 -
 23
23 -
 24
24 -
 25
25 -
 26
26 -
27
-
28
-
29
-
30
-
31
-
32
-
33
-
34
-
35
-
36
-
37
-
38
-
39
-
40
-
41
-
42
-
43
-
44
-
45
-
46
-
47
-
48
-
49
-
50
-
51
-
52
-
53
-
54
-
55
-
56
-
57
-
58
-
59
-
60
 |
 |