Sharp DK-CL6N DK-CL6N Operation Manual - Page 6
System connections - manual
 |
UPC - 074000369412
View all Sharp DK-CL6N manuals
Add to My Manuals
Save this manual to your list of manuals |
Page 6 highlights
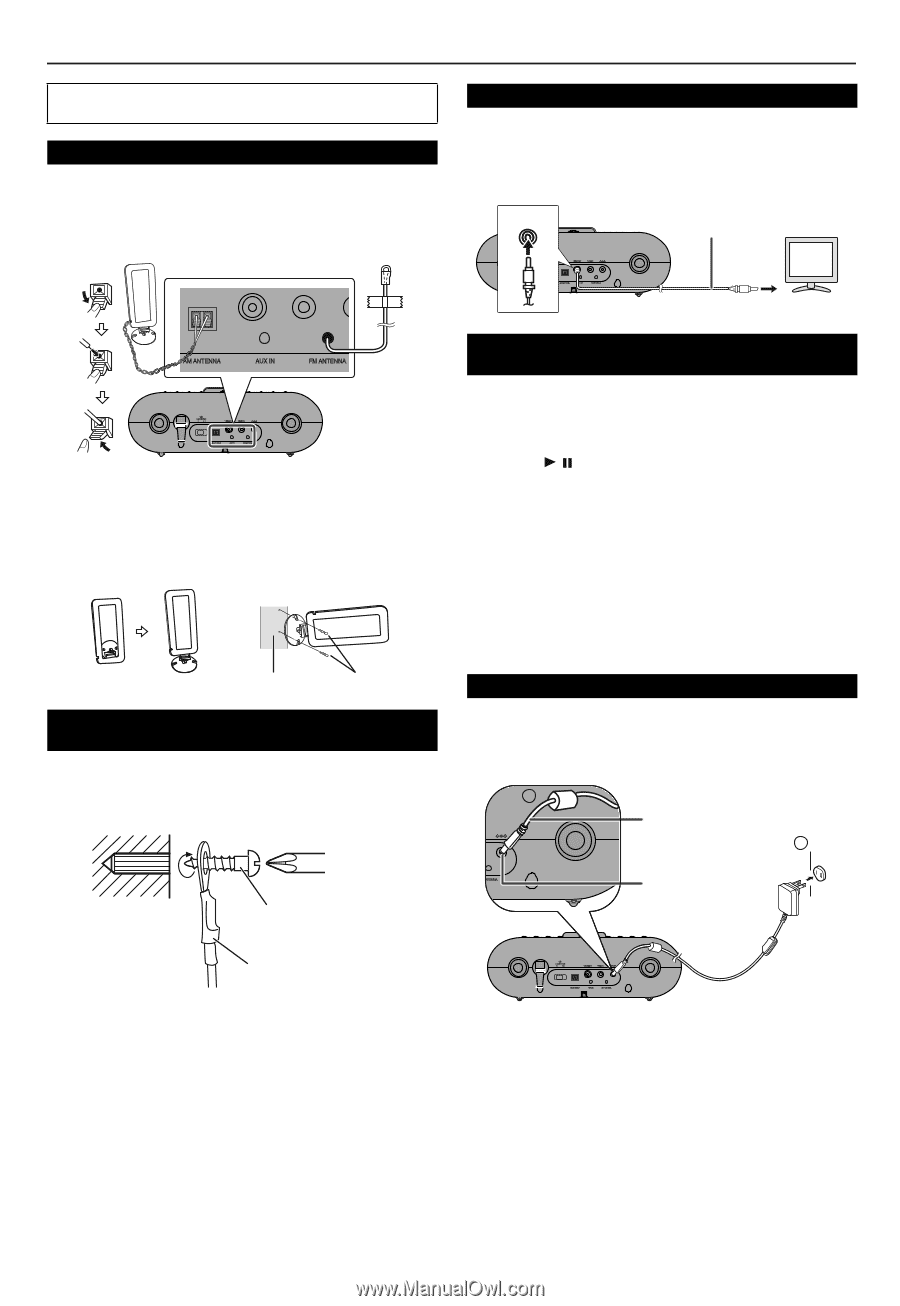
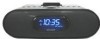
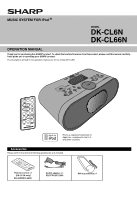
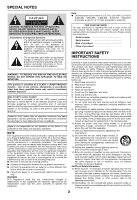
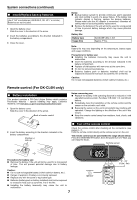
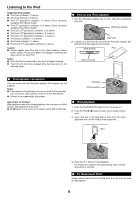
System connections Make sure to unplug the AC/DC adaptor before making any connections. ■ Antenna connection Supplied AM loop antenna: Connect the AM loop antenna to the AM and GND terminals. Position the AM loop antenna for optimum reception. Place the AM loop antenna on a shelf, etc., or attach it to a stand or a wall with screws (not supplied). ■ Connecting iPod to TV Photo and video files from iPod can be viewed by connecting the system to TV/monitor. If the TV/monitor has a video input, connect it to the VIDEO OUT jack at the back of the unit and set the TV Out on the iPod unit to "ON" position. VIDEO OUT Video cable (not supplied) TV To video input jack (Fixed) Note: Placing the antenna on the unit or near the AC power cord may cause noise pickup. Place the antenna away from the unit for better reception. Installing the AM loop antenna: < Assembling > < Attaching to the wall > Wall Screws (not supplied) ■ Installing the security cable (For DK-CL66N only) SHARP designed the unit (DK-CL66N only). So you may fix the security cable on the wall. Use proper screw (not supplied) to fix screw into the wall for security cable, as shown in the illustration. Wall surface Wall mounting screw (not supplied) ■ Watching videos on a TV connected to iPod 1 Enter the iPod menu. 2 Select the desired video from the iPod unit. 3 Press the / button on the iPod unit to start playback. Notes: ● To return to watching video on iPod screen, press and hold the AUX/-TV OUT until the beep sound heard. ● During iPod video playback, pressing the AUX/-TV OUT button until the beep sound heard will not toggle video out display between iPod and TV. ● Please make sure to set iPod unit to either NTSC or PAL to match your TV signal. Please visit Apple's home page for further information. ● Customer should also refer iPod operation manual before making video out setting. ■ AC/DC adaptor connection 1 Plug the AC/DC adaptor cable into the DC IN jack on the unit. 2 Plug the AC/DC adaptor into an AC outlet. 1 AC/DC Adaptor Cable 2 DC IN Jack (DC 12V) Security cable AC Outlet (AC 100 - 240 V, 50/60 Hz) Notes: ● Unplug the AC/DC adaptor from the AC outlet if the unit will not be used for a prolonged period of time. ● Connecting the AC/DC adaptor to the unit disconnects the batteries. ● Use only the supplied AC/DC adaptor. Using other AC/DC adaptor may cause an electric shock or fire. ● The unit does not operate with batteries. Backup batteries is to provide continuous alarm and clock setting during power failure. 6
-
 1
1 -
 2
2 -
 3
3 -
 4
4 -
 5
5 -
 6
6 -
 7
7 -
 8
8 -
 9
9 -
 10
10 -
 11
11 -
 12
12 -
13
-
14
-
15
-
16
 |
 |