Sharp LC-39LE440U Operation Manual - Page 32
Initial Setup
 |
View all Sharp LC-39LE440U manuals
Add to My Manuals
Save this manual to your list of manuals |
Page 32 highlights
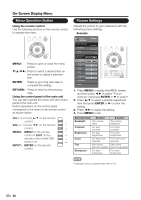
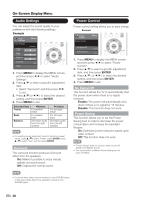
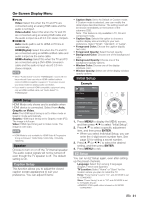
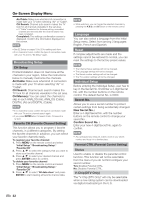
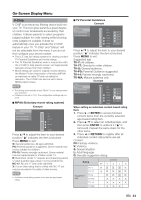
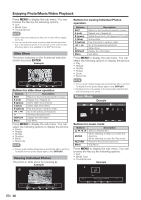
On-Screen Display Menu PC IN Video: Select this when the TV and PC are connected using an analog RGB cable and the audio is not input. Video+Audio: Select this when the TV and PC are connected using an analog RGB cable and the audio is input via a Ø 3.5 mm stereo minijack. HDMI IN Auto: Audio path is set to HDMI or PC line in automatically. HDMI(Digital): Select this when the TV and PC are connected using an HDMI-certified cable and audio is input via the same cable. HDMI+Analog: Select this when the TV and PC are connected using a DVI-HDMI conversion cable and the audio is input via a Ø 3.5 mm stereo minijack. • When "Audio Select" is set to "HDMI(Digital)", sound will not be produced if you use only an HDMI-certified cable to connect HDMI-compatible equipment. To produce sound, you should make an analog audio connection. • If you want to connect HDMI-compatible equipment using only an HDMI-certified cable, set "Audio Select" to "HDMI(Digital)". HDMI Setup HDMI Mode only shows and is available when HDMI device is connected. Select from Auto, Graphic or Video. Auto: The HDMI input timing is set to Video mode or Graphic mode automatically. Graphic: HDMI input timing set to Graphic mode (PC). The image is full scan. Video: HDMI input timing set to Video mode. The image is over scan. • HDMI Mode is only workable for HDMI Video & Progressive timing as followed: 1920x1080p,1280x720p, 720x480p, 720x576p. Speaker Choose to turn on or off the TV internal speaker. The audio output signals will not be turned off even though the TV speaker is off. The default setting is On. Caption Setup This function allows you to adjust the closed caption screen appearance to suit your preference. You can adjust 8 items: • Caption Style: Set to As Default or Custom mode. If Custom mode is selected, user can modify the detail styles described below. The setting result will be shown immediately on the bottom of the submenu OSD. Note : This feature is only available in TV, AV and component mode. • Caption Size: Selects this option to choose a caption display size according to your own preference. Select "Small", "standard", or "Large". • Foreground Color: Choose the caption display text color. • Foreground Opacity: Select the text opacity. • Background Color: Choose one of the background color. • Background Opacity: Choose one of the background opacity options. • Window Color: Choose one of the display windows color. • Window Opacity: Select one of the display window opacity options. Initial Setup Example Initial Setup Initial Setup Menu TV USB PC MENU EZ Setup Broadcasting Setup Language Individual Setup [English] Reset EXIT ENTER RETURN 1. Press MENU to display the MENU screen, and then press / to select "Initial Setup". 2. Press / to select a specific adjustment item, and then press ENTER. • When you select Individual Setup, you can enter the 4-digit secret number here. See page 32 for setting a secret number. 3. Press / (or / ) to select the desired setting, and then press ENTER. 4. Press MENU to exit. EZ Setup You can run EZ Setup again, even after setting up the preset channels. Language: Select from among 3 languages (English, French and Spanish). TV Location: Select "Home" or "Store" for the location where you plan to install the TV. Home: "Power Saving" is set to "On", and AV MODE is set to "STANDARD". Store: "Power Saving" is set to "Off" and AV MODE is set to "DYNAMIC (Fixed)". • ENERGY STAR qualifi cation is based on AV MODE "STANDARD". 31
-
 1
1 -
2
-
3
-
4
-
5
-
6
-
7
-
8
-
9
-
10
-
11
-
12
-
13
-
14
-
15
-
16
-
17
-
18
-
19
-
20
-
21
-
22
-
23
-
24
-
25
-
26
-
 27
27 -
 28
28 -
 29
29 -
 30
30 -
 31
31 -
 32
32 -
 33
33 -
 34
34 -
 35
35 -
 36
36 -
 37
37 -
38
-
39
-
40
-
41
-
42
-
43
-
44
-
45
 |
 |