Sharp LC-60LE810UN Service Manual - Page 48
LE810, UPGRADE SUCCESS, The inch and model name are displayed. - update
 |
UPC - 074000372580
View all Sharp LC-60LE810UN manuals
Add to My Manuals
Save this manual to your list of manuals |
Page 48 highlights
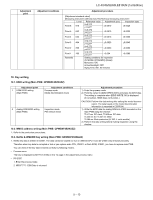
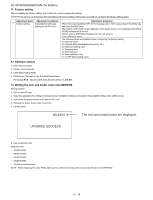
LC-40/46/52/60LE810UN (1st Edition) 11. Factory setting After completing the factory setting, pull out the AC cord to complete the setting. CAUTION: Do not turn on the power after completing the factory setting. If the power is turned on, configure the factory setting again. Adjustment point Adjustment conditions 1 Factory setting Complete the setting by pulling out the AC cord. Adjustment procedure •Point the cursor to [INDUSTRY INIT (+Cause)], set to "ON" using [+]/[-] of the [VOL] key, and press the [ENT] key. The version confirmation screen appears on the green screen. It is completed when [SUCCESS] is displayed at the top. (If error occurs, [ERROR] is displayed on the red screen.) •Turn off the AC power. The following items are initialized when configuring the factory setting. 1) User set value 2) Channel data (broadcasting frequency, etc.) 3) Password setting value 4) Operating time 5) StandbyCause 6) Auto installation flag 7) V-CHIP block setting value 12. Software version 1. Main microcomputer 2. Monitor microcomputer 3. EDID data (Analog RGB) 4. (Reference: File name in the Technical Department) For analog RGB Input3: IC509: edid_dsub15_fullhd_v6_256.BIN 13. Writing the inch and model name onto EEPROM Writing method 1. Pull out the AC cord. 2. Copy the application for writing inch/model name (HLNIMA01.USB) and model/inch file (40LE810.MDL) to the USB memory. 3. Hold down the power button and insert the AC cord. 4. Release the power button after 5 seconds. 5. Update starts. 40LE810 The inch and model name are displayed. UPGRADE SUCCESS 6. Pull out the AC cord. Model/inch file • 40LE810.MDL • 46LE810.MDL • 52LE810.MDL • 60LE810.MDL * 32 inch is not necessary. NOTE: When replacing the main PWB, make sure to perform the writing the inch and model name onto EEPROM 5 - 14
-
 1
1 -
2
-
3
-
4
-
5
-
6
-
7
-
8
-
9
-
10
-
11
-
12
-
13
-
14
-
15
-
16
-
17
-
18
-
19
-
20
-
21
-
22
-
23
-
24
-
25
-
26
-
27
-
28
-
29
-
30
-
31
-
32
-
33
-
34
-
35
-
36
-
37
-
38
-
39
-
40
-
41
-
42
-
 43
43 -
 44
44 -
 45
45 -
 46
46 -
 47
47 -
 48
48 -
 49
49 -
 50
50 -
 51
51 -
 52
52 -
 53
53 -
54
-
55
-
56
-
57
-
58
-
59
-
60
-
61
-
62
-
63
-
64
-
65
-
66
-
67
-
68
-
69
-
70
-
71
-
72
-
73
-
74
-
75
-
76
-
77
-
78
-
79
-
80
-
81
-
82
-
83
-
84
-
85
-
86
-
87
-
88
-
89
-
90
-
91
-
92
-
93
-
94
-
95
-
96
 |
 |
