Sharp R-820JS R-820BC , R-820JS Microwave Operation Manual - Page 10
Part Names - convection microwave
 |
UPC - 074000612235
View all Sharp R-820JS manuals
Add to My Manuals
Save this manual to your list of manuals |
Page 10 highlights
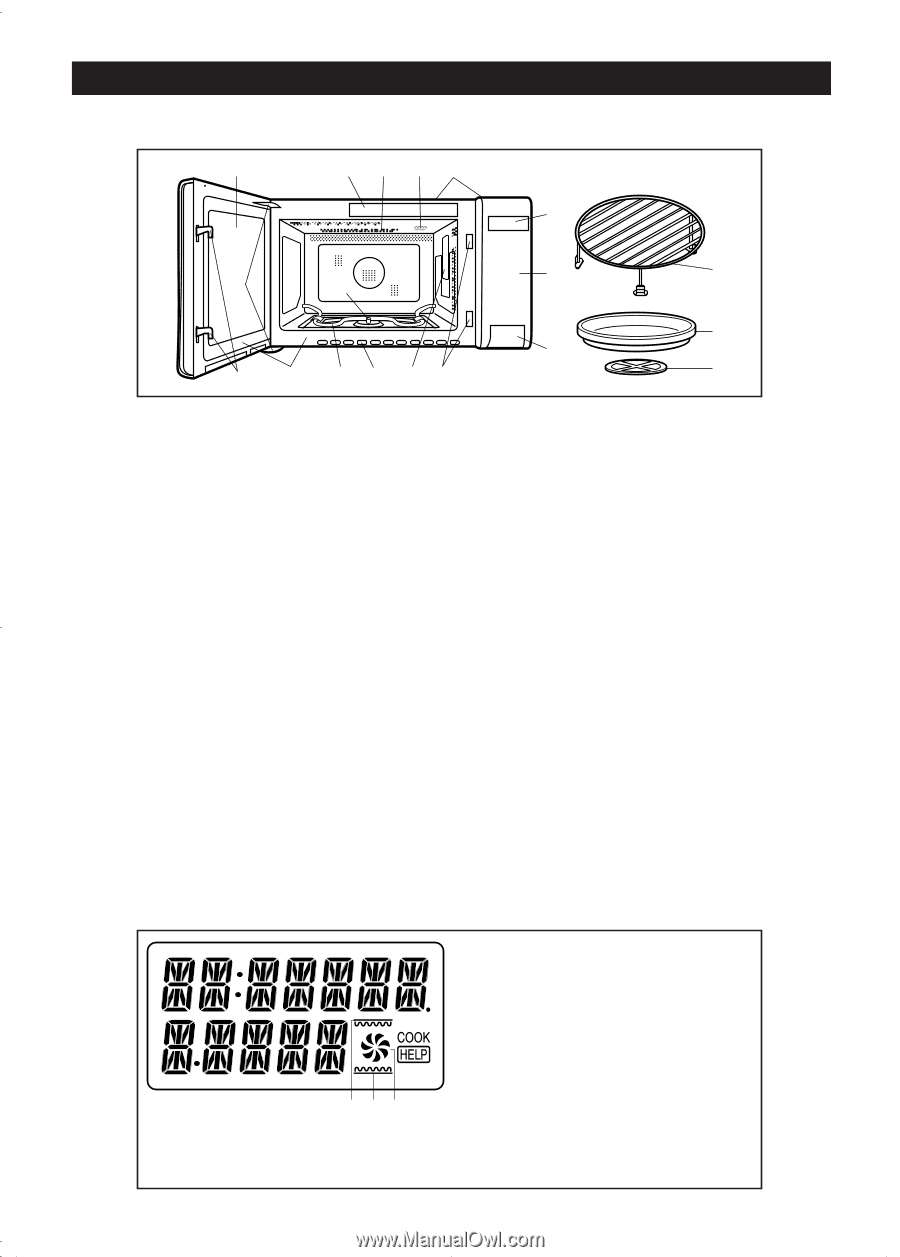
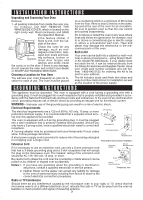
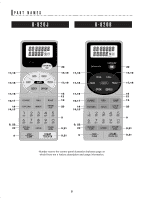
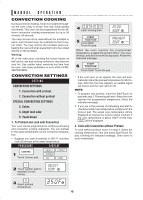
PART NAMES MICROWAVE OVEN PARTS 2 17 15 11 10 14 4 6 13 9 8 1 3 5 16 10 12 3 7 1 One touch door open button Push to open door. 2 Oven door with see-through window 3 Safety door latches The oven will not operate unless the door is securely closed. 4 Door hinges 5 Door seals and sealing surfaces 6 Turntable motor shaft 7 Removable turntable support Carefully place the turntable support in the center of the oven floor. 8 Removable turntable Place the turntable on the turntable support securely. The turntable will rotate clockwise or counterclockwise. 9 Rack Place on the turntable. The rack is designed especially for use in this oven only for convection, roast or grill cooking. DO NOT USE FOR MICROWAVE ONLY COOKING. Do not substitute a similar rack for this specially designed one. 10 Ventilation openings 11 Oven light It will light when oven is operating or door is open. 12 Waveguide cover: DO NOT REMOVE. 13 Auto-Touch control panel 14 Time display: 99 minutes, 99 seconds 15 Top heater 16 Bottom heater 17 Menu label NOTE: Whenever the top heater, bottom heater or convection symbols are lighted in the display, the oven may become very hot. Use caution when removing any item from the oven. Use heavy potholders or oven mitts. INTERACTIVE DISPLAY 1.TOP HEATER SYMBOL The symbol will light when the top heater is in use. 2.BOTTOM HEATER SYMBOL The symbol will light when the bottom heater is in use. 3.CONVECTION SYMBOL The symbol will light during convection cooking. 123 The two-line, Interactive Display spells out operating steps and shows cooking hints. When HELP is lighted in the display, touch the Custom Help pad to read a specific hint which may assist you. 7
-
 1
1 -
2
-
3
-
4
-
 5
5 -
 6
6 -
 7
7 -
 8
8 -
 9
9 -
 10
10 -
 11
11 -
 12
12 -
 13
13 -
 14
14 -
 15
15 -
16
-
17
-
18
-
19
-
20
-
21
-
22
-
23
-
24
-
25
-
26
-
27
-
28
-
29
-
30
-
31
-
32
-
33
-
34
-
35
-
36
-
37
-
38
-
39
-
40
-
41
-
42
-
43
-
44
-
45
-
46
-
47
 |
 |