Singer 3116 Simple Instruction Manual - Page 35
Thread tension
 |
View all Singer 3116 Simple manuals
Add to My Manuals
Save this manual to your list of manuals |
Page 35 highlights
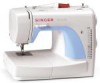
GB Thread tension 4 Upper thread tension Basic thread tension setting: "4" To increase the tension, turn the dial to the next number up. To reduce the tension, turn the dial to the next number down. A. Normal thread tension for straight stitch sewing. B. Thread tension too loose for straight stitch sewing. Turn dial to higher number. C. Thread tension too tight for straight stitch sewing. Turn dial to lower number. D. Normal thread tension for zig zag and decorative sewing. Correct thread tension is when a small amount of the upper thread appears on the bottom side of fabric. 1 2 Lower thread tension To test the bobbin thread tension, remove the bobbin case and bobbin and hold it by suspending it by the thread. Jerk it once or twice. If the tension is correct, the thread will unwind by about an inch or two. If the tension is too tight, it does not unwind at all. If the tension is too loose, it will drop too much. To adjust, turn the small screw on the side of the bobbin case. A B C D Please note: - Proper setting of tension is important to good sewing. - There is no single tension setting appropriate for all stitch functions, thread or fabric. - A balanced tension (identical stitches both top and bottom) is usually only desirable for straight stitch construction sewing. - 90% of all sewing will be between "3" and "5". - For zig zag and decorative sewing stitch functions, thread tension should generally be less than for straight stitch sewing. - For all decorative sewing you will always obtain a nicer stitch and less fabric puckering when the upper thread appears on the bottom side of your fabric. 28
-
 1
1 -
2
-
3
-
4
-
5
-
6
-
7
-
8
-
9
-
10
-
11
-
12
-
13
-
14
-
15
-
16
-
17
-
18
-
19
-
20
-
21
-
22
-
23
-
24
-
25
-
26
-
27
-
28
-
29
-
 30
30 -
 31
31 -
 32
32 -
 33
33 -
 34
34 -
 35
35 -
 36
36 -
 37
37 -
 38
38 -
 39
39 -
 40
40 -
41
-
42
-
43
-
44
-
45
-
46
-
47
-
48
-
49
-
50
-
51
-
52
-
53
-
54
-
55
-
56
-
57
-
58
-
59
-
60
-
61
-
62
-
63
-
64
-
65
-
66
-
67
-
68
-
69
-
70
-
71
-
72
-
73
-
74
-
75
-
76
-
77
-
78
-
79
-
80
-
81
-
82
-
83
-
84
-
85
-
86
-
87
-
88
-
89
-
90
-
91
-
92
-
93
-
94
 |
 |
