Singer 3337 SIMPLE Instruction Manual and Troubleshooting Guide
Singer 3337 SIMPLE Manual
 |
View all Singer 3337 SIMPLE manuals
Add to My Manuals
Save this manual to your list of manuals |
Singer 3337 SIMPLE manual content summary:
- Singer 3337 SIMPLE | Instruction Manual and Troubleshooting Guide - Page 1
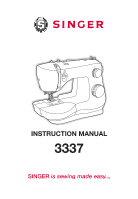
INSTRUCTION MANUAL 3337 - Singer 3337 SIMPLE | Instruction Manual and Troubleshooting Guide - Page 2
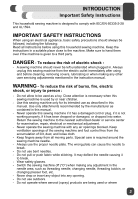
-step instructions. 2. Assistance on the web at www.singerco.com 3. Personal assistance via email: [email protected] 4. Live, one-on-one help from one of our SINGER® Sewing Assistants, at 1-844-664-5188. (North America Only) We're ready to help and hope that you enjoy your SINGER® sewing machine - Singer 3337 SIMPLE | Instruction Manual and Troubleshooting Guide - Page 3
pull or push fabric while stitching. It may deflect the needle causing it to break. - Wear safety glasses. - Switch the sewing machine off ("O") when making any adjustment in the needle area, such as threading needle, changing needle, threading bobbin, or changing presser foot, etc. - Never drop or - Singer 3337 SIMPLE | Instruction Manual and Troubleshooting Guide - Page 4
with the foot control is damaged, it must be replaced by the manufacturer or its service agent or a similarly qualified person, in order to avoid a hazard. - This sewing machine is provided with double insulation. Use only identical replacement parts. See instructions for Servicing of Double - Singer 3337 SIMPLE | Instruction Manual and Troubleshooting Guide - Page 5
product requires extreme care and knowledge of the system and should be done only by qualified service personnel. Replacement parts for a double-insulated product must be identical to those parts in the product. A double-insulated product is marked with the words "DOUBLE INSULATION" or "DOUBLE - Singer 3337 SIMPLE | Instruction Manual and Troubleshooting Guide - Page 6
MACHINE 7-10 Main Parts of the Machine Front...7 Main Parts of the Machine Back...8 Needle and Presser Foot Area...9 Removable Storage Compartment and Accessories 10 GETTING READY TO SEW 11-16 Powering Your Machine...11 Winding the Bobbin...12 Inserting the Bobbin...13 Threading the Upper Thread - Singer 3337 SIMPLE | Instruction Manual and Troubleshooting Guide - Page 7
1 ABOUT YOUR MACHINE Main Parts of the Machine Front 13 1. THREAD TENSION DIAL allows you to select just the right tension for your stitch, thread and fabric. (See Page 18) 2. THREAD TAKE-UP LEVER controls the flow of the upper thread while sewing. (See Page 14) 3. THREAD CUTTER is conveniently - Singer 3337 SIMPLE | Instruction Manual and Troubleshooting Guide - Page 8
controls movement of the needle and the thread take-up lever. 5. POWER AND LIGHT SWITCH turns on machine and sewing light simultaneously. (See Page 11) 6. MAIN PLUG SOCKET is used to connect the power cord/foot controller. (See Page 11) 7. BOBBIN WINDING TENSION DISK holds the thread snuggly to help - Singer 3337 SIMPLE | Instruction Manual and Troubleshooting Guide - Page 9
it in hook pin. 3. THREAD GUIDE controls movement of upper thread. 4. NEEDLE holds thread during stitch formation. 5. PRESSER FOOT SCREW secures the presser foot holder (shank) onto the presser bar. 6. PRESSER FOOT holds fabric against the feed teeth while sewing. Various optional presser feet are - Singer 3337 SIMPLE | Instruction Manual and Troubleshooting Guide - Page 10
Brush (remove stitches/brush out lint) g. Edge/Quilting guide (for straight & accurate quilting) h. Pack of Needles (replacement needles) i. Spool Holders (2 sizes for various thread spool styles) j. Bobbins (SINGER® Class 15 transparent bobbins) k. L-Screwdriver (to remove needle plate for cleaning - Singer 3337 SIMPLE | Instruction Manual and Troubleshooting Guide - Page 11
when machine is not in use. Foot Control The foot control regulates the sewing speed. When foot control is disconnected, the machine will not operate. Sewing Light in any way. ⚠ Your Singer machine is adjusted to provide the best stitch results at normal room temperature. Extreme hot and - Singer 3337 SIMPLE | Instruction Manual and Troubleshooting Guide - Page 12
2 GETTING READY TO SEW Winding the Bobbin This machine uses SINGER® Class 15 transparent bobbins. Use only this style of bobbin when purchasing additional bobbins for your machine. Do not substitute with metal bobbins. 4 1. Place thread spool and corresponding size spool holder onto spool pin. - Singer 3337 SIMPLE | Instruction Manual and Troubleshooting Guide - Page 13
TO SEW Inserting the Bobbin ⚠ Turn power switch off before inserting or removing the bobbin. 1 1. When inserting or removing the bobbin, the needle and presser foot must be fully raised. 2. Remove the bobbin cover plate and bobbin. 3. Insert the bobbin in the bobbin case with the thread running - Singer 3337 SIMPLE | Instruction Manual and Troubleshooting Guide - Page 14
eye of the take-up lever, the machine will jam. After threading the take-up lever, bring the thread downward again. (C) Pass the thread behind the metal thread guide and then down to the needle. 6. If you want to thread the needle manually, thread it from front to back. Pull about 6-8 inches - Singer 3337 SIMPLE | Instruction Manual and Troubleshooting Guide - Page 15
. If you turn the handwheel backward, the machine will jam when you start to sew. 2. Pass thread around thread guide. 3. Press lever down as far as it will go. 4. The threader automatically swings to the threading position. 5. Pass the thread in front of the needle and under the hook. 6. Release the - Singer 3337 SIMPLE | Instruction Manual and Troubleshooting Guide - Page 16
2 GETTING READY TO SEW Drawing Up the Bobbin Thread ⚠ For safety, turn off the power before threading the machine. A B C D 1. Hold the upper thread tail with the left hand (A). Turn the handwheel toward you (B), first lowering (C) and then raising the needle (D). 2. As you turn the handwheel, - Singer 3337 SIMPLE | Instruction Manual and Troubleshooting Guide - Page 17
take your foot off the foot control, the machine will stop. Needles are an important part of sewing. Using old, damaged or incorrect needles for your projects can affect sewing results. For information about which needle to use for your project, refer to the Stitch Reference Guide at www.singerco - Singer 3337 SIMPLE | Instruction Manual and Troubleshooting Guide - Page 18
upper thread and the bobbin thread interlock between the fabric layers. Stitching is well balanced when the needle thread appears on the top and the bobbin thread appears on the bottom. 2. Thread Tension Dial The Thread Tension Dial has a range of settings between 0 and 9. Most of your sewing will - Singer 3337 SIMPLE | Instruction Manual and Troubleshooting Guide - Page 19
with the dot above this dial. This dial must be set at the S1 marking for the blue stitches or the S2 marking for the red stitches, or the stitch pattern will not sew. Stitch Length Dial For examples of stitch patterns and further instruction, see the Stitch Reference Guide at www. singerco.com. 19 - Singer 3337 SIMPLE | Instruction Manual and Troubleshooting Guide - Page 20
the dot on the machine. This is an average stitch length setting for regular sewing. 3. Place the fabric under the All-Purpose Foot or the Sew Easy Foot (see page 26) with the right-hand edge of the fabric lined up with the desired seam guide line on the right side of the needle plate. Lower the - Singer 3337 SIMPLE | Instruction Manual and Troubleshooting Guide - Page 21
dot on the machine. 3. Place the fabric under the All-Purpose Foot with the right-hand edge of the fabric lined up with the desired seam guide line on the right side of the needle plate. Lower the presser foot, then step on the foot control to begin sewing. Sew 2 to 3 stitches and then backstitch - Singer 3337 SIMPLE | Instruction Manual and Troubleshooting Guide - Page 22
the Stitch Length Dial control so that the S1 setting is below the dot. 3. Place the fabric under the All-Purpose Foot with the right-hand edge of the fabric lined up with the desired seam guide line on the right side of the needle plate. Lower the presser foot, then step on the foot control - Singer 3337 SIMPLE | Instruction Manual and Troubleshooting Guide - Page 23
on the left of the buttonhole foot. 7. Hold upper thread slightly and start to sew until the buttonhole is completed. 8. Return the buttonhole lever to its original position once all buttonholes are completed. Use a stabilizer to support the stitches. Slightly reducing your upper tension by 1 or - Singer 3337 SIMPLE | Instruction Manual and Troubleshooting Guide - Page 24
1. Set the machine to Straight Stitch by turning the Stitch Selector Dial to the Straight Stitch Symbol. (see page 19) 2. Set the Stitch Length Dial to 0 to begin. (see page 19) SEW ALONG: Attaching a Button 1. Attach the Darning Plate to the needle plate directly below the presser foot. To do this - Singer 3337 SIMPLE | Instruction Manual and Troubleshooting Guide - Page 25
view the Stitch Reference Guide) For best results, use SINGER® branded needles in your SINGER® sewing machine. Loosen the needle clamp screw (A) by turning the screw toward you. Remove and discard the old needle. Insert the new needle, making sure that the flat side of the top part of the needle is - Singer 3337 SIMPLE | Instruction Manual and Troubleshooting Guide - Page 26
the Sew Easy Foot. 2. Select Straight Stitch. n 3. Witoh your needle set in the center position, use the guide to select 3/8", 1/2", 5/8", 3/4", and even 1" seam allowances. 4. Place your fabric under the foot, lining up the raw edges with the guide on the foot. Lower the presser foot lifter - Singer 3337 SIMPLE | Instruction Manual and Troubleshooting Guide - Page 27
Stitches 7. Bobbin Winding Difficulties 8. Bobbin Thread Breaking 9. Needles Breaking 10. Stitches Distorted 11. Fabric Puckers 12. Fabric Is "Tunneling" Under Stitches 13. Machine Not Feeding Fabric 14. Needle Threader Not Working 15. Loud Noise When Sewing 16. Machine Will Not Run 1. THREAD - Singer 3337 SIMPLE | Instruction Manual and Troubleshooting Guide - Page 28
: Reduce upper thread tension. (See Page 18) 4. THREAD IS SHREDDING Possible Cause: Thread is old or poor quality. Solution: Rethread the top of the machine and bobbin with good quality thread. (See Page 14) Possible Cause: The needle is either worn or old, or it is the wrong style or size for the - Singer 3337 SIMPLE | Instruction Manual and Troubleshooting Guide - Page 29
needle for fabric type. (Go to www.singerco.com to view the Stitch Reference Guide) Possible Cause: Machine not threaded correctly. Solution: Rethread the machine completely. (See Page 14) Possible Cause: "Pushing" or "pulling" fabric. Solution: Don't manually push/pull fabric in order to sew - Singer 3337 SIMPLE | Instruction Manual and Troubleshooting Guide - Page 30
TROUBLESHOOTING AND MAINTENANCE Troubleshooting 10. STITCHES DISTORTED Possible Cause: "Pushing" or "pulling" the fabric. Solution: Don't manually push/pull fabric in order to sew, but allow the machine's feed teeth to draw fabric under presser foot as you guide it. Possible Cause: Incorrect stitch - Singer 3337 SIMPLE | Instruction Manual and Troubleshooting Guide - Page 31
Page 25) Possible Cause: Hook pin damaged. Solution: Needle Threader needs replacement; contact authorized SINGER® service center: Visit www.singerco.com. 15. LOUD NOISE WHEN SEWING Possible Cause: Thread not in take-up lever. Solution: Rethread the machine, making sure the take up lever is in its - Singer 3337 SIMPLE | Instruction Manual and Troubleshooting Guide - Page 32
essential parts clean. For daily machine use, it is recommended that you clean the machine weekly. 1. Remove the bobbin cover and then the presser foot by pressing down on both sides of the presser foot. Removing the presser foot will provide better access to the needle plate and bobbin case area - Singer 3337 SIMPLE | Instruction Manual and Troubleshooting Guide - Page 33
or fraying. Stabilizer Stabilizer is special material used to provide additional support for stitches for special techniques such as decorative machine stitching, appliqué, buttonholes and more. Topstitching Topstitching is straight stitching that appears on the top side of the fabric, used for - Singer 3337 SIMPLE | Instruction Manual and Troubleshooting Guide - Page 34
of in landfills or dumps, hazardous substances can leak into the groundwater and get into the food chain, damaging your health and well-being. SINGER® is a registered trademark of The SINGER® Company Limited or its affiliates. ©2016 The SINGER® Company Limited or its affiliates. All rights reserved. - Singer 3337 SIMPLE | Instruction Manual and Troubleshooting Guide - Page 35
MANUAL DE INSTRUCCIONES 3337 SINGER la costura hecha fácil.™ - Singer 3337 SIMPLE | Instruction Manual and Troubleshooting Guide - Page 36
, así que brindamos una amplia gama de recursos útiles: 1. Un manual de instrucciones con gráficas fáciles de entender e instrucciones paso a paso talktous@singerco. com. 4. Ayuda persona a persona de parte de alguno de nuestros asistentes SINGER®, en 1-844-664-5188 (asistencia ingles disponible en - Singer 3337 SIMPLE | Instruction Manual and Troubleshooting Guide - Page 37
tal y como se explica en este manual. Utilice únicamente los accesorios recomendados por el fabricante, según se indica en este manual. - No utilice nunca la má Mantenga las aberturas de ventilación de la máquina de coser y el pedal limpios de hilos, suciedad y trozos de tela sueltos. - Mantenga los - Singer 3337 SIMPLE | Instruction Manual and Troubleshooting Guide - Page 38
de ruido en condiciones de funcionamiento normales es inferior a 75 dB (A). La máquina solamente se debe usar con un pedal de tipo KD-1902, FC-1902 (110-120V area) / KD-2902, FC-2902A, FC-2902C, FC-2902D sido supervisados o recibido instrucciones sobre el uso de la máquina de coser por parte de 4 - Singer 3337 SIMPLE | Instruction Manual and Troubleshooting Guide - Page 39
la máquina de coser. El nivel de ruido en condiciones de funcionamiento normales es inferior a 75 dB (A). La máquina solamente se debe usar con un pedal de tipo KD-1902, FC-1902 (110-120V area) / KD-2902, FC-2902A, FC-2902C, FC-2902D (220-240V area) fabricado por ZHEJIANG FOUNDER MOTOR - Singer 3337 SIMPLE | Instruction Manual and Troubleshooting Guide - Page 40
Partes Principales del Frente...7 Partes Principales de la Parte Glosario de Términos Usados...33 Explicaciones clave en este manual: = Información útil ⚠ = Puede causar SINGER® & Singer la costura hecha fácil es una marca registrada de The SINGER® Company Limited o sus Afiliadas. © 2016 The SINGER - Singer 3337 SIMPLE | Instruction Manual and Troubleshooting Guide - Page 41
1 ACERCA DE SU MÁQUINA Partes Principales del Frente 13 1. PALANCA ENSARTADOR DE AGUJA se usa para accionar el ensartador automático. (ver página 18) 2. automático de aguja (ver página 15) 13. BOBINA sostiene el hilo que forma la puntada que aparece en la parte de atrás de la tela (ver página 12) 7 - Singer 3337 SIMPLE | Instruction Manual and Troubleshooting Guide - Page 42
21 ACERCA DE SU MÁQUINA Partes Principales de la Parte de Atrás 1 7 2 3 8 9 4 10 11 12 5 13 6 1. PORTA forma simultánea. (ver página 11) 6. RECEPTÁCULO CONECTOR para conectar el cable de energía/pedal controlador. (ver página 11) 7. DISCO DE TENSIÓN DEVANADO DE BOBINA sostiene el hilo con - Singer 3337 SIMPLE | Instruction Manual and Troubleshooting Guide - Page 43
1 ACERCA DE SU MÁQUINA Área del Prensatelas y Aguja 8 1 9 3 4 10 11 2 12 5 13 6 14 7 1. PALANCA ENSARTADOR AGUJA se usa para accionar el ensartador automático. 2. GUÍA ENSARTADOR AGUJA sostiene el hilo con firmeza antes de colocarlo en el gancho. 3. GUÍA HILO controla el movimiento del - Singer 3337 SIMPLE | Instruction Manual and Troubleshooting Guide - Page 44
recta y precisa) h. Paquete de Agujas (agujas de remplazo) i. Sujeta Carretes (2 tamaños para diferentes estilos de carretes de hilo) j. Bobinas (SINGER® Clase 15 bobinas transparentes) k. Destornillador en L (para quitar la placa para limpieza) l. Placa de Zurcido (cubierta para el impelente) m. En - Singer 3337 SIMPLE | Instruction Manual and Troubleshooting Guide - Page 45
la máquina no esté en uso. Pedal Controlador El pedal controlador regula la velocidad de costura. Cuando el pedal es desconectado, la máquina nopodrá operar No modifique en ninguna forma la clavija. ⚠ Su máquina de coser Singer se ha ajustado para ofrecer el mejor resultado de puntada con una - Singer 3337 SIMPLE | Instruction Manual and Troubleshooting Guide - Page 46
COSER Devanando la Bobina Esta máquina usa bobinas transparentes SINGER® Clase 15. Use sólo este tipo de bobina cuando compre cerca de la parte superior de bobina, luego finalice pisando el pedal controlador. A B 6. La bobina dej ará de devanarse cuando se llene. Suelte el pedal. Presione la - Singer 3337 SIMPLE | Instruction Manual and Troubleshooting Guide - Page 47
en sentido contrario a las manecillas del reloj, como se muestra en la ilustración. 4. Tire del hilo en la muesca (A). A 5. Con una mientras presiona la parte superior de la bobina, colocar el hilo en las guías como se muestra. 6. Para cortar el hilo sobrante, tire de él hacia usted para córtalo - Singer 3337 SIMPLE | Instruction Manual and Troubleshooting Guide - Page 48
correctamente. 4 3. Coloque el carrete de hilo y tapa carrete en el porta carrete. 4. jale el hilo de carrete por la guía hilo superior en la parte superior de la máquina. Sostenga el hilo con ambas manos y jálelo hacia la guía de pretensión. 5. (A) Jale el hilo hacia el canal derecho, alrededor - Singer 3337 SIMPLE | Instruction Manual and Troubleshooting Guide - Page 49
2 PREPARÁNDOSE PARA COSER Ensartador Automático de Aguja ⚠ Por seguridad, apague la máquina antes de usar el ensartador automático. 1. Levante la aguja a su posición más alta girando el volante hacia usted. Si gira el volante hacia atrás, la máquina se atascará cuando comience a coser. 2. Pase el - Singer 3337 SIMPLE | Instruction Manual and Troubleshooting Guide - Page 50
aparece, revise que el hilo de la bobina no esté atorado con la cubierta de la bobina. 3. Lleve ambos extremos debajo del prensatelas y hacia la parte de atrás de la máquina. 16 - Singer 3337 SIMPLE | Instruction Manual and Troubleshooting Guide - Page 51
regular la velocidad de costura. Cuando presiona el pedal, la máquina coserá. Entre mayor la presión que aplique al pedal, más rápido coserá la máquina. Cuando quite el pie del pedal controlador, la máquina se detendrá. Las agujas son parte importante de la costura. Usar agujas incorrectas, viejas - Singer 3337 SIMPLE | Instruction Manual and Troubleshooting Guide - Page 52
está bien balanceada cuando el hilo aguja aparece en la parte superior y el hilo bobina aparece en la parte de abajo. 2. Perilla Tensión de Hilo La tensión bobina Surfacerficie 3. Cuando cose, si ve grandes bucles en la parte inferior de la tela, es realmente una indicación que el hilo superior - Singer 3337 SIMPLE | Instruction Manual and Troubleshooting Guide - Page 53
: 1. Gire la Perilla Selectora de Puntada hasta que escuche un clic debajo de la abajo del punto directamente por encima de la línea en la parte frontal de la máquina. 2. Ajuste la Perilla Largo de Puntada según el largo que desee. Puede ajustarse entre el 0.5 y el 4, donde el 4 es el ajuste - Singer 3337 SIMPLE | Instruction Manual and Troubleshooting Guide - Page 54
derecho de la tela alineado con la guía de costura deseado en el lado derecho de la placa aguja. Baje el prensatelas, pise entonces el pedal para comenzar a coser. Asegúrese siempre que el prensatelas esté abajo antes de comenzar a coser. Si no lo hace, la máquina se atascará cuando cosa - Singer 3337 SIMPLE | Instruction Manual and Troubleshooting Guide - Page 55
guía de costura deseado en el lado derecho de la placa aguja. Baje el prensatelas, luego pise el pedal para iniciar la costura. Cosa 2 o 3 puntadas y luego cosa en reversa (ver página 20) para Esto ayudará a evitar que el hilo bobina aparezca en la parte de arriba cuando cosa puntadas más densas. 21 - Singer 3337 SIMPLE | Instruction Manual and Troubleshooting Guide - Page 56
de la tela alineado con la línea guía de costura deseado en el lado derecho de la placa aguja. Baje el prensatelas, lego pise el pedal para iniciar la costura. Cosa 2 a 3 puntadas y luego una puntada de refuerzo (ver página 20) para reforzar la costura. 22 - Singer 3337 SIMPLE | Instruction Manual and Troubleshooting Guide - Page 57
página 19) 2. Coloque la Perilla Largo Puntada dentro del rango del ojal. (ver página 19) COSIENDO: Puntada de Ojal 1. Coloque el botón en la parte de atrás del prensatelas de ojal. Marque la posición y el largo del ojal en la tela. 2. Retire el prensatelas universal y coloque el prensatelas de ojal - Singer 3337 SIMPLE | Instruction Manual and Troubleshooting Guide - Page 58
los dos orificios del botón en el frente del pie. Gire el volante para que la aguja libre el orificio de la izquierda. Pise el pedal y cosa 3 a 4 puntadas. Levante la aguja fuera de la tela. 6. Coloque la Perilla Selectora, de modo que el símbolo Zig Zag esté debajo del punto.Ajuste - Singer 3337 SIMPLE | Instruction Manual and Troubleshooting Guide - Page 59
en su máquina de coser SINGER®. Afloje el tornillo sujeta aguja (A) girando el tornillo hacia usted. Inserte la nueva aguja, asegurándose que el lado plano de la parte superior de la aguja está hacia la parte de atrás de la máquina (B). Inserte la nueva aguja hasta el fondo (C). Apriete el tornillo - Singer 3337 SIMPLE | Instruction Manual and Troubleshooting Guide - Page 60
3 COMENZANDO A COSER Cambiando el Prensatelas ⚠ Apague la máquina antes de cambiar el prensatelas. Antes de cambiar el prensatelas, levante el alza prensatelas. El sujeta prensatelas (b) está sujeto a la barra presionadora (a). El prensatelas (e) tiene un perno (d) que une con el sujeta prensatelas - Singer 3337 SIMPLE | Instruction Manual and Troubleshooting Guide - Page 61
de tensión y la palanca tira hilo. (ver página 14) Para saber si ha rensartado correctamente la máquina, intente esta simple prueba: • Levante el eleva prensatelas y ensarte la parte de arriba de la máquina. • Ensarte la aguja, pero no ponga aún el hilo debajo del prensatelas. Conforme jala el hilo - Singer 3337 SIMPLE | Instruction Manual and Troubleshooting Guide - Page 62
tensión del hilo superior. (ver página 18) 4. EL HILO SE DESHILACHA Causa Posible: El hilo es viejo o de mala calidad. Solución: Ensarte de nuevo la parte superior de la máquina y bobina con hilo de calidad. (ver página 14) Causa Posible: La aguja está vieja o gastada o es del tipo o tamaño correcto - Singer 3337 SIMPLE | Instruction Manual and Troubleshooting Guide - Page 63
32) Causa Posible: Se usan bobinas equivocadas. Solution: Use bobinas SINGER® del mismo estilo que las que vienen con su máquina, no las sustituya. Su máquina viene con bobinas transparentes SINGER® Clase 15. 9. SE ROMPE LA AGUJA Causa Posible: Aguja doblada, - Singer 3337 SIMPLE | Instruction Manual and Troubleshooting Guide - Page 64
de la máquina jalen la tela debajo del prensatelas conforme usted la guia. Causa Posible: Ajuste incorrecto de largo puntada. Solución: Revise el manual para los ajustes correctos de largo/ancho puntada. (visite www. singerco.com para información Guía de Referencia de Puntadas) Causa Posible: Puede - Singer 3337 SIMPLE | Instruction Manual and Troubleshooting Guide - Page 65
bien conectados. Solución: Asegúrese de que el cable y/o pedal controlador estén bien asentados en la máquina y a la fuente de energía. (ver página 11) Causa Posible: Se están usando las bobinas incorrectas. Solución: Use sólo bobinas SINGER® del mismo estilo que vienen con su máquina. (ver página - Singer 3337 SIMPLE | Instruction Manual and Troubleshooting Guide - Page 66
la bobina. 2. Gire el volante hacia usted hasta que la aguja esté en la posición más alta. (La palanca tira hilos debe ser visible en la parte superior de la máquina) 3. Retire los dos tornillos de la placa aguja usando el desarmador en L, incluido en su máquina. Remueva la placa aguja. 4. Retire - Singer 3337 SIMPLE | Instruction Manual and Troubleshooting Guide - Page 67
especial usado para dar apoyo adicional a las puntadas en técnicas especiales como aplicaciones, ojales y más. Pespunte El pespunte es una puntada recta que aparece en la parte de arriba de la tela, se usa para refuerzo adicional, adorno o ambos. 33 - Singer 3337 SIMPLE | Instruction Manual and Troubleshooting Guide - Page 68
vertedero, pueden producirse fugas de sustancias peligrosas en el terreno y llegar a la cadena alimentaria, dañando su salud y bienestar. SINGER® es una marca registrada de The SINGER® Company Limited o sus afiliados. ©2016 The SINGER® Company Limited o sus afliliados. Todos los derechos reservados. - Singer 3337 SIMPLE | Instruction Manual and Troubleshooting Guide - Page 69
MANUEL D'INSTRUCTION 3337 SINGER vous facilite la couture.™ - Singer 3337 SIMPLE | Instruction Manual and Troubleshooting Guide - Page 70
achat d'une toute nouvelle machine à coudre SINGER®! La marque SINGER® représente la qualité depuis 160 ans. Nous créons nos machines pour tous niveau de et instructions étape par étape facile à comprendre. 1. Un manuel d'instruction avec des graphiques facile à comprendre et des instructions - Singer 3337 SIMPLE | Instruction Manual and Troubleshooting Guide - Page 71
ées, y compris les suivantes : Lisez attentivement toutes les instructions avant d'utiliser cette machine à coudre à usage domestique. Conservez les instructions dans un lieu approprié près de la machine. Veillez à les transmettre avec la machine si celle-ci est donnée à une autre personne. DANGER - Singer 3337 SIMPLE | Instruction Manual and Troubleshooting Guide - Page 72
é par le fabricant ou son agent de service, ou toute autre personne qualifiée, afin d'éviter les risques. - Cette machine est équipée d'une double isolation. N'utilisez que des pièces détachées d'origine. Voir les instructions relatives à l'entretien des appareils à double isolation. CONSERVEZ - Singer 3337 SIMPLE | Instruction Manual and Troubleshooting Guide - Page 73
) / 4C-336G (240V) / 4C-336G (220-240V) fabriquée par Wakaho Electric Ind. Co., Ltd. (Vietnam) ENTRETIEN DES PRODUITS ÉQUIPÉS D'UNE DOUBLE ISOLATION Une machine à double isolation est équipée de deux systèmes d'isolation au lieu d'une mise à la terre. Aucun branchement à la terre n'est livré avec un - Singer 3337 SIMPLE | Instruction Manual and Troubleshooting Guide - Page 74
l'apparence, la conception ou les accessoires de cette machine à coudre lorsque considéré nécessaire. SINGER® & Singer vous facilite la couture est une marque enregistré de The SINGER® Company Limited ou de ses sociétés affiliées. © 2016 The SINGER® Company Limited ou ses sociétés affiliées. Tous - Singer 3337 SIMPLE | Instruction Manual and Troubleshooting Guide - Page 75
À PROPOS DE VOTRE MACHINE Parties Avant Principales de la Machine 13 1. LE CADRAN DE LA TENSION DU FIL vous permet de sélectionner la tension appropriée pour le cousez. (Voir Page 26) 5. LA PLAQUE D'AIGUILLE comporte des lignes guide pour vous aider à coudre des lignes droite. (Voir Page 9) 6. LE - Singer 3337 SIMPLE | Instruction Manual and Troubleshooting Guide - Page 76
et en douceur. (Voir Page 12) 8. LE GUIDE-FIL PRÉ-TENSION aide à maintenir le débit du fil pendant la couture. (Voir Page 14) 9. LA PLAQUE FRONTALE renferme et protège le mécanisme intérieur de la machine. 10. LA POIGNÉE est utilisée pour transporté la machine. 11. LE LEVIER DU PIED PRESSEUR soulève - Singer 3337 SIMPLE | Instruction Manual and Troubleshooting Guide - Page 77
GUIDE-FIL contrôle le déplacement du fil supérieur. 4. L'AIGUILLE retient le fil durant la formation du point. 5. LA VIS DU PIED PRESSEUR sécurise le support sous le pied presseur. 8. LE PINCE AIGUILLE retient l'aiguille de la machine en place. 9. LA VIS DE L'AIGUILLE sécurise l'aiguille lorsqu'insérée - Singer 3337 SIMPLE | Instruction Manual and Troubleshooting Guide - Page 78
amovible horizontalement, tirez ensuite vers la gauche pour le retirer de la machine. En ce faisant, vous aurez accès au bras libre, qui L'ACHAT DE CET ARTICLE, VISITER WWW.SINGER.COM f. Découseur/Brosse (pour enlever des points/enlever la mousse) g. Guide Matelassé (Pour des coutures droites et - Singer 3337 SIMPLE | Instruction Manual and Troubleshooting Guide - Page 79
la prise, veuillez contacter un électricien qualifié afin qu'il installe la prise murale appropriée. Ne modifiez la fiche en aucun cas. ⚠ Votre machine à coudre Singer est réglée pour vous donner le meilleur fini de point à une température ambiante normale. Les températures extrêmement élevées ou - Singer 3337 SIMPLE | Instruction Manual and Troubleshooting Guide - Page 80
Canette Cette machine utilise des canettes SINGER® de Classe 15 transparente. Utilisez seulement ce type de canette, pour votre machine, lorsque vous Insérez le fil dans le guide sur le dessus de la machine. (B) Bien insérer le fil dans les disques de tension du bobineur pour vous assurer un - Singer 3337 SIMPLE | Instruction Manual and Troubleshooting Guide - Page 81
2 PRÉPARATIFS DE LA COUTURE Mise en Place de la Canette ⚠ Placez l'interrupteur de la machine en position ("O") avant de retirer la canette. 1 1. Lors de l'insertion ou le retrait de la canette, l'aiguille et le pied-presseur doivent être complètement - Singer 3337 SIMPLE | Instruction Manual and Troubleshooting Guide - Page 82
1 2. Soulevez le pied presseur. Ceci est nécessaire pour enfiler la machine correctement. 4 3. Installer la bobine de fil et le chapeau de bobine le dans le guide fil supérieur sur le dessus de la machine. En tenant le fil avec vos deux mains inséré-le dans le guide de pré-tension. 5. (A) - Singer 3337 SIMPLE | Instruction Manual and Troubleshooting Guide - Page 83
position haute en tournant le volant vers vous. Si vous tournez le volant dans le sens contraire, la machine pourrait ce coincé lorsque vous débuterez la couture. 2. Passer le fil autour du guide-fil. 3. Appuyer sur le levier pour le faire descendre le plus bas possible. 4. Le crochet d'enfilage se - Singer 3337 SIMPLE | Instruction Manual and Troubleshooting Guide - Page 84
2 PRÉPARATIFS DE LA COUTURE Rappel du Fil Inférieur ⚠ Par mesure de sécurité, placez l'interrupteur de la machine en position ("O") avant d'enfiler la machine. A B C D 1. Retenez le bout du fil supérieur avec votre main gauche (A). Faites tourner le volant vers vous (B), l'aiguille doit - Singer 3337 SIMPLE | Instruction Manual and Troubleshooting Guide - Page 85
bouton. Pour chaque technique, vous avez l'occasion de coudre. Pour plus d'informations sur les divers points que comportent votre machine et comment les utiliser, référez-vous au Guide de Référence de Point au www.singerco.com. Voici d'autres astuces que vous pourriez trouver utile avant de débuter - Singer 3337 SIMPLE | Instruction Manual and Troubleshooting Guide - Page 86
canette apparaît sur l'envers. 2. Le cadran de Réglage de Tension du Fil Le Cadran de Réglage de Tension du Fil se règle entre 0 et 9. La majeure partie supérieur n'a pas été enfilé correctement, comme s'il n'y a aucune tension d'appliquée. Pour plus d'informations sur la façon de corriger ce type - Singer 3337 SIMPLE | Instruction Manual and Troubleshooting Guide - Page 87
Sélection des Motifs jusqu'à ce que le motif désiré soit directement en dessous du point rond sur la machine. 2. Placez le Cadran de la Longueur du Point de façon à ce que le S1 ou S2 soit exemples de motifs et plus d'information, référez-vous au Guide de Référence de Point au www.singerco.com. 19 - Singer 3337 SIMPLE | Instruction Manual and Troubleshooting Guide - Page 88
page 26) avec le rebord droit du tissu aligné sur la ligne guide choisit sur le côté droit de la plaque d'aiguille.Abaissez le pied presseur est baissé avant de débuter une couture. Si vous ne faite cela, la machine va ce coincé dès que vous débuterez la couture. Débutez votre couture en cousant - Singer 3337 SIMPLE | Instruction Manual and Troubleshooting Guide - Page 89
point rond de la machine. 3. Placez le tissu en dessous du pied Tout-Usage avec le rebord droit du tissu aligné sur la ligne guide choisit sur le côté plisser ou s'enrouler en cousant. Il pourrait être utile de diminuer la tension du fil supérieur de 1 à 2 valeurs lorsque vous cousez des points dé - Singer 3337 SIMPLE | Instruction Manual and Troubleshooting Guide - Page 90
pour plus de points extensible qui peuvent être utilisés.) COMMENT: 1. Réglez la machine sur le point désiré en déplaçant le Cadran de Sélections des Motifs rond de la machine. 3. Placez le tissu en dessous du pied Tout-Usage avec le rebord droit du tissu aligné sur la ligne guide choisit sur le - Singer 3337 SIMPLE | Instruction Manual and Troubleshooting Guide - Page 91
Cadran de Sélection des Motifs. COMMENT: 1. Réglez la machine sur le point désiré en déplaçant le Cadran de de la boutonnière. (Voir page 19) POUR COUDRE: Buttonhole Stitch 1. Placez le bouton à l'arrière du pied de boutonni sultats ; réduisez légèrement la tension du fil supérieure de 1 à 2 - Singer 3337 SIMPLE | Instruction Manual and Troubleshooting Guide - Page 92
à ce que la valeur 0 soit directement en dessous du point rond de la machine. 4. Déplacez le Cadran de Sélections des Motifs de façon à ce que ésentant le point Droit soit directement en dessous du point rond de la machine. 5. Placez le bouton sur le tissu, alignez ensuite le bouton directement sous - Singer 3337 SIMPLE | Instruction Manual and Troubleshooting Guide - Page 93
la bonne aiguille pour le tissu à coudre. (Visiter www.singerco.com pour voir le Guide de Reference des Points) Pour de meilleurs résultats, utilisez des aiguilles de marque SINGER® dans votre machine à coudre SINGER®. Desserrez la vis d'arrêt d'aiguille (A) en tournant la vis vers vous. Insérez la - Singer 3337 SIMPLE | Instruction Manual and Troubleshooting Guide - Page 94
e CET ARTICLE EN PRIME N'EST PAS INCLUS AVEC MACHINES VENDUS DANS CERTAINS DOMAINES ET PEUT ETRE UN ACCESSOIRE FACULTATIF. POUR OBTENIR DES INFORjMATIONS SUR L'ACHAT DE CET ARTICLE, VISITER WWW.SINGER.COM. Le Pied Couture Facile dispose d'un guide pour vous aider à réaliser les coutures les plus - Singer 3337 SIMPLE | Instruction Manual and Troubleshooting Guide - Page 95
de procéder à l'enfilage, de cette façon le fil s'insèrera correctement dans le mécanisme de tension et dans le levier releveur de fil. (Voir page 14) Pour savoir si vous avez bien réenfilez la machine, faite ce simple test: • Levez le pied presseur et enfiler la partie supérieure de la - Singer 3337 SIMPLE | Instruction Manual and Troubleshooting Guide - Page 96
14) Cause Possible: la tension supérieure est trop grande. Solution: réduire la tension du fil supérieur. ( pied presseur et dirigé vers l'arrière de la machine avant de débuter la couture. (Voir page 20) d'aiguille pour le tissu à coudre. (Voir le Guide de Référence des Points au www.singerco.com) - Singer 3337 SIMPLE | Instruction Manual and Troubleshooting Guide - Page 97
de tension du SINGER® du même type que celle fourni avec la machine - n'utilisez pas de substitue. Votre machine est livrée avec des canettes transparente SINGER Guide de Référence des Points au www.singerco.com) Cause Possible: la machine n'est pas enfiler correctement. Solution: réenfilez la machine - Singer 3337 SIMPLE | Instruction Manual and Troubleshooting Guide - Page 98
laissez plutôt les griffes d'entraînement de la machine déplacer le tissu en dessous du pied presseur tension du fil supérieur. (Voir page 18) Cause Possible: la longueur du point est réglée à un point trop court pour le type de tissu à coudre. Solution: augmentez la longueur du point. (Voir le Guide - Singer 3337 SIMPLE | Instruction Manual and Troubleshooting Guide - Page 99
de chas d'aiguille doit être remplacé; contacter le centre de service sur garantie autorisé SINGER® ou visiter le site à www.singerco.com. 15. BRUIT ou en arrière du chapeau de bobine. (Voir page 14) 16. LA MACHINE NE FONCTIONNE PAS Cause Possible: l'axe du bobineur est engagé lorsque vous avez essay - Singer 3337 SIMPLE | Instruction Manual and Troubleshooting Guide - Page 100
la plus élevée. (Le releveur de fil doit être visible sur le dessus de la machine). 7. Prendre la main sur le boîtier de canette avec le pouce et l'index à qui devrait durer la vie de la machine. Veuillez contacter un agent de service local, si la lumière néanmoins nécessite un remplacement. 32 - Singer 3337 SIMPLE | Instruction Manual and Troubleshooting Guide - Page 101
un point droit espacé et une tension réduite. Cette couture provisoire maintien les devrez retirer le compartiment de rangement amovible de la machine vous donnants accès au bras libre. Entoilage L' riel spécialement conçu pour donner un support additionnel aux coutures lors de l'utilisation de - Singer 3337 SIMPLE | Instruction Manual and Troubleshooting Guide - Page 102
dans la chaîne alimentaire, devenant ainsi un risque pour votre santé et votre bien-être. SINGER® est une marque enregistré de The SINGER® Company Limited ou de ses sociétés affiliées. ©2016 The SINGER® Company Limited ou ses sociétés affiliées. Tous droits réservés. 021Q4G0101(A)(EN.ES.FR)
-
 1
1 -
 2
2 -
 3
3 -
 4
4 -
 5
5 -
 6
6 -
 7
7 -
8
-
9
-
10
-
11
-
12
-
13
-
14
-
15
-
16
-
17
-
18
-
19
-
20
-
21
-
22
-
23
-
24
-
25
-
26
-
27
-
28
-
29
-
30
-
31
-
32
-
33
-
34
-
35
-
36
-
37
-
38
-
39
-
40
-
41
-
42
-
43
-
44
-
45
-
46
-
47
-
48
-
49
-
50
-
51
-
52
-
53
-
54
-
55
-
56
-
57
-
58
-
59
-
60
-
61
-
62
-
63
-
64
-
65
-
66
-
67
-
68
-
69
-
70
-
71
-
72
-
73
-
74
-
75
-
76
-
77
-
78
-
79
-
80
-
81
-
82
-
83
-
84
-
85
-
86
-
87
-
88
-
89
-
90
-
91
-
92
-
93
-
94
-
95
-
96
-
97
-
98
-
99
-
100
-
101
-
102
 |
 |
INSTRUCTION MANUAL
3337