Singer S10 I STUDIO Instruction Manual 2 - Page 20
Using Automatic Needle Threader
 |
View all Singer S10 I STUDIO manuals
Add to My Manuals
Save this manual to your list of manuals |
Page 20 highlights
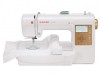
USING AUTOMATIC NEEDLE THREADER Raise the needle to its highest position by rotating the hand 1 wheel towards you. 1. Hook thread to thread guide as illustrated. 2. Pull down threader lever until the hooked end passes 2 through the needle eye. Guide thread into hooked end and pull it upward. 3. Release the threader lever and thread simultaneously, and needle will be threaded automatically. 3 NOTE: For smooth threading, it is recommended that the machine be set for straight stitch (in center needle position) when using the automatic needle threader. 20
-
 1
1 -
2
-
3
-
4
-
5
-
6
-
7
-
8
-
9
-
10
-
11
-
12
-
13
-
14
-
 15
15 -
 16
16 -
 17
17 -
 18
18 -
 19
19 -
 20
20 -
 21
21 -
 22
22 -
 23
23 -
 24
24 -
 25
25 -
26
-
27
-
28
-
29
-
30
-
31
-
32
-
33
-
34
-
35
-
36
-
37
-
38
-
39
-
40
-
41
-
42
-
43
-
44
-
45
-
46
-
47
-
48
-
49
-
50
-
51
-
52
-
53
-
54
-
55
-
56
-
57
-
58
-
59
-
60
-
61
-
62
-
63
-
64
-
65
-
66
-
67
-
68
-
69
-
70
-
71
-
72
-
73
-
74
-
75
-
76
-
77
-
78
-
79
-
80
-
81
-
82
-
83
-
84
-
85
-
86
-
87
-
88
-
89
-
90
-
91
-
92
-
93
-
94
-
95
-
96
-
97
-
98
-
99
-
100
-
101
-
102
-
103
-
104
-
105
-
106
-
107
-
108
-
109
-
110
-
111
-
112
 |
 |

²0
1
2
3
USING AUTOMATIC NEEDLE THREADER
Raise the needle to its highest position by rotating the hand
wheel towards you.
1. Hook thread to thread guide as illustrated.
2. Pull down threader lever until the hooked end passes
through the needle eye. Guide thread into hooked end and
pull it upward.
3. Release the threader lever and thread simultaneously, and
needle will be threaded automatically.
NOTE: For smooth threading, it is recommended that the
machine be set for straight stitch (in center needle
position) when using the automatic needle threader.