Sony DCRPC110 Operating Instructions - Page 37
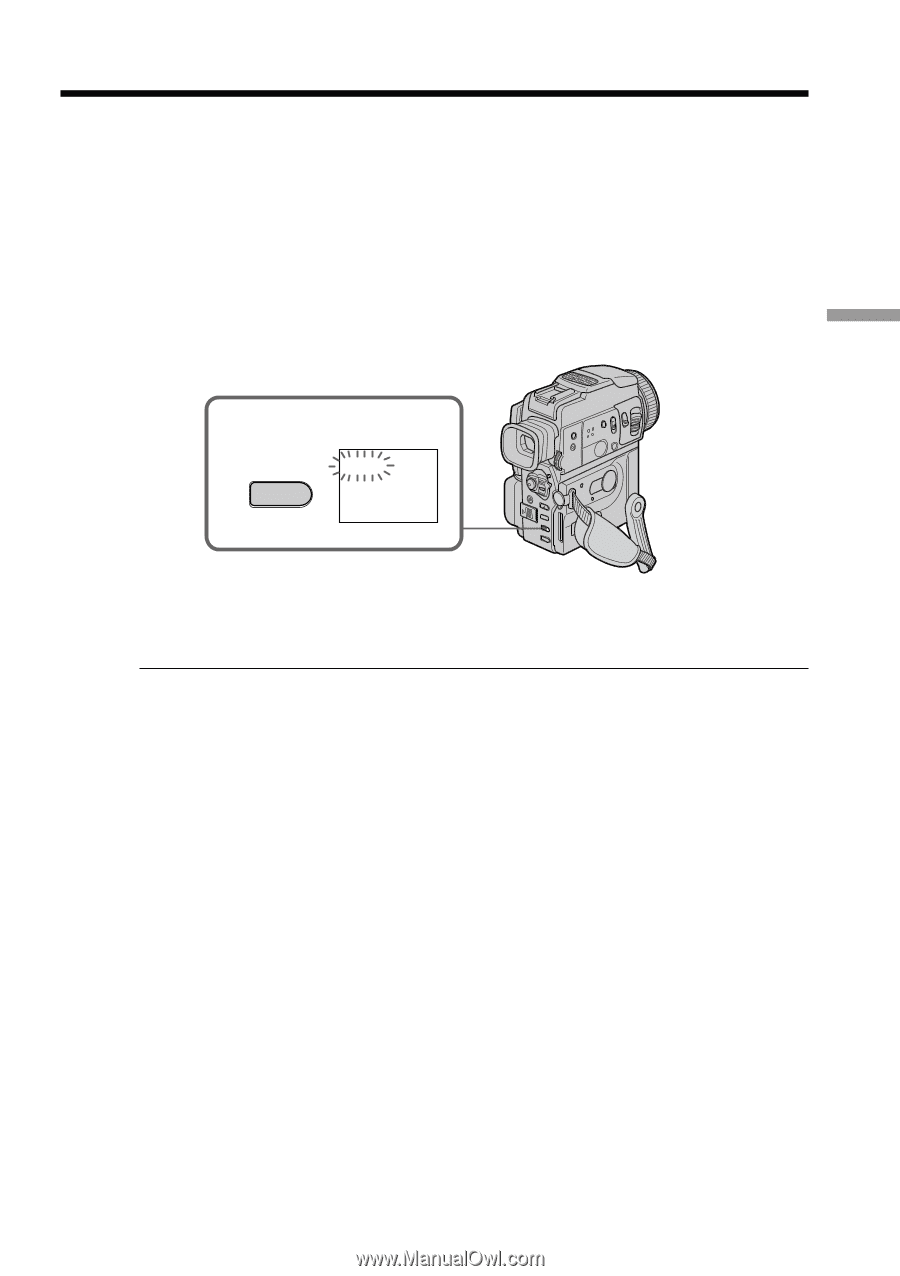
When fading in, When fading out
 |
UPC - 027242580763
View all Sony DCRPC110 manuals
Add to My Manuals
Save this manual to your list of manuals |
Page 37 highlights
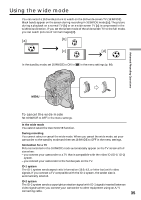
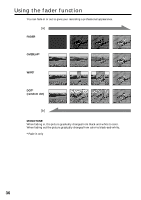
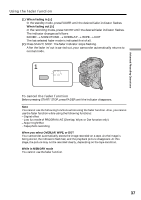
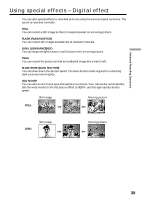
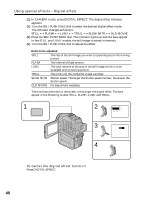
Advanced Recording Operations Using the fader function (1) When fading in [a] In the standby mode, press FADER until the desired fader indicator flashes. When fading out [b] In the recording mode, press FADER until the desired fader indicator flashes. The indicator changes as follows: FADER t MONOTONE t OVERLAP t WIPE t DOT The last selected fader mode is indicated first of all. (2) Press START/STOP. The fader indicator stops flashing. After the fader in/out is carried out, your camcorder automatically returns to normal mode. 1 FADER FADER To cancel the fader function Before pressing START/STOP, press FADER until the indicator disappears. Note You cannot use the following functions while using the fader function. Also, you cannot use the fader function while using the following functions: - Digital effect - Low lux mode of PROGRAM AE (Overlap, Wipe, or Dot function only) - Super NightShot - Tape photo recording When you select OVERLAP, WIPE, or DOT Your camcorder automatically stores the image recorded on a tape. As the image is being stored, the indicators flash fast, and the playback picture disappears. At this stage, the picture may not be recorded clearly, depending on the tape condition. While in MEMORY mode You cannot use the fader function. 37
-
 1
1 -
2
-
3
-
4
-
5
-
6
-
7
-
8
-
9
-
10
-
11
-
12
-
13
-
14
-
15
-
16
-
17
-
18
-
19
-
20
-
21
-
22
-
23
-
24
-
25
-
26
-
27
-
28
-
29
-
30
-
31
-
 32
32 -
 33
33 -
 34
34 -
 35
35 -
 36
36 -
 37
37 -
 38
38 -
 39
39 -
 40
40 -
 41
41 -
 42
42 -
43
-
44
-
45
-
46
-
47
-
48
-
49
-
50
-
51
-
52
-
53
-
54
-
55
-
56
-
57
-
58
-
59
-
60
-
61
-
62
-
63
-
64
-
65
-
66
-
67
-
68
-
69
-
70
-
71
-
72
-
73
-
74
-
75
-
76
-
77
-
78
-
79
-
80
-
81
-
82
-
83
-
84
-
85
-
86
-
87
-
88
-
89
-
90
-
91
-
92
-
93
-
94
-
95
-
96
-
97
-
98
-
99
-
100
-
101
-
102
-
103
-
104
-
105
-
106
-
107
-
108
-
109
-
110
-
111
-
112
-
113
-
114
-
115
-
116
-
117
-
118
-
119
-
120
-
121
-
122
-
123
-
124
-
125
-
126
-
127
-
128
-
129
-
130
-
131
-
132
-
133
-
134
-
135
-
136
-
137
-
138
-
139
-
140
-
141
-
142
-
143
-
144
-
145
-
146
-
147
-
148
-
149
-
150
-
151
-
152
-
153
-
154
-
155
-
156
-
157
-
158
-
159
-
160
-
161
-
162
-
163
-
164
-
165
-
166
-
167
-
168
 |
 |