Sony DSC P50 Operating Instructions - Page 24
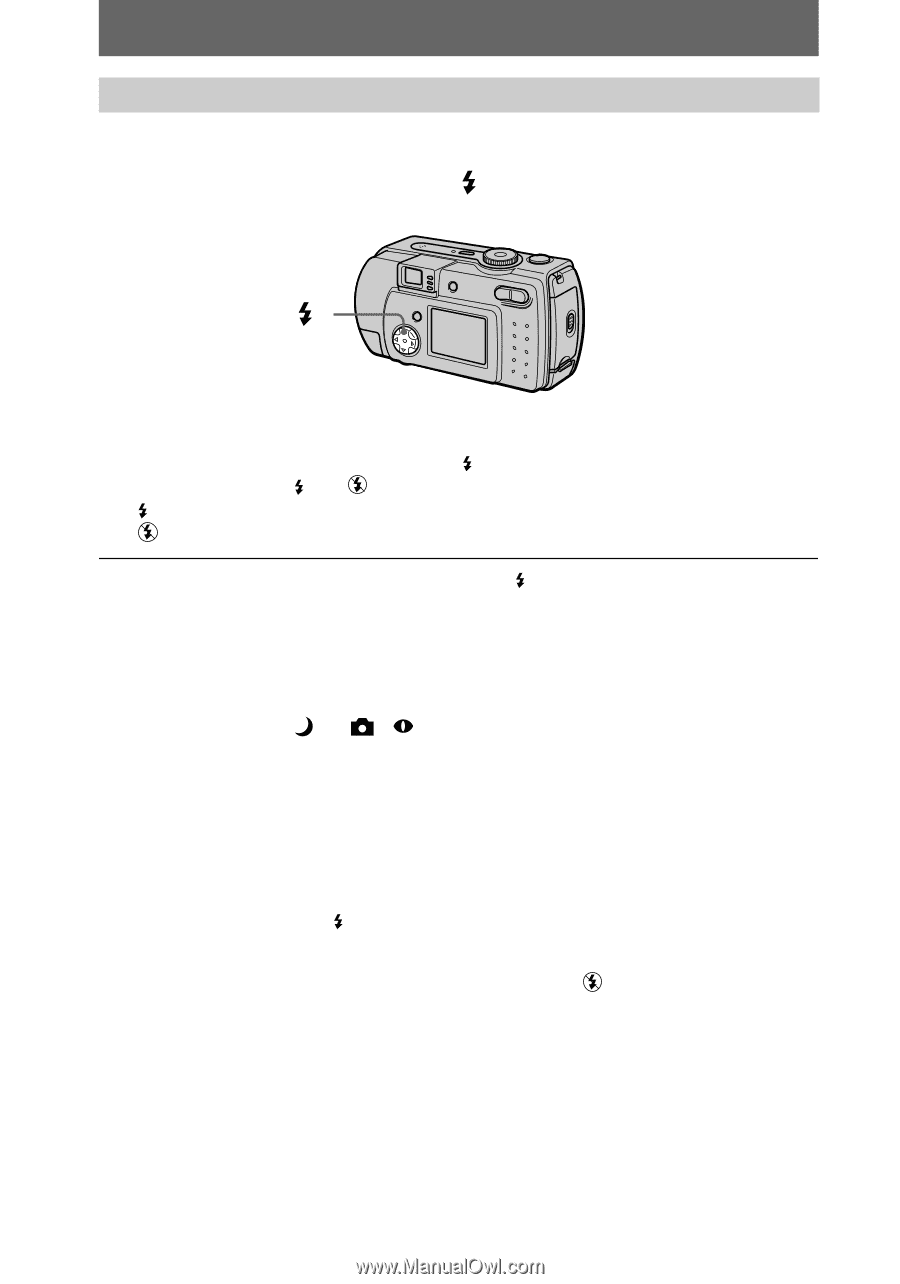
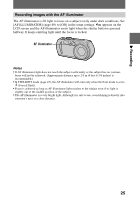
Recording images with the flash, Control button
 |
UPC - 027242589315
View all Sony DSC P50 manuals
Add to My Manuals
Save this manual to your list of manuals |
Page 24 highlights
Recording images with the flash The factory setting is auto (no indicator). In this mode, the flash automatically strobes when the surroundings is dark. To change the flash mode, clear the menu (page 40), then press the control button v ( ) repeatedly so that the flash mode indicator appears on the LCD screen. Control button v ( ) Each time you press the control button v ( ), the indicator changes as follows. (No indicator) t t t (No indicator) Forced flash: The flash strobes regardless of the surrounding brightness. No flash: The flash does not strobe. You can change the brightness of the flash with [ ±] (FLASH LEVEL) in the menu settings (page 42). To reduce the red-eye phenomenon Set [RED EYE REDUCTION] to [ON] in the setup settings, the flash strobes before recording to reduce the red-eye phenomenon (page 69). When [ON] is selected and the mode dial is set to or , appears on the LCD screen. Notes • When [ISO] is set to [AUTO] in the menu settings, the recommended shooting distance using the built-in flash is 0.3 m to 2.0 m (11 13/16 inches to 6 feet 6 3/4 inches). When it is not set to [AUTO], the flash may be ineffective even if the flash level is changed. • Red-eye reduction may not produce the desired effects depending on individual differences, the distance to the subject, if the subject does not see the pre-strobe, or other conditions. • The flash effect is not obtained easily when you use forced flash in a bright location. • While charging the flash, the /CHG lamp flashes. After the charging is complete, the lamp goes out. • The flash does not function when recording moving images (excluding Clip Motion). • When you record images in a dark place with the camera set to (no flash), the shutter speed becomes slow, so using a tripod is recommended to prevent shaking. 24
-
 1
1 -
2
-
3
-
4
-
5
-
6
-
7
-
8
-
9
-
10
-
11
-
12
-
13
-
14
-
15
-
16
-
17
-
18
-
 19
19 -
 20
20 -
 21
21 -
 22
22 -
 23
23 -
 24
24 -
 25
25 -
 26
26 -
 27
27 -
 28
28 -
 29
29 -
30
-
31
-
32
-
33
-
34
-
35
-
36
-
37
-
38
-
39
-
40
-
41
-
42
-
43
-
44
-
45
-
46
-
47
-
48
-
49
-
50
-
51
-
52
-
53
-
54
-
55
-
56
-
57
-
58
-
59
-
60
-
61
-
62
-
63
-
64
-
65
-
66
-
67
-
68
-
69
-
70
-
71
-
72
-
73
-
74
-
75
-
76
-
77
-
78
-
79
-
80
-
81
-
82
-
83
-
84
-
85
-
86
-
87
-
88
-
89
-
90
-
91
-
92
 |
 |