Sony HDR SR10 Operating Instructions
Sony HDR SR10 - Handycam Camcorder - 1080i Manual
 |
UPC - 027242727779
View all Sony HDR SR10 manuals
Add to My Manuals
Save this manual to your list of manuals |
Sony HDR SR10 manual content summary:
- Sony HDR SR10 | Operating Instructions - Page 1
HD Video Camera Recorder Operating Guide Guía de operaciones HDR-SR10 3-286-593-11(1) US ES For details on the advanced operations, please refer to "Handycam Handbook" (PDF). Para obtener más información acerca de las funciones avanzadas, consulte la "Guía práctica de Handycam" (PDF). © 2008 Sony - Sony HDR SR10 | Operating Instructions - Page 2
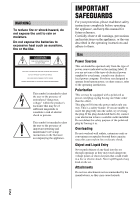
servicing) instructions in the literature accompanying the appliance. IMPORTANT SAFEGUARDS For your protection, please read these safety instructions completely before operating the appliance, and keep this manual from battery power, or other sources, refer to the operating instructions. - Sony HDR SR10 | Operating Instructions - Page 3
. Accessories Do instructions. Improper adjustment of other controls may result in damage and will often require extensive work by a qualified technician to restore the set to normal operation. - When the set exhibits a distinct change in performance - this indicates a need for service. Servicing - Sony HDR SR10 | Operating Instructions - Page 4
interference that may cause undesired operation. Notes HDR-SR10 is to be used with the Handycam Station Model DCRA-C220 and AC Adaptor Model AC-L200/L200B. CAUTION You are cautioned that any changes or modifications not expressly approved in this manual could void your authority to operate this - Sony HDR SR10 | Operating Instructions - Page 5
-type lithium battery is already installed. • Rechargeable battery pack NP-FH60 (1) • CD-ROM "Handycam Application Software" (1) (p. 24) - Picture Motion Browser (Software) - PMB Guide - Handycam Handbook (PDF) • "Operating Guide" (This manual) (1) A B C D Using the camcorder • The camcorder is - Sony HDR SR10 | Operating Instructions - Page 6
. On playing back recorded images on other devices • Your camcorder is compatible with MPEG-4 AVC/H.264 High Profile for HD (high definition) image quality recording. Therefore, you cannot play back images recorded with HD (high definition) image quality on your camcorder with the following devices - Sony HDR SR10 | Operating Instructions - Page 7
this manual for illustration purposes are captured using a digital still camera, and therefore may appear different from the actual images of the LCD screen. • In this Operating Guide, the hard disk of your camcorder and "Memory Stick PRO Duo" are called "media." • The screenshots are from Windows - Sony HDR SR10 | Operating Instructions - Page 8
securely. The /CHG (charge) lamp lights up and charging starts. The /CHG (charge) lamp turns off when the battery pack is fully charged. Remove the camcorder from the Handycam Station. 2 Connect the power cord (mains lead) to the AC Adaptor and the wall outlet (wall socket). 3 Turn the POWER - Sony HDR SR10 | Operating Instructions - Page 9
battery pack. "HD" stands for high definition image quality, and "SD" stands for standard image quality. Hard disk HD SD (Unit:min.) "Memory Stick PRO Duo" HD supplied from the battery as long as the AC Adaptor is connected to the DC IN jack of your camcorder or the Handycam Station, even when the - Sony HDR SR10 | Operating Instructions - Page 10
in the direction of the arrow until the respective lamp lights up. (Movie): To record movies (Still): To record still images Go to step 3 when you turn on your camcorder for the first time. • When you turn on (Still) lamp, the screen aspect ratio is changed to 4:3 automatically. 2 Touch (HOME - Sony HDR SR10 | Operating Instructions - Page 11
of your camcorder (p. 18). 1 Touch (HOME) t (MANAGE MEDIA). HDD HDD MEMORY STICK MEMORY STICK MOVIE MEDIA SET Select the media and image quality. 3 Touch the desired media and image quality. indicates HD (high definition) image quality, and indicates SD (standard definition) image quality - Sony HDR SR10 | Operating Instructions - Page 12
lights up. If the POWER switch is set to OFF (CHG), turn it on while pressing the green button. 3 Touch [YES]. To record only still images on a "Memory Stick PRO Duo," touch [NO]. To eject the "Memory Stick PRO Duo" Open the Memory Stick Duo cover and lightly push the "Memory - Sony HDR SR10 | Operating Instructions - Page 13
respective lamp lights up. Press the green button only when the POWER switch C is in the OFF (CHG) position. 2 Start recording. Movies Still Images Press START/STOP D (or A). To stop recording, press START/STOP D (or A) again. Press PHOTO E lightly to adjust the focus A (a beep sounds), then - Sony HDR SR10 | Operating Instructions - Page 14
with HD (high definition) image quality* 8 Displays still images 9 Searches for images by date q; (OPTION) * appears when you select the movie with SD (standard definition) image quality in [MOVIE MEDIA SET] (p. 11). 1 Turn the POWER switch B to turn on your camcorder. 2 Press (VIEW IMAGES) C (or - Sony HDR SR10 | Operating Instructions - Page 15
to the connected jack. Refer to the instruction manuals of the TV. r Connect your camcorder and TV referring to [TV CONNECT Guide]. Touch (HOME) t (OTHERS) t [TV CONNECT Guide]. r Make the required output settings on your camcorder. Handycam Station A/V Remote Connector Open the jack cover. b Notes - Sony HDR SR10 | Operating Instructions - Page 16
ql w; wa ws qs Handycam Station ws 7 6 Recording/ images from about 1.1 to 5 times the original size (Playback zoom). • When you touch the screen during playback zoom, the point you touched will be displayed in the center of the LCD screen. 2 QUICK ON button When you press QUICK ON, the camcorder - Sony HDR SR10 | Operating Instructions - Page 17
The Active Interface Shoe supplies power to optional accessories such as a video light, a flash, or a microphone. The accessory can be turned on or off as you operate the POWER switch on your camcorder. ws Interface connector Connect your camcorder and the Handycam Station. US 17 Recording/Playback - Sony HDR SR10 | Operating Instructions - Page 18
Indicators displayed during recording/playback Recording movies Recording still images Viewing movies Viewing still images 4.0M A HOME button B Remaining battery (approx.) C Recording status ([STBY] (standby) or [REC] (recording)) D Recording quality (HD/SD) and Recording mode (FH/HQ/SP/LP) E - Sony HDR SR10 | Operating Instructions - Page 19
effect Digital effect Manual focus SCENE SELECTION Backlight White balance SteadyShot off EXPOSURE/ SPOT METER TELE MACRO ZEBRA X.V.COLOR CONVERSION LENS z Tips • Indicators and their positions are approximate and differ from what you actually see. See "Handycam Handbook" (PDF) for details. • The - Sony HDR SR10 | Operating Instructions - Page 20
B)/ (OPTION). For details of the menu items, see "Handycam Handbook" (PDF) (p. 24). (HOME) B To see the explanation of then item to change the setting. 2 Follow the instructions on the screen. z Tips • If the item MENU appears just like the pop-up window that appears when you right-click the - Sony HDR SR10 | Operating Instructions - Page 21
Handycam operation. Items of the HOME MENU (CAMERA) category MOVIE* PHOTO* SMTH SLW REC (VIEW IMAGES ], [ USB CONNECT], [DISC BURN] TV CONNECT Guide* (MANAGE MEDIA) category MOVIE MEDIA SET* PHOTO MEDIA REDUC], [FACE DETECTION], [CONVERSION LENS] VIEW IMAGES SET [DATA CODE], [ DISPLAY] - Sony HDR SR10 | Operating Instructions - Page 22
can save the images recorded on your camcorder with HD (high definition) image quality or SD (standard definition) image quality. You can rewrite movies with HD (high definition) image quality from the computer to your camcorder, if necessary. For details, see "PMB Guide" (p. 26). Creating a disc - Sony HDR SR10 | Operating Instructions - Page 23
quality. Connecting with the USB cable You can dub to movie dubbing compatible DVD writers, etc., with HD (high definition) image quality. z Tips • You can dub movies or copy still images from the hard disk to a "Memory Stick PRO Duo." Touch (HOME) t (OTHERS) t [MOVIE DUB]/[PHOTO COPY]. Select - Sony HDR SR10 | Operating Instructions - Page 24
software "Picture Motion Browser" is not supported by Macintosh computers. To use a Macintosh computer connected to your camcorder, see the following website for details. http://guide.d-imaging.sony.co.jp/mac/ms/us/ Installing and viewing "Handycam Handbook" (PDF) To view "Handycam Handbook" (PDF - Sony HDR SR10 | Operating Instructions - Page 25
definition) image quality Memory: For Windows 2000/Windows XP: 512 MB or more (1 GB or more is recommended.) For processing SD (standard definition) image Attention This camcorder captures high definition footage in the AVCHD format. Using the enclosed PC software, high definition footage can - Sony HDR SR10 | Operating Instructions - Page 26
1 Connect the AC Adaptor to the Handycam Station and a wall outlet (wall socket). 2 Set your camcorder onto the Handycam Station, then turn on your camcorder. 3 Connect the (USB) jack of the Handycam Station (p. 17) to the computer using the supplied USB cable. The [USB SELECT] screen appears on - Sony HDR SR10 | Operating Instructions - Page 27
hard disk in order to investigate the problem. However, your Sony dealer will neither copy nor retain your data. • For the symptoms of your camcorder, see "Handycam Handbook" (PDF) and for connecting to the computer, see "PMB Guide." The power does not turn on. • Attach a charged battery pack to the - Sony HDR SR10 | Operating Instructions - Page 28
" battery pack (H series) (p. 8). • Connect the DC plug of the AC Adaptor to the DC IN jack of the Handycam Station or your camcorder securely (p. 8). • Remove the power source. Reconnect it and operate your camcorder again. • A malfunction that you cannot service has occurred. Contact your Sony - Sony HDR SR10 | Operating Instructions - Page 29
with both hands. However, note that the camera-shake warning indicator does not disappear. • The drop sensor function is activated. You may not record/ play back images. • The media is full. • Still images cannot be recorded during processing. Wait for a while, then record. Troubleshooting US 29 - Sony HDR SR10 | Operating Instructions - Page 30
repaired. - Near windows or outdoors, where the LCD screen or the lens may be exposed to direct sunlight. This damages the inside of the LCD screen. • Operate your camcorder on DC 6.8 V/7.2 V (battery pack) or DC 8.4 V (AC Adaptor). • For DC or AC operation, use the accessories recommended in these - Sony HDR SR10 | Operating Instructions - Page 31
• To prevent mold, periodically clean the lens as described above. It is recommended that you operate your camcorder about once a month to keep it long time. On charging the pre-installed rechargeable battery Your camcorder has a pre-installed rechargeable battery to retain the date, time, and other - Sony HDR SR10 | Operating Instructions - Page 32
Image: 6.7 cm (2.7 type, aspect ratio 16:9) Total dot number: 211 200 (960 × 220) General Power requirements: DC 6.8 V/7.2 V (battery pack) DC 8.4 V (AC Adaptor) Average power consumption: During camera recording with normal brightness: Hard disk: HD rechargeable battery pack Handycam Station DCRA- - Sony HDR SR10 | Operating Instructions - Page 33
) Type: Li-ion Design and specifications of your camcorder and accessories are subject to change without notice. • Your camcorder is produced under the license of Dolby Laboratories. On trademarks • "Handycam" and are registered trademarks of Sony Corporation. • "AVCHD" and "AVCHD" logotype are - Sony HDR SR10 | Operating Instructions - Page 34
y consérvelo para futuras consultas. - Guía de PMB - Guía práctica de Handycam (PDF) • "Guía de operaciones" (este manual) (1) A B C D Nombre del producto: Videocámara Modelo: HDR-SR10 ADVERTENCIA Para reducir el riesgo de incendios o electrocución, no exponga la unidad a la lluvia ni a la - Sony HDR SR10 | Operating Instructions - Page 35
"Memory Stick PRO Duo". • Tanto el "Memory Stick PRO Duo" como el "Memory Stick PRO-HG Duo" se denominan "Memory Stick PRO Duo" en este manual. ES 3 - Sony HDR SR10 | Operating Instructions - Page 36
MPEG-4 AVC/H.264 High Profile para la grabación con calidad de imagen HD (alta definición). Por de este manual • Las imágenes de la pantalla de cristal líquido utilizadas en este manual se capturaron • Las capturas de pantalla corresponden a Windows Vista. Las escenas pueden variar en función del sistema - Sony HDR SR10 | Operating Instructions - Page 37
25 Utilización con una computadora Utilización con una computadora 26 Instalación y visualización de la "Guía práctica de Handycam" (PDF 26 Instalación de "Picture Motion Browser 27 Solución de problemas Solución de problemas 30 Información complementaria Precauciones 33 Especificaciones 35 - Sony HDR SR10 | Operating Instructions - Page 38
otra batería "InfoLITHIUM" que no sea de la serie H. 1 Conecte el adaptador de alimentación de ca a la toma de entrada de cc de la Handycam Station. Compruebe que la marca v de la clavija de cc esté orientada hacia arriba. 2 Conecte el cable de alimentación al adaptador de alimentación de ca y al - Sony HDR SR10 | Operating Instructions - Page 39
imagen estándar. (Unidad: min) Disco duro "Memory Stick PRO Duo" HD SD HD SD Tiempo de carga 135 Tiempo de grabación*1*2 Tiempo de grabación continua 90 toma de entrada de cc de la videocámara o de la Handycam Station, aunque el cable de alimentación esté desconectado del tomacorriente de - Sony HDR SR10 | Operating Instructions - Page 40
• En función de las condiciones en las que utilice la videocámara, es posible que el tiempo de grabación y reproducción disponible se vea reducido. Acerca del adaptador de alimentación de ca • Si utiliza el adaptador de alimentación de ca conéctelo a un tomacorriente de pared cercano. Si se produce - Sony HDR SR10 | Operating Instructions - Page 41
Paso 2: Conexión de la alimentación y ajuste de la fecha y la hora (HOME) (pág. 21) Toque el botón que aparece en 1 la pantalla de cristal líquido. Procedimientos iniciales Interruptor POWER 60min AJUS.ZONA AJUS.RELOJ ESPERA Chicago Ciudad de México Nueva York Bogotá Santiago 12:00:00AM - Sony HDR SR10 | Operating Instructions - Page 42
Cambio del ajuste de idioma Puede modificar las indicaciones en pantalla para que muestren los mensajes en un idioma determinado. Toque (HOME) t (AJUSTES) t [AJ.REL./IDIOM. ] t [ AJUSTE IDIOMA] y, a continuación, seleccione el idioma deseado. ES 10 - Sony HDR SR10 | Operating Instructions - Page 43
11 h 50 m - En un "Memory Stick PRO Duo" (4 GB) fabricado por Sony Corporation: aprox. 1 h 5 m z Sugerencias • Compruebe el número de imágenes fijas Toque el soporte y la calidad de imagen deseados. indica calidad de imagen HD (alta definición) y indica calidad de imagen SD (definición estándar). - Sony HDR SR10 | Operating Instructions - Page 44
Inserción de un "Memory Stick PRO Duo" Inserte un "Memory Stick PRO Duo" si seleccionó "Memory Stick PRO Duo" como soporte. Para saber qué tipos de "Memory Stick" puede utilizar en la videocámara, consulte la página 3. 1 Inserte el "Memory Stick PRO Duo". 1 Abra la tapa del Memory Stick Duo en el - Sony HDR SR10 | Operating Instructions - Page 45
Grabación/reproducción Grabación Las imágenes se graban en el soporte seleccionado en la configuración de soporte (pág. 11). En el ajuste predeterminado, se reproducen las películas y las imágenes fijas grabadas en el disco duro. Interruptor POWER C : para grabar películas : para grabar imágenes - Sony HDR SR10 | Operating Instructions - Page 46
POWER B (VISUALIZAR IMÁGENES) C 1 Permite pasar a la pantalla (Índice de rollos de película) 7 Muestra películas con calidad de imagen HD (alta definición)* 2 Permite pasar a la pantalla (Índice de 8 Muestra imágenes fijas caras) 9 Permite buscar imágenes por fecha 3 Permite desplazarse - Sony HDR SR10 | Operating Instructions - Page 47
de la imagen (HD (alta definición)/SD manual de instrucciones del televisor. r Conecte la videocámara y el televisor siguiendo las indicaciones de la [GUÍA CONEXIÓN TV]. Toque (HOME) t (OTROS) t [GUÍA CONEXIÓN TV]. r Realice los ajustes de salida necesarios en la videocámara. Handycam Station - Sony HDR SR10 | Operating Instructions - Page 48
OUT (pág. 17). Conecte el cable de conexión de A/V o el cable de A/V de componente a la Handycam Station o a la videocámara. Si conecta los cables de conexión A/V o el cable A/V del componente a Handycam Station y a la videocámara al mismo tiempo, pueden producirse perturbaciones en la imagen. ES 16 - Sony HDR SR10 | Operating Instructions - Page 49
no se explican en otros capítulos se describen en este apartado. 8 9 0 qs qd qf qa qg qh qj qk ql w; wa ws qs Handycam Station ws 7 6 Grabación/reproducción 1 Palanca del zoom motorizado Mueva la palanca del zoom motorizado levemente para obtener un zoom más lento. Muévala más para obtener - Sony HDR SR10 | Operating Instructions - Page 50
ófono. El accesorio se puede encender o apagar al utilizar el interruptor POWER de la videocámara. ws Conector de interfaz Conecte la videocámara y la Handycam Station a esta toma. ES 18 - Sony HDR SR10 | Operating Instructions - Page 51
4,0M A Botón HOME B Energía restante de la batería (aprox.) C Estado de grabación ([ESPERA] (en espera) o [GRAB.] (grabación)) D Calidad de grabación (HD/SD) y modo de grabación (FH/HQ/SP/LP) E Grabación/reproducción del soporte F Contador (hora/minuto/segundo) G Tiempo de grabación restante H Bot - Sony HDR SR10 | Operating Instructions - Page 52
automático Flash, R.OJOS ROJ. MIC.ZOOM INCOR. NIVEL REFMIC bajo SELEC. Efecto de imagen Efectos digitales Enfoque manual SELEC.ESCENA . n Contraluz Balance de lo que realmente se ve. Consulte la "Guía práctica de Handycam" (PDF) para obtener más información. • La fecha y la hora de grabaci - Sony HDR SR10 | Operating Instructions - Page 53
de los elementos del menú, consulte la "Guía práctica de Handycam" (PDF) (pág. 26). (HOME) B • La situación actual de grabación (HELP) se ilumina en naranja. (HOME) A (OPTION) ESPERA PELÍCULA FOTO GR.LEN.UNIF. TOMA DE IMÁGENES Uso del HOME MENU Es posible modificar los ajustes de operación - Sony HDR SR10 | Operating Instructions - Page 54
ón actual. • No se puede utilizar el (OPTION) MENU durante el funcionamiento en modo Easy Handycam. Elementos del HOME MENU Categoría (TOMA DE IMÁGENES) PELÍCULA* FOTO* GR.LEN. UNIF. Categoría (VISUALIZAR IMÁGENES) VISUAL INDEX* INDEX* INDEX* PLAYLIST Categoría (OTROS) BORRAR* [ BORRAR - Sony HDR SR10 | Operating Instructions - Page 55
el modo Easy Handycam. ** El nombre del menú cambia a [AJUSTES SONIDO] durante el funcionamiento en modo Easy Handycam. Elementos del OPTION SHTR], [SUPER NIGHTSHOT] Ficha [DESVANECEDOR], [EFECTO DIG.], [EFECTO IMAG.] Ficha [MIC.ZOOM INCOR.], [NIVEL REFMIC], [AUTODISPAR.], [TEMPORIZ.], [GRABAR - Sony HDR SR10 | Operating Instructions - Page 56
SD (definición estándar). Puede reescribir películas con calidad de imagen HD (alta definición) desde la computadora a la videocámara, si es necesario dispositivos Para obtener más información, consulte la "Guía práctica de Handycam" (PDF). Conexión con el cable de conexión A/V Puede realizar copias - Sony HDR SR10 | Operating Instructions - Page 57
Borrado de imágenes Seleccione el soporte que contiene la imagen que desea eliminar antes de la operación (pág. 11). Eliminación de películas 1 Toque (HOME) t t [BORRAR]. (OTROS) 2 Toque [ BORRAR]. 3 Toque [ BORRAR] o [ BORRAR] y, a continuación, la película que desea eliminar. La película - Sony HDR SR10 | Operating Instructions - Page 58
, consulte el sitio web siguiente para obtener más información. http://guide.d-imaging.sony.co.jp/mac/ms/es/ Instalación y visualización de la "Guía práctica de Handycam" (PDF) Para poder ver la "Guía práctica de Handycam" (PDF), deberá tener Adobe Reader instalado en la computadora. Continúe con - Sony HDR SR10 | Operating Instructions - Page 59
reproducir en un reproductor o una grabadora compatible con Blu-ray Disc™ u otro dispositivo compatible. x Procedimiento de instalación Debe instalar el software en la computadora Windows antes de conectar la videocámara a ésta. La instalación se debe realizar sólo la primera vez. El contenido y los - Sony HDR SR10 | Operating Instructions - Page 60
. 1 Conecte el adaptador de alimentación de ca a la Handycam Station y al tomacorriente de pared. 2 Coloque la videocámara en la Handycam Station y, a continuación, encienda la videocámara. 3 Conecte la toma (USB) de la Handycam Station (pág. 18) a la computadora mediante el cable USB suministrado - Sony HDR SR10 | Operating Instructions - Page 61
Motion Browser", haga clic en [Start] t [All Programs] t [Sony Picture Utility] t [PMB - Picture Motion Browser]. Para conocer las ". Para visualizar la "Guía de PMB", haga clic en [Start] t [All Programs] t [Sony Picture Utility] t [Ayuda] t [Guía de PMB]. z Sugerencias • Si no aparece la pantalla - Sony HDR SR10 | Operating Instructions - Page 62
almacenados en el disco duro para investigar el problema. No obstante, el distribuidor Sony no copiará ni conservará los datos. • Para consultar los problemas de la videocámara, consulte la "Guía práctica de Handycam" (PDF) y, para obtener información acerca de la conexión de la videocámara a la - Sony HDR SR10 | Operating Instructions - Page 63
Desconecte el cable USB de la computadora y de la Handycam Station, reinicie la computadora y, a continuación, vuelva a conectar varias veces, póngase en contacto con su distribuidor de Sony o con un centro de servicio técnico local autorizado de Sony. Indicadores C:04:ss C:13:ss / C:32:ss - Sony HDR SR10 | Operating Instructions - Page 64
E - ES 32 • El disco duro de la videocámara está lleno. Elimine las imágenes innecesarias del disco duro. • Es posible que se haya producido un error en la unidad de disco duro de la videocámara. • La batería dispone de poca energía. • La temperatura de la videocámara aumenta. Apague la videocámara - Sony HDR SR10 | Operating Instructions - Page 65
alimentar la videocámara con cc o ca utilice los accesorios recomendados en este manual de instrucciones. • No permita que la videocámara se moje; por ejemplo en contacto con un centro de servicio técnico local autorizado de Sony. - Limpie con agua cualquier líquido que haya estado en contacto - Sony HDR SR10 | Operating Instructions - Page 66
que la distancia de operación del control remoto se reduzca o que éste no funcione correctamente. En ese caso, sustituya la pila por una de litio Sony CR2025. Si utiliza otro tipo de pila, podría producirse un incendio o una explosión. - Sony HDR SR10 | Operating Instructions - Page 67
cuales se utiliza para la administración de datos. Formato de grabación: Película (HD): AVCHD 1080/60i Película (SD): MPEG2-PS Imagen fija: Exif versión del sensor ClearVid CMOS y el sistema de procesamiento de imágenes de Sony (BIONZ) permiten que la resolución de imágenes fijas sea equivalente a - Sony HDR SR10 | Operating Instructions - Page 68
• "Handycam" y son marcas comerciales registradas de Sony Corporation. High-Definition Multimedia Interface son marcas comerciales o marcas comerciales registradas de HDMI Licensing LLC. • Microsoft, Windows, Windows Media, Windows productos mencionados en este manual pueden ser marcas - Sony HDR SR10 | Operating Instructions - Page 69
- Sony HDR SR10 | Operating Instructions - Page 70
- Sony HDR SR10 | Operating Instructions - Page 71
- Sony HDR SR10 | Operating Instructions - Page 72
US/ES Additional information on this product and answers to frequently asked questions can be found at our Customer Support Website. Puede encontrar más información sobre este producto y respuestas a las preguntas más frecuentes en nuestro sitio Web de atención al cliente. Printed on 70% or more
-
 1
1 -
 2
2 -
 3
3 -
 4
4 -
 5
5 -
 6
6 -
 7
7 -
8
-
9
-
10
-
11
-
12
-
13
-
14
-
15
-
16
-
17
-
18
-
19
-
20
-
21
-
22
-
23
-
24
-
25
-
26
-
27
-
28
-
29
-
30
-
31
-
32
-
33
-
34
-
35
-
36
-
37
-
38
-
39
-
40
-
41
-
42
-
43
-
44
-
45
-
46
-
47
-
48
-
49
-
50
-
51
-
52
-
53
-
54
-
55
-
56
-
57
-
58
-
59
-
60
-
61
-
62
-
63
-
64
-
65
-
66
-
67
-
68
-
69
-
70
-
71
-
72
 |
 |
3-286-593-
11
(1)
© 2008 Sony Corporation
US
ES
Digital HD Video Camera Recorder
Operating Guide
Guía de operaciones
HDR-SR10
For details on the advanced operations, please refer to “Handycam
Handbook” (PDF).
Para obtener más información acerca de las funciones avanzadas,
consulte la “Guía práctica de Handycam” (PDF).