Sony KLV32S400A Revision History - Page 24
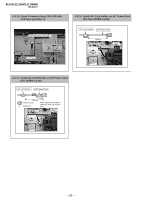
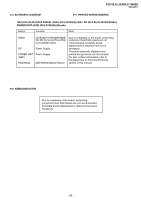
Board & Panel Replacement
 |
UPC - 011110668585
View all Sony KLV32S400A manuals
Add to My Manuals
Save this manual to your list of manuals |
Page 24 highlights
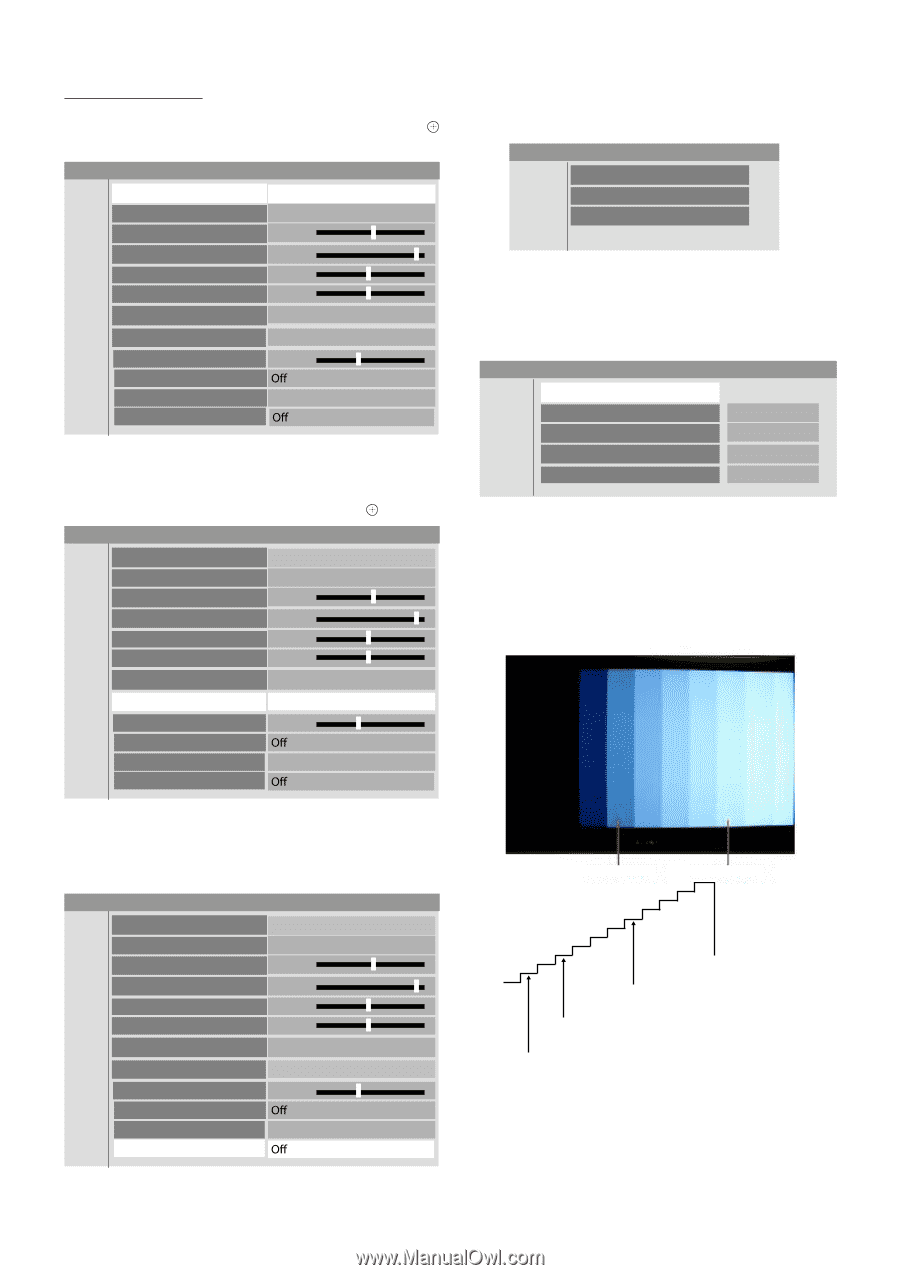
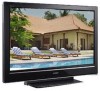
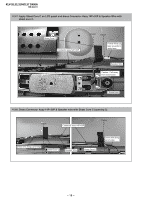
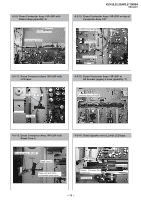
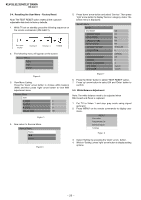
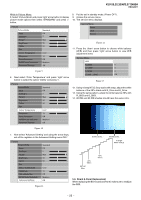
KLV-26,32,32/H/S,37 S400A RM-GA011 While in Picture Menu: 5. Select 'Picture Mode' and press 'right' arrow button to display picture mode options then select 'STANDARD' and press button. Picture Picture Mode Reset Backlight Picture Brightness Colour Hue Colour Temperature Sharpness Noise Reduction MPEG Noise Reduction Advanced Settings Standard OK 5 Max 50 50 Cool 13 Medium Figure 9 6. Next select 'Color Temperature' and press 'right' arrow button to select the option 'COOL' and press . Picture Picture Mode Reset Backlight Picture Brightness Colour Hue Standard OK 5 Max 50 50 Colour Temperature Sharpness Noise Reduction MPEG Noise Reduction Advanced Settings Cool 13 Medium 8. Put the set in standby mode. (Power OFF). 9. Access the service menu. 10. The service menu displays. Service Menu Status W/B Service Figure 12 11. Press the 'down' arrow button to choose white balance (W/B) and then press 'right' arrow button to view W/B adjustment items. Service Menu W/B R_DRIVE 0 G_DRIVE 0 B_DRIVE 0 COLOR _SAVE OK Figure 13 12. Using 10 step NTSC Gray scale with setup, adjust the white balance of the 60% shade with R_Drive and B_Drive. 13. Using the same pattern, adjust the white balance 20% with R_BKG and B_BKG. 14. 20 IRE and 60 IRE shades should have the same color. Figure 10 7. Now select 'Advanced Setting' and using the arrow keys, set all the registers in the Advanced Setting menu OFF'. Picture Picture Mode Reset Backlight Picture Brightness Colour Hue Colour Temperature Sharpness Noise Reduction MPEG Noise Reduction Advanced Settings Standard OK 5 Max 50 50 Cool 13 Medium Figure 11 20 IRE LEVEL 60 IRE LEVEL 10 STEP GRAY SCALE 20% 188mv SET-UP 56mv 60% 451mv 5-6. Board & Panel Replacement When replacing the BG1 board and Panel, make sure to readjust the W/B. - 23 -
-
 1
1 -
2
-
3
-
4
-
5
-
6
-
7
-
8
-
9
-
10
-
11
-
12
-
13
-
14
-
15
-
16
-
17
-
18
-
 19
19 -
 20
20 -
 21
21 -
 22
22 -
 23
23 -
 24
24 -
 25
25 -
 26
26 -
 27
27 -
 28
28 -
 29
29 -
30
-
31
-
32
-
33
-
34
-
35
-
36
-
37
-
38
-
39
-
40
-
41
-
42
-
43
-
44
-
45
-
46
-
47
-
48
-
49
-
50
-
51
-
52
-
53
-
54
-
55
-
56
-
57
-
58
-
59
-
60
-
61
-
62
-
63
-
64
-
65
-
66
-
67
-
68
-
69
-
70
-
71
-
72
-
73
-
74
-
75
-
76
-
77
-
78
-
79
-
80
-
81
 |
 |