Sony KLV32S400A Revision History - Page 79
Step 6: Installing the TV on, the wall, Refer to the Instructions for the SU-WL100.
 |
UPC - 011110668585
View all Sony KLV32S400A manuals
Add to My Manuals
Save this manual to your list of manuals |
Page 79 highlights
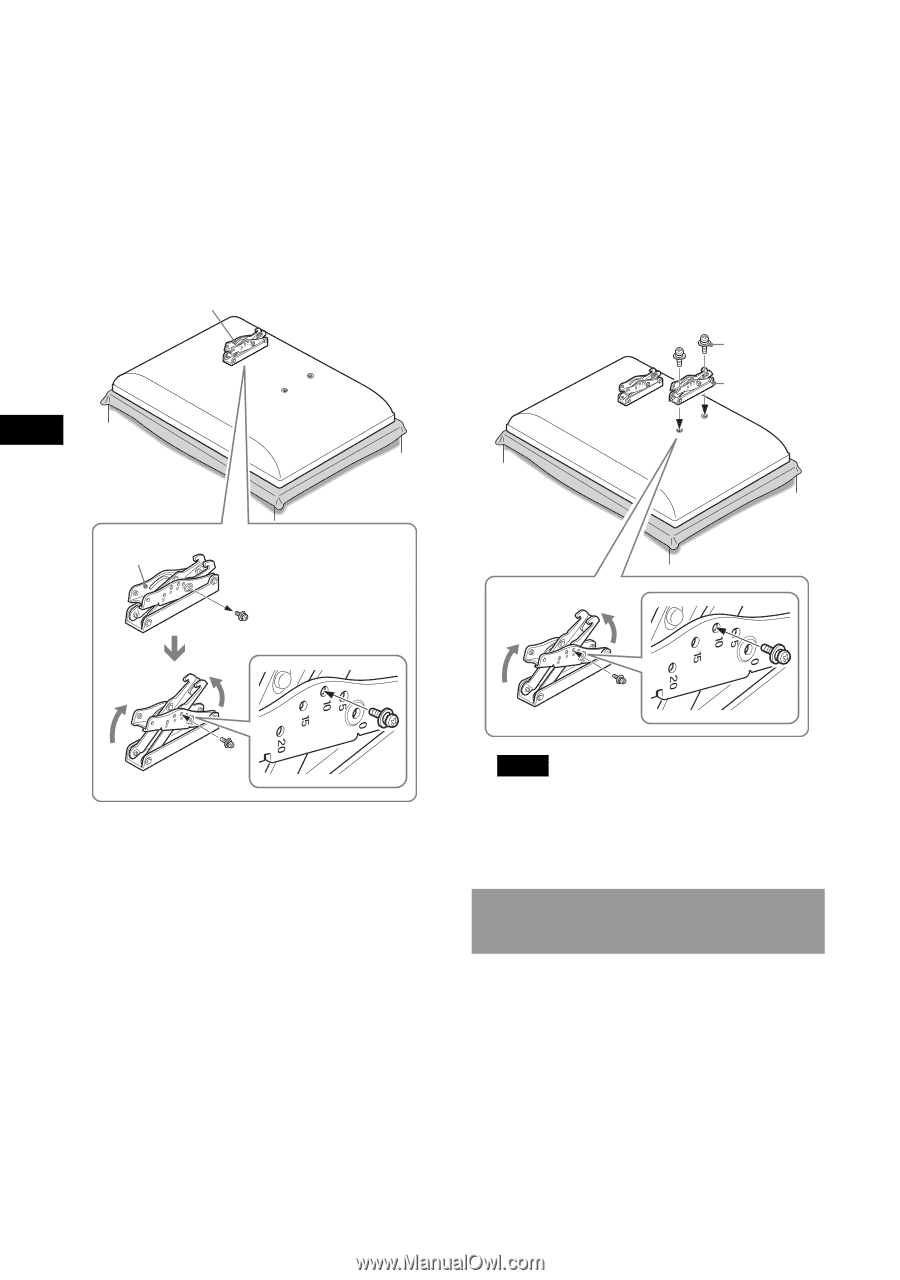
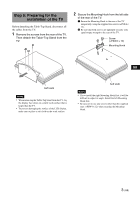
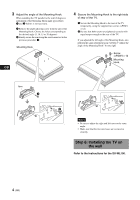
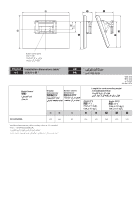
3 Adjust the angle of the Mounting Hook. When installing the TV parallel to the wall (0 degrees), adjustment of the Mounting Hook angle (procedures 1 and 2 below) is not necessary. 1 Remove the angle adjusting screw from the arm of the Mounting Hook. Choose the holes corresponding to the desired angle (5, 10, 15 or 20 degrees). 2 Firmly secure the arm using the screw removed in the previous procedure 1. Mounting Hook GB 4 Secure the Mounting Hook to the right side of rear of the TV. 1 Secure the Mounting Hook to the rear of the TV temporarily, using the supplied two screws (+PSW4 × 12). 2 Be sure that both screws are tightened securely with equal torque strength to the rear of the TV. If you adjusted the left angle of the Mounting Hook, also perform the same adjustment as in 3 of Step 5 "Adjust the angle of the Mounting Hook" for the right. Screw (+PSW4 × 12) Mounting Hook Arm 1 2 Notes • Be sure to adjust the right and left arms to the same angle. • Make sure that the two arm bases are screwed in securely. Step 6: Installing the TV on the wall Refer to the Instructions for the SU-WL100. 4 (GB)
-
 1
1 -
2
-
3
-
4
-
5
-
6
-
7
-
8
-
9
-
10
-
11
-
12
-
13
-
14
-
15
-
16
-
17
-
18
-
19
-
20
-
21
-
22
-
23
-
24
-
25
-
26
-
27
-
28
-
29
-
30
-
31
-
32
-
33
-
34
-
35
-
36
-
37
-
38
-
39
-
40
-
41
-
42
-
43
-
44
-
45
-
46
-
47
-
48
-
49
-
50
-
51
-
52
-
53
-
54
-
55
-
56
-
57
-
58
-
59
-
60
-
61
-
62
-
63
-
64
-
65
-
66
-
67
-
68
-
69
-
70
-
71
-
72
-
73
-
 74
74 -
 75
75 -
 76
76 -
 77
77 -
 78
78 -
 79
79 -
 80
80 -
 81
81
 |
 |