TP-Link TD-W8961ND User Guide - Page 14
Quick Installation Guide - wireless n adsl2
 |
View all TP-Link TD-W8961ND manuals
Add to My Manuals
Save this manual to your list of manuals |
Page 14 highlights
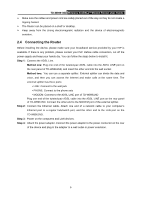
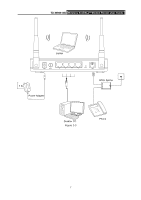
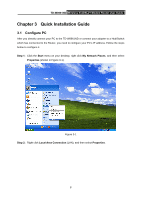
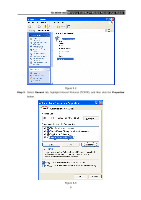
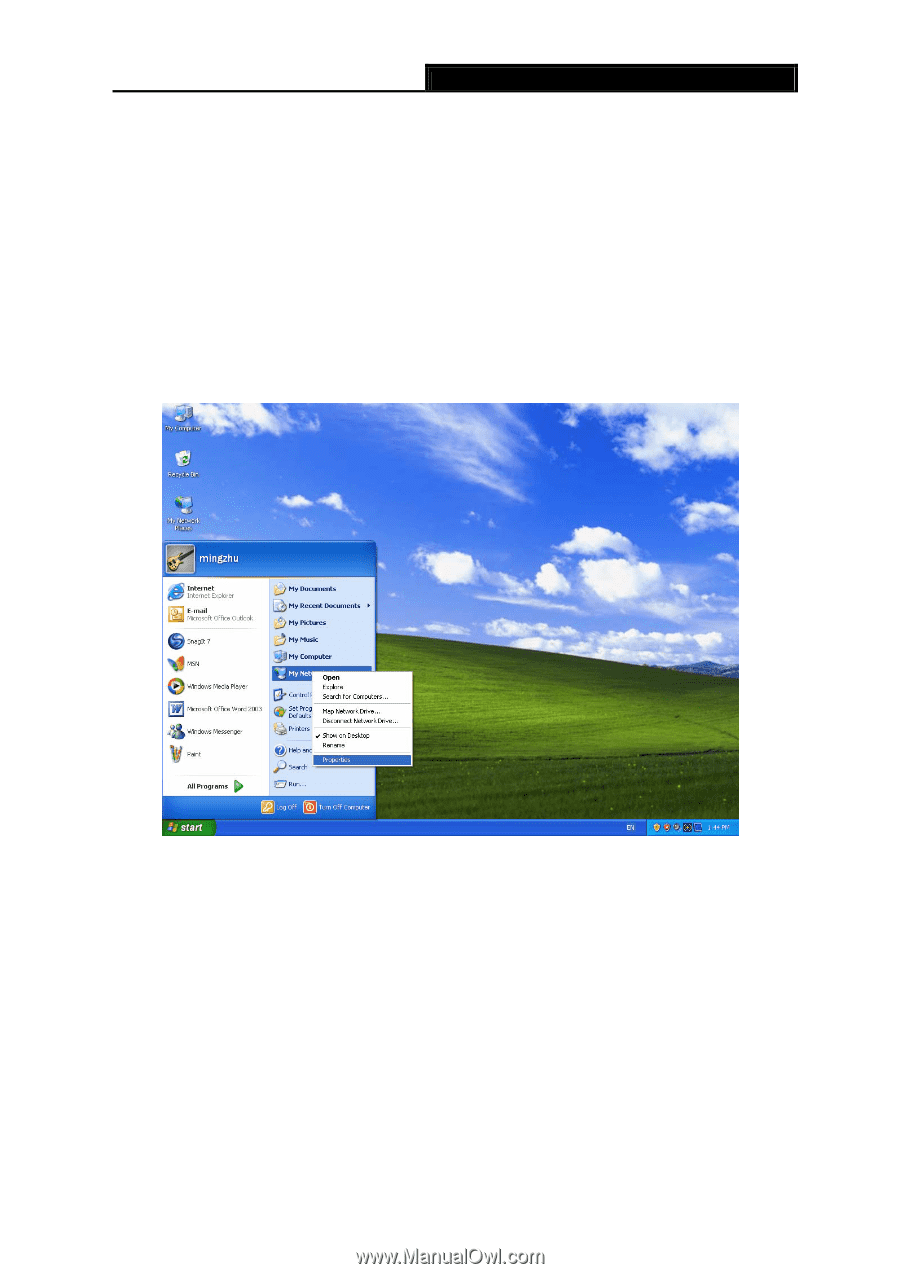
TD-W8961ND Wireless N ADSL2+ Modem Router User Guide Chapter 3 Quick Installation Guide 3.1 Configure PC After you directly connect your PC to the TD-W8961ND or connect your adapter to a Hub/Switch which has connected to the Router, you need to configure your PC's IP address. Follow the steps below to configure it. Step 1: Click the Start menu on your desktop, right click My Network Places, and then select Properties (shown in Figure 3-1). Figure 3-1 Step 2: Right click Local Area Connection (LAN), and then select Properties. 8
-
 1
1 -
2
-
3
-
4
-
5
-
6
-
7
-
8
-
 9
9 -
 10
10 -
 11
11 -
 12
12 -
 13
13 -
 14
14 -
 15
15 -
 16
16 -
 17
17 -
 18
18 -
 19
19 -
20
-
21
-
22
-
23
-
24
-
25
-
26
-
27
-
28
-
29
-
30
-
31
-
32
-
33
-
34
-
35
-
36
-
37
-
38
-
39
-
40
-
41
-
42
-
43
-
44
-
45
-
46
-
47
-
48
-
49
-
50
-
51
-
52
-
53
-
54
-
55
-
56
-
57
-
58
-
59
-
60
-
61
-
62
-
63
-
64
-
65
-
66
-
67
-
68
-
69
-
70
-
71
 |
 |
TD-W8961ND
Wireless N ADSL2+ Modem Router User Guide
8
Chapter 3
Quick Installation Guide
3.1
Configure PC
After you directly connect your PC to the TD-W8961ND or connect your adapter to a Hub/Switch
which has connected to the Router, you need to configure your PC’s IP address. Follow the steps
below to configure it.
Step 1:
Click the
Start
menu on your desktop, right click
My Network Places
, and then select
Properties
(shown in Figure 3-1).
Figure 3-1
Step 2:
Right click
Local Area Connection
(LAN), and then select
Properties
.