TP-Link TD-W8961ND User Guide - Page 44
TD-W8961ND, Firewall, Advanced Setup, Routing, ADD ROUTE, Destination IP Address, IP Subnet Mask, - port forward
 |
View all TP-Link TD-W8961ND manuals
Add to My Manuals
Save this manual to your list of manuals |
Page 44 highlights
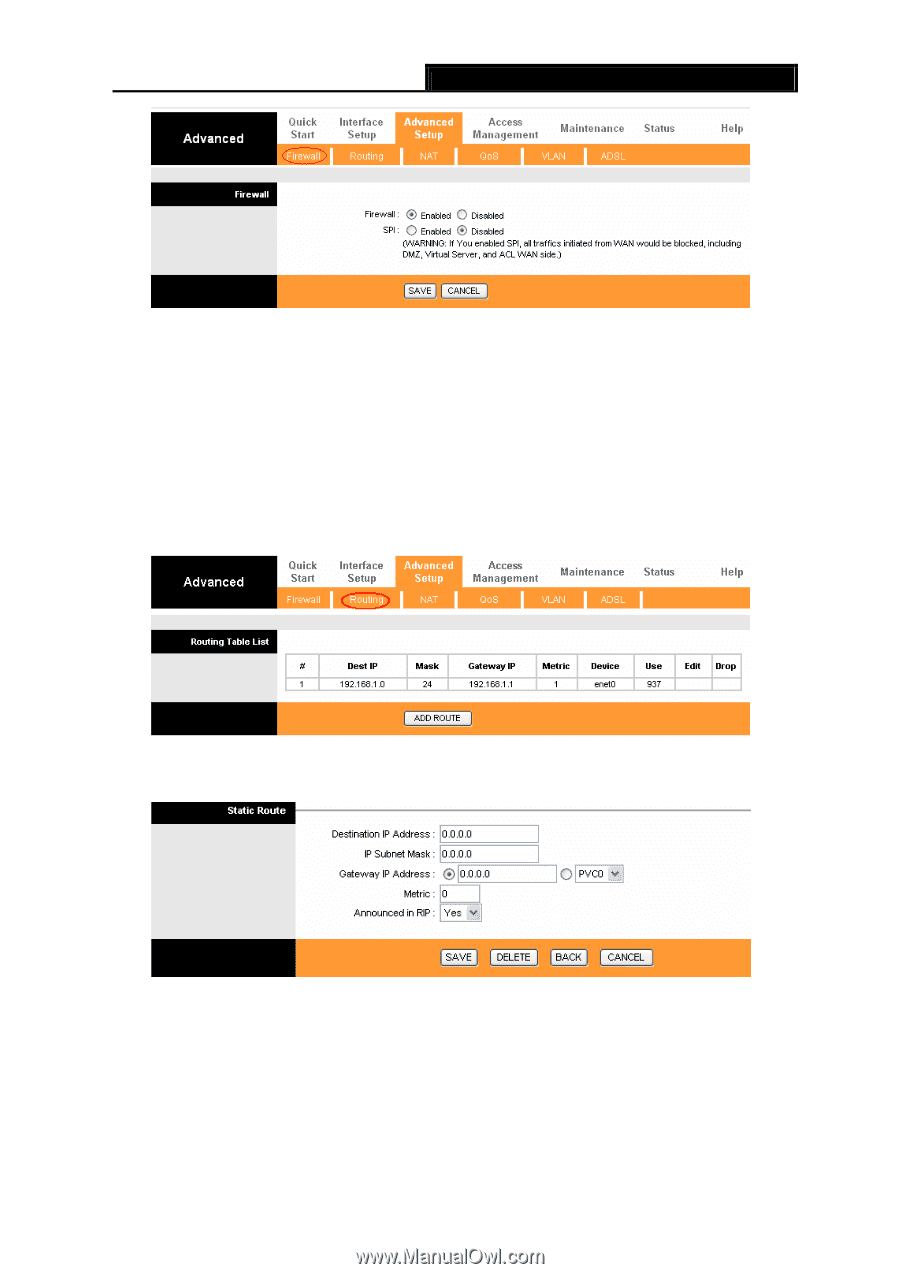
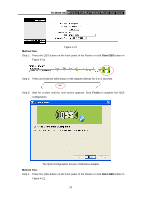
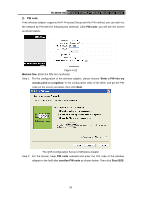
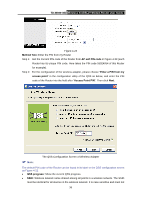
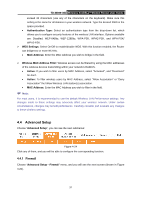
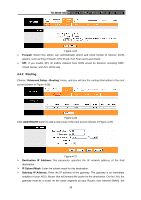
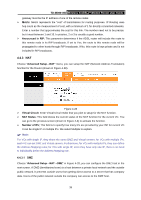
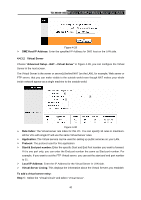
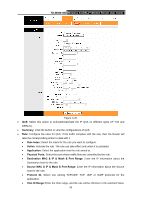
TD-W8961ND Wireless N ADSL2+ Modem Router User Guide Figure 4-25 ¾ Firewall: Select this option can automatically detect and block Denial of Service (DoS) attacks, such as Ping of Death, SYN Flood, Port Scan and Land Attack. ¾ SPI: If you enable SPI, all traffics initiated from WAN would be blocked, including DMZ, Virtual Server, and ACL WAN side. 4.4.2 Routing Choose "Advanced Setup→Routing" menu, and you will see the routing information in the next screen (shown in Figure 4-26). Figure 4-26 Click ADD ROUTE button to add a new route in the next screen (shown in Figure 4-27). Figure 4-27 ¾ Destination IP Address: This parameter specifies the IP network address of the final destination. ¾ IP Subnet Mask: Enter the subnet mask for this destination. ¾ Gateway IP Address: Enter the IP address of the gateway. The gateway is an immediate neighbor of your ADSL Router that will forward the packet to the destination. On the LAN, the gateway must be a router on the same segment as your Router; over Internet (WAN), the 38
-
 1
1 -
2
-
3
-
4
-
5
-
6
-
7
-
8
-
9
-
10
-
11
-
12
-
13
-
14
-
15
-
16
-
17
-
18
-
19
-
20
-
21
-
22
-
23
-
24
-
25
-
26
-
27
-
28
-
29
-
30
-
31
-
32
-
33
-
34
-
35
-
36
-
37
-
38
-
 39
39 -
 40
40 -
 41
41 -
 42
42 -
 43
43 -
 44
44 -
 45
45 -
 46
46 -
 47
47 -
 48
48 -
 49
49 -
50
-
51
-
52
-
53
-
54
-
55
-
56
-
57
-
58
-
59
-
60
-
61
-
62
-
63
-
64
-
65
-
66
-
67
-
68
-
69
-
70
-
71
 |
 |