TP-Link TL-WR1043ND User Guide - Page 54
Network Sharing, 4.8.1 Sharing Service
 |
UPC - 845973051389
View all TP-Link TL-WR1043ND manuals
Add to My Manuals
Save this manual to your list of manuals |
Page 54 highlights
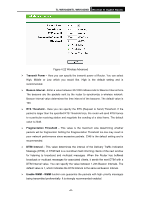
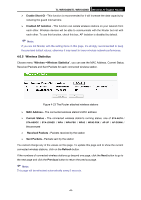
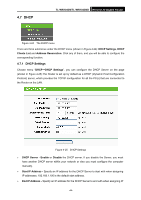
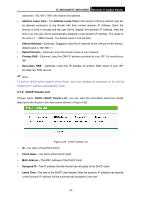
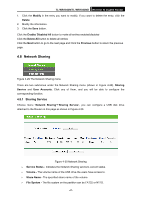
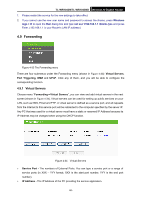
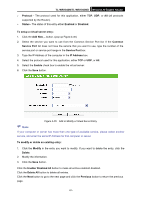
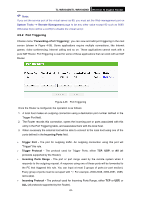
TL-WR1043N/TL-WR1043ND Wireless N Gigabit Router 1. Click the Modify in the entry you want to modify. If you want to delete the entry, click the Delete. 2. Modify the information. 3. Click the Save button. Click the Enable/ Disabled All button to make all entries enabled/disabled Click the Delete All button to delete all entries Click the Next button to go to the next page and Click the Previous button to return the previous page. 4.8 Network Sharing Figure 4-29 The Network Sharing menu There are two submenus under the Network Sharing menu (shown in Figure 4-29), Sharing Service and User Accounts. Click any of them, and you will be able to configure the corresponding function. 4.8.1 Sharing Service Choose menu "Network Sharing→Sharing Service", you can configure a USB disk drive attached to the Router on this page as shown in Figure 4-30. Figure 4-30 Network Sharing ¾ Service Status - Indicates the Network Sharing service's current status. ¾ Volume - The volume name of the USB drive the users have access to. ¾ Share Name - The specified share name of the volume. ¾ File System - The file system on the partition can be FAT32 or NTFS. -47-
-
 1
1 -
2
-
3
-
4
-
5
-
6
-
7
-
8
-
9
-
10
-
11
-
12
-
13
-
14
-
15
-
16
-
17
-
18
-
19
-
20
-
21
-
22
-
23
-
24
-
25
-
26
-
27
-
28
-
29
-
30
-
31
-
32
-
33
-
34
-
35
-
36
-
37
-
38
-
39
-
40
-
41
-
42
-
43
-
44
-
45
-
46
-
47
-
48
-
 49
49 -
 50
50 -
 51
51 -
 52
52 -
 53
53 -
 54
54 -
 55
55 -
 56
56 -
 57
57 -
 58
58 -
 59
59 -
60
-
61
-
62
-
63
-
64
-
65
-
66
-
67
-
68
-
69
-
70
-
71
-
72
-
73
-
74
-
75
-
76
-
77
-
78
-
79
-
80
-
81
-
82
-
83
-
84
-
85
-
86
-
87
-
88
-
89
-
90
-
91
-
92
-
93
-
94
-
95
-
96
-
97
-
98
-
99
-
100
-
101
-
102
-
103
-
104
-
105
-
106
-
107
-
108
-
109
 |
 |