Toshiba 32WL66 Owners Manual - Page 30
PC settings - picture position, clock phase, sampling clock, reset - lcd tv
 |
View all Toshiba 32WL66 manuals
Add to My Manuals
Save this manual to your list of manuals |
Page 30 highlights
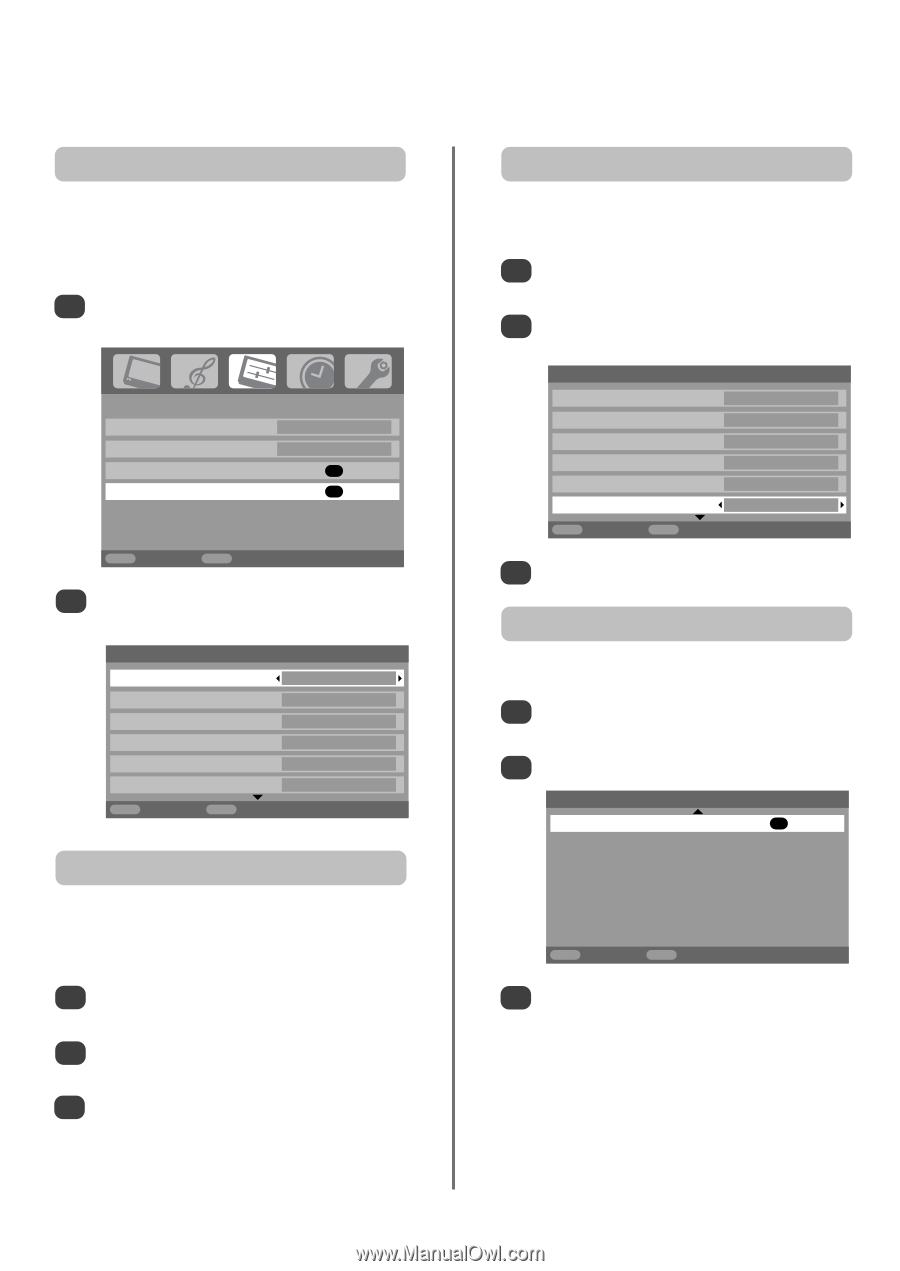
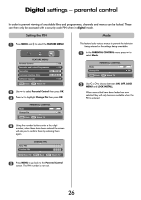
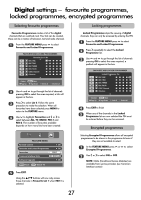
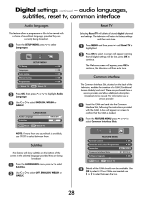
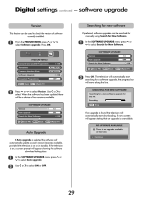
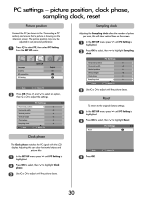
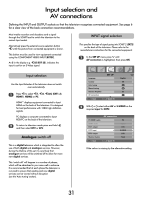
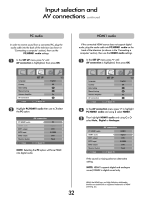
PC settings - picture position, clock phase, sampling clock, reset Picture position Connect the PC (as shown in the 'Connecting a PC' section) and ensure that a picture is showing on the television screen. The picture position may now be adjusted to suit personal preference. B 1 Press to select PC, then select PC Setting from the SET UP menu. Language Country AV connection PC Setting SET UP English UK OK OK MENU Back EXIT Watch TV 2 Press OK. Press P and Q to select an option, then S or R to adjust the settings. PC Settings 1/2 Horizontal position 0 Horizontal width -5 Vertical position 0 Vertical height -5 Clock phase 0 Sampling clock 0 MENU Back EXIT Watch TV Clock phase The Clock phase matches the PC signal with the LCD display. Adjusting this can clear horizontal stripes and picture blur. 1 In the SET UP menu press Q until PC Setting is highlighted. 2 Press OK to select, then Q to highlight Clock phase. 3 Use S or R to adjust until the picture clears. Sampling clock Adjusting the Sampling clock alters the number of pulses per scan, this will clear vertical lines on the screen. 1 In the SET UP menu press Q until PC Setting is highlighted. 2 Press OK to select, then Q to highlight Sampling clock. PC Settings 1/2 Horizontal position 0 Horizontal width -5 Vertical position 0 Vertical height -5 Clock phase 0 Sampling clock 0 MENU Back EXIT Watch TV 3 Use S or R to adjust until the picture clears. Reset To return to the original factory settings. 1 In the SET UP menu press Q until PC Setting is highlighted. 2 Press OK to select, then Q to highlight Reset. Reset PC Settings 2/2 OK MENU Back 3 Press OK. EXIT Watch TV 30
-
 1
1 -
2
-
3
-
4
-
5
-
6
-
7
-
8
-
9
-
10
-
11
-
12
-
13
-
14
-
15
-
16
-
17
-
18
-
19
-
20
-
21
-
22
-
23
-
24
-
 25
25 -
 26
26 -
 27
27 -
 28
28 -
 29
29 -
 30
30 -
 31
31 -
 32
32 -
 33
33 -
 34
34 -
 35
35 -
36
-
37
-
38
-
39
-
40
 |
 |