Toshiba SD-V290 Owners Manual - Page 23
VISS (VHS Index Search System), Normal Recording, OPERATION, To pause the recording
 |
View all Toshiba SD-V290 manuals
Add to My Manuals
Save this manual to your list of manuals |
Page 23 highlights
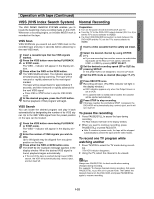
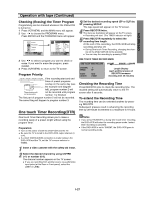
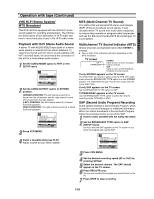
OPERATION Operation with tape (Continued) VISS (VHS Index Search System) The VHS INDEX SEARCH SYSTEM enables you to locate the beginning of any recording made on this VCR. Whenever a recording begins, an invisible INDEX mark is recorded on the tape. VISS Scan VISS SCAN lets you search out each VISS mark on the recorded tape and play 5 seconds before advancing to the next VISS mark. 1 Insert a cassette tape that has VISS signals marked. 2 Press the VISS button once during PLAYBACK or STOP mode. The VISS -- indicator will appear in the display window. 3 Press either the FWD or the REW button. The VISS SCAN will start. The indicator appears simultaneously during scanning. The tape will be rewound or rapidly advanced to the next signal marked. The tape will be played back for approximately 5 seconds, and then rewound or rapidly advanced to the next VISS signal. z Press VISS or STOP button to stop the VISS SCAN mode. 4 At the desired program, press the PLAY button. Normal playback of that program will begin. VISS Search You can locate the desired program and play it back automatically by designating the number of its VISS signal. Up to the 99th VISS signal from the preset position on the tape can be located. 1 Press the VISS button once during PLAYBACK or STOP mode. The VISS -- indicator will appear in the display window. 2 Enter the number of VISS signals you wish to skip. Up to 99 signals may be skipped from any given position on the tape. 3 Press either the FWD or REW button once. The SrCH 02 (for example) message appears in the display window. When the desired VISS signal is found, playback begins automatically. z If the end of the tape is reached during forward VISS search, the VCR will automatically stop, rewind, eject, and turn itself off. Normal Recording Preparation: z Turn on the power of both the DVD+VCR and TV. z Tune the TV to the DVD+VCR output channel (CH 3 or 4) or set the TV's source selector to VIDEO. z If a direct VIDEO/AUDIO connection is made between the DVD+VCR and the TV, set the TV's source selector to VIDEO. 1 Insert a video cassette that the safety tab intact. 2 Select the desired channel by using CH/TRK (+/-). z If you are recording from another source via audio/video input jacks (at the Rear or Front panel), select the LINE1 or LINE2 by pressing INPUT SELECT. 3 Set the desired recording speed (SP or SLP) by pressing SP/SLP. z This DVD+VCR is not designed to record in LP mode. 4 Set the MTS mode as desired (See page 17, 27). 5 Press REC/OTR once. Recording will start. (The REC indicator will light in the display window.) z REC indicator appears only when the Output Source is set to VCR. z If a cassette with no safety tab is loaded, the cassette will be ejected automatically. 6 Press STOP to stop recording. If the tape reaches the end before STOP is pressed, the DVD+VCR will automatically stop, rewind, eject, and it will turn itself off. To pause the recording 1 Press PAUSE/STILL to pause the tape during recording. The REC indicator will flash in the display window. 2 When you want to continue recording, press PAUSE/STILL or press REC/OTR. z After 5 minutes in pause mode, the tape will be stopped automatically to protect the tape and the video heads. To record one TV program while watching another 1 Press TV/VCR to select the TV mode during recording. The VCR indicator disappears. 2 Using the TV, select the channel to be viewed. Tips Always use PAUSE/STILL for best results when making changes during recording. For example: To change channels during recording, first press PAUSE/STILL to put the unit in pause mode. Then select the desired channel on the DVD+VCR, and press PAUSE/STILL again to resume recording. 1-25
-
 1
1 -
2
-
3
-
4
-
5
-
6
-
7
-
8
-
9
-
10
-
11
-
12
-
13
-
14
-
15
-
16
-
17
-
 18
18 -
 19
19 -
 20
20 -
 21
21 -
 22
22 -
 23
23 -
 24
24 -
 25
25 -
 26
26 -
 27
27 -
 28
28 -
29
-
30
-
31
-
32
-
33
-
34
-
35
-
36
-
37
-
38
-
39
-
40
-
41
-
42
-
43
-
44
-
45
-
46
 |
 |