Toshiba SDK990 Owner's Manual - English - Page 13
Connecting to Optional Equipment - remote control
 |
UPC - 022265002209
View all Toshiba SDK990 manuals
Add to My Manuals
Save this manual to your list of manuals |
Page 13 highlights
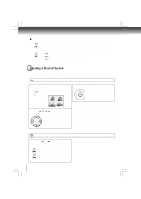
Connections Content of the output for each output jack is shown in the following table and differ depending on the On-Screen Display Setting: Connections On-Screen Display Setting "Video Out" HDMI Output Setting Setting * Component Invalid (Interlaced) P-Scan Invalid (Progressive) 480p HDMI 720p 1080i 1080p Content of output for each output jack HDMI Video Component Output Output Output - Composite 480i - Composite 480p 480p 720p 1080i 1080p Composite Composite Composite Composite 480p 480p 480p 480p Note: Both Composite (Video) and Component do not have output when HD JPEG Mode is on 32 , except 480p video resolution mode. You may view photos (JPEG ) through HDMI connection. To watch disc playback through Composite and Component output, set HD JPEG Mode to "Off". * Settings for HDMI output format are performed using the HDMI button on the remote control or HDMI SELECT button on the front panel. Notes • If Auto is selected, it follows preference HDMI aspect ratio of TV. • Refer to the owner's manual of the connected TV as well. • When you connect the DVD player to your TV, be sure to turn off the power and unplug both units from the wall outlet before making any connections. • If you have a HDMI (with HDCP) equipped monitor or display, you can connect it to this player using a HDMI cable. • The HDMI connector outputs uncompressed digital video, as well as almost every kind of digital audio that the player is compatible with, including DVD-Video, Video CD/Super VCD, CD, WMA, MP3 and DivX®. • This unit has been designed to be compliant with HDMI (High Definition Multimedia Interface) depending on the component you have connected. Using a HDMI connection may result in unreliable signal transfers. • Because HDMI is an evolving technology, it is possible that some devices with an HDMI input may not operate properly with this DVD player. • When using HDMI cable, do not connect to other analog video outputs. • No sound will be output from the HDMI cable if the digital out is not set to PCM. • HDMI output is only available when the Video Output is set to "HDMI". Otherwise the HDMI button is invalid. Connecting to Optional Equipment You can enjoy high quality dynamic sounds by connecting the DVD player to optional audio equipment. • For connection to your TV, see "Connecting to a TV" . • This section uses the following reference marks. Warning • When you are connecting (via the COAXIAL DIGITAL AUDIO OUT jack) an AV decoder that does not have Dolby Digital, : Front speaker Digital Theater Systems (DTS) or MPEG2 decoding function, be sure to set "Digital Output" to "PCM" from the on-screen : Rear speaker displays. Otherwise, high volume sound may damage your hearing as well as the speakers. : Sub woofer • When playing DTS-encoded discs (DVDs and audio CDs), excessive noise may be output from the analog audio output : Center speaker jacks. To avoid possible damage to the audio system, you should take proper precautions when the analog audio output : Signal flow jacks of the DVD player are connected to an amplification system.To enjoy DTS Digital Surround™ playback, an external 5.1 channel DTS Digital Surround™ decoder system must be connected to the COAXIAL DIGITAL AUDIO OUT jack of the DVD player. Notes • Do NOT connect the COAXIAL DIGITAL AUDIO OUT jack of the DVD player to the AC-3 RF input of a Dolby Digital Receiver. This input on your A/V Receiver is reserved for Laser disc use only and is incompatible with the COAXIAL DIGITAL AUDIO OUT jack of the DVD player. • Connect the COAXIAL DIGITAL AUDIO OUT jack of the DVD player to the "DIGITAL (COAXIAL)" input of a Receiver or Processor. • Refer to the owner's manual of the connected equipment as well. • When you connect the DVD player to other equipment, be sure to turn off the power and unplug all of the equipment from the wall outlet before making any connections. • The output sound of the DVD player has a wide dynamic range. Be sure to adjust the receiver's volume to a moderate listening level. Otherwise, the speakers may be damaged by a sudden high volume sound. • Turn off the amplifier before you connect or disconnect the DVD player's power cord. If you leave the amplifier power on, the speakers may be damaged. 13
-
 1
1 -
2
-
3
-
4
-
5
-
6
-
7
-
 8
8 -
 9
9 -
 10
10 -
 11
11 -
 12
12 -
 13
13 -
 14
14 -
 15
15 -
 16
16 -
 17
17 -
 18
18 -
19
-
20
-
21
-
22
-
23
-
24
-
25
-
26
-
27
-
28
-
29
-
30
-
31
-
32
-
33
-
34
-
35
-
36
-
37
-
38
-
39
-
40
 |
 |
