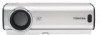
Toshiba TDP-TW420U Owners Manual
Toshiba TDP-TW420U - XGA DLP Projector Manual
 |
UPC - 883974104604
View all Toshiba TDP-TW420U manuals
Add to My Manuals
Save this manual to your list of manuals |
Toshiba TDP-TW420U manual content summary:
- Toshiba TDP-TW420U | Owners Manual - Page 1
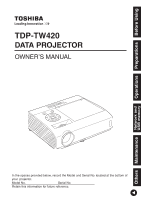
Before Using Preparations TDP-TW420 DATA PROJECTOR OWNER'S MANUAL Operations Network and USB memory Maintenance Others In the spaces provided below, record the Model and Serial No. located at the bottom of your projector. Model No. Serial No. Retain this information for future - Toshiba TDP-TW420U | Owners Manual - Page 2
Lamp contains mercury. Disposal of this product may be regulated due to environmental considerations. For disposal, reuse or recycling information, please contact your local government or the Electronic Industries Alliance at www.eiae.org. MODEL NAME: TDP-TW420 USA only TRADE NAME: DATA PROJECTOR - Toshiba TDP-TW420U | Owners Manual - Page 3
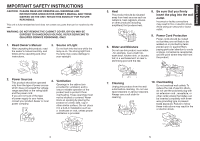
TO DANGEROUS VOLTAGE. REFER SERVICING TO QUALIFIED SERVICE PERSONNEL ONLY. 1. Read Owner's Manual After unpacking this product, read the owner's manual carefully, and follow all the operating and other instructions. 3. Source of Light Do not look into the lens while the lamp is on. The strong - Toshiba TDP-TW420U | Owners Manual - Page 4
the operating instructions. Adjust only those controls that are covered by the operating instructions since an lamp ruptures, thoroughly clean the area around the projector and discard any edible items placed in that area since they may be contaminated. 21. Servicing Do not attempt to service - Toshiba TDP-TW420U | Owners Manual - Page 5
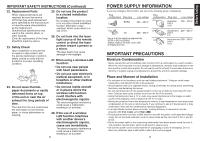
of the lamp should be made by users.) 23. Safety Check Upon completion of any service or repairs to this product, ask the service technician away from the TV or radio. • Moving the projector from a low-temperature room to a high-temperature room may cause condensation on the lens or internal parts. - Toshiba TDP-TW420U | Owners Manual - Page 6
problems. • Toshiba lamp contains mercury. Please dispose of this product or used lamps service or the shop where you purchased the product. 10 OTHER INFORMATION (Continued) Trademarks • VGA, SVGA, XGA Used in This Manual • References to new ones. • If the remote control does not operate correctly, - Toshiba TDP-TW420U | Owners Manual - Page 7
INSTRUCTIONS 4 POWER SUPPLY INFORMATION 9 IMPORTANT PRECAUTIONS 9 EXEMPTION CLAUSES 10 OTHER INFORMATION 10 REMOTE projector using a Web browser 85 Maintenance About lamp...88 Lamp replacement 89 Lens and main unit cleaning 92 Others Trouble indications 93 Troubleshooting 94 Specifications - Toshiba TDP-TW420U | Owners Manual - Page 8
lamp. p.90 (3) Control panel : Operates the projector. p.16 (4) Zooming ring : Adjusts screen size. p.27 (5) Focusing ring : Adjusts screen focus. p.27 (6) Lens : Projects expanded image. (7) Lens cap : Replace the cap when not using the projector to protect the lens. (8) Infrared remote - Toshiba TDP-TW420U | Owners Manual - Page 9
control, etc. p.35 : Displays lamp mode. p.93 : Displays whether power wireless LAN, from which numbers and characters can be entered. p.50 (18) Remote control code switch : Sets the code of remote control to that of the projector • For the remainder of this manual, buttons are referred to as - Toshiba TDP-TW420U | Owners Manual - Page 10
and minus ends of the batteries properly. Approx.15° Approx.5m Two batteries (LR03, SIZE AAA) are used. 3 Replace the battery cover. When operating the remote control from behind the projector, infrared signal is reflected on the projecting surface and may travel a shorter distance to reach the - Toshiba TDP-TW420U | Owners Manual - Page 11
, or Windows Vista® OS, that is equipped with a USB port which can support USB1.1 (The mouse remote control receiver is also supported on OS 9 or OS X for the Macintosh). However, please note that Toshiba does not guarantee the operation of all computers. 1 Connecting a computer Connect the mouse - Toshiba TDP-TW420U | Owners Manual - Page 12
Preparations Connection Before connection • Read the owner's manual of the device you are connecting to the projector. • Some computers cannot be used with or connected to this projector. Check for an RGB output terminal, supported signal p.97 , etc. • Turn off the power of both devices before - Toshiba TDP-TW420U | Owners Manual - Page 13
Control panel Remote control CAUTION • Do not look into the lens while the lamp is on. The strong light from the lamp may cause problem with unplugging the power cord in this state. 3 Turn off the main power switch. 4 Replace the lens cap. After use, replace the lens cap. Note • The projector - Toshiba TDP-TW420U | Owners Manual - Page 14
following the instructions in "Turning the power on" p.24 . 2 Select the language and the lamp power (When using the first time). When the projector is the Display setting menu p.38 and Lamp power via the Default setting 2 menu p.42 . • This owner's manual assumes that English has been selected. - Toshiba TDP-TW420U | Owners Manual - Page 15
could burn out. This is characteristic of a lamp, and is not malfunction. (The lifetime of the lamp depends on conditions of use.) • Although this projector supports a wide range of RGB signals p.97 , any resolutions not supported by this projector (XGA) will be expanded or shrunk, which will affect - Toshiba TDP-TW420U | Owners Manual - Page 16
images This projector is provided with the digital zoom (electric zoom: 100 - 62%) in addition to the optical zoom (manual adjustment with You can keep pressing. (However, the image cannot be smaller than the original size.) Remote control 3 To move the area to zoom in, use the buttons. You can - Toshiba TDP-TW420U | Owners Manual - Page 17
off the picture and sound temporarily (Mute) When you want to project the images of another projector, overhead projector, etc. temporarily, this projector's images and sound can be turned off. Press the remote control's MUTE button. The picture and sound are cut off. (The Mute function is released - Toshiba TDP-TW420U | Owners Manual - Page 18
lamp lights and the password entry screen appears. 3 Enter the password using numeric keys of the remote control. If the entered password is correct, the start-up screen appears and the projector The figure shows displays given for operation instructions purposes. As the display may differ depending - Toshiba TDP-TW420U | Owners Manual - Page 19
Using the menus 1 (Continued) ■ The image adjustment menu Use this menu to set or adjust image-related items. Items that can be set or adjusted are marked "Yes", and those that cannot are marked "No". (When an item is masked, it indicates that you cannot select for the current input.) Item Contrast - Toshiba TDP-TW420U | Owners Manual - Page 20
None Icon Display icons as function guides On Off Start-up screen User logo Display start-up screen available when the projector is connected to your computer using the Network Projector (Windows Vista®) ]. [Background] • TOSHIBA is set for [Logo] by factory setting. • If user's logo has been - Toshiba TDP-TW420U | Owners Manual - Page 21
registration> How to register user logo 1 Project a picture to register. 2 Select [User logo] in the Display STANDBY button is pressed (Manual), or when the main power switch is turned on (Auto). Manual Auto Detailed description [ projector will come on once power is restored. 41 Operations - Toshiba TDP-TW420U | Owners Manual - Page 22
Off] [ : Confirm] Lamp power Set the lamp power. Low Standard Reset all Press . (The password and user logo are not reset.) remote control. Pressing the [RETURN] button on the projector for 10 seconds also sets the [Key lock] to [Off]. (When operating the main unit, the 2 indicators of LAMP - Toshiba TDP-TW420U | Owners Manual - Page 23
LAN equipment. This mode is applicable, for example, to a presentation in the conference room, as it requires no other facilities. This function can only be used if the projector is in range of the computer's wireless signals. Toshiba does not guarantee the converage of the radio wave in the form of - Toshiba TDP-TW420U | Owners Manual - Page 24
not support the supplied mouse remote control receiver or a commercial mouse controller. • A USB hub is also not supported. Precaution like before use. Toshiba assumes no liability for losses incurred by data lost through the use of this projector. Supported files (1) Supported file extensions are - Toshiba TDP-TW420U | Owners Manual - Page 25
the Network Projector/Network Utility If you select Network Utility, the following items can be set. Category Item Description Wireless LAN Easy .] DHCP: Use Not use IP address: Enter using the numeric keys of the remote control. [ : Move left or right one character.] [ to : Set a character - Toshiba TDP-TW420U | Owners Manual - Page 26
keypad on the remote control. Character entry Enter characters using numeric keys of the remote control. The projector in Infrastructure mode. This is an ID code for connecting to specific individuals over a wireless address, Subnet mask and Gateway manually. When DHCP is - Toshiba TDP-TW420U | Owners Manual - Page 27
projector's coverage. When you have set Encryption to WEP, Key index must be set. By default, "1" is selected. Select a key index identical to that of the wireless network administrator for the settings below and set the IP address manually. An IP address is a unique number assigned to a - Toshiba TDP-TW420U | Owners Manual - Page 28
to easily connect the projector to a computer over wireless networks, without making wireless LAN settings. For Easy Connect support, the computer requires a wireless LAN environment that is NDIS5.1 or higher driver compliant. Refer to the user's manual supplied with the wireless LAN adapter or the - Toshiba TDP-TW420U | Owners Manual - Page 29
wireless LAN for network connection. Note • The Email function does not support transmission to the SMTP server that requires authentication. Setting slideshow options Slideshow is the function to allow users When playing a slide show, the projector can give various display effects or transitions - Toshiba TDP-TW420U | Owners Manual - Page 30
the projector address. 8 When the password is displayed in step 3 , enter the password. Precaution Before connection, be sure that your computer is in either condition described below. 1) The screen resolution of your computer is set in XGA (1024 × 768 dots) or lower. 2) Windows Vista SP 1 (Service - Toshiba TDP-TW420U | Owners Manual - Page 31
projector's internal wireless LAN function, install the Network Utility on the supplied CD-ROM onto your computer. ■ System Requirements Supported items. Follow the on-screen instructions. During the installation, a dialog How to uninstall Uninstall [Toshiba Data Projector] and [Jpeg Conversion - Toshiba TDP-TW420U | Owners Manual - Page 32
button and R-CLICK button of the projector's remote control. Note 1: This function is available when only one projector is connected to computer. Note 2: the sound being played on a computer can be sent to the projector. When "Update manually" is selected in step 2 A single screen image is sent - Toshiba TDP-TW420U | Owners Manual - Page 33
active (in use), the image may not be correctly displayed by the projector. • The projector ID is the MAC address of the wired LAN inserted into the projector. • Playing contents protected by copyright is not supported. • To transmit sound, press the button then launch the application that plays - Toshiba TDP-TW420U | Owners Manual - Page 34
to the projector. • Repeat projector to transmit to. The IDs of projectors accessible for transmission will be listed. (If projector projector's screen for few seconds. It is possible to select only one projector. 7 Click on the button. The selected file's image is displayed by the projector - Toshiba TDP-TW420U | Owners Manual - Page 35
manually. See step 8 for the meanings of Update automatically and Update manually. of the computer's remote control. Note 1: This function is available when only one projector is connected to 2 Right click on the desired virtual display (Toshiba DPJ Secondary Display Driver) and select Attached from - Toshiba TDP-TW420U | Owners Manual - Page 36
sound being played on a computer can be sent to the projector. When "Update manually" is selected in step 3 A single screen image is memory Note • The examples shown here are illustrated as projectors are connected to a computer via wireless LAN, however, this also applies for the connection via - Toshiba TDP-TW420U | Owners Manual - Page 37
the projector. • The projector ID is the MAC address of the wired LAN inserted into the projector. • Playing contents protected by copyright is not supported. This feature allows users to easily connect the projector to a computer over wireless networks, without making Wireless LAN settings using - Toshiba TDP-TW420U | Owners Manual - Page 38
memory, follow the instructions in the user's manual supplied with the USB memory or the computer. • Setting on the projector 5 Turn the projector power on. appears, insert the USB memory into the projector. 5 Click Yes then press the button. The wireless LAN settings are saved to the USB memory - Toshiba TDP-TW420U | Owners Manual - Page 39
menu to make necessary wireless LAN settings manually. 76 ■ Operating the projector This function can be used with any projector input. 1 Launch right/diagonal) 5 To quit, click on the button on the Remote Control window. Performing this does not close the Network Utility window. To exit both - Toshiba TDP-TW420U | Owners Manual - Page 40
lists Current File Name Operation Guide Previous page exists Orange frame: the JPEG, MPEG or other file is not supported. When the Thumbnail display is set to Off to the procedure in "Connecting USB device" p.46 . The projector starts loading data from the USB memory and displays a thumbnail list - Toshiba TDP-TW420U | Owners Manual - Page 41
supported. • Pressing the GUIDE button on the remote control with a slide displayed displays the operation guide for slideshow. • When you operate the projector JPEG files supported by the projector. The JPEG files converted with this tool can be displayed by sending them using the wireless LAN p.64 - Toshiba TDP-TW420U | Owners Manual - Page 42
supported by this process. Animation and audio are not supported. list" p.78 to display a list of thumbnails. (3) Follow the instructions in step 2 in "Playing a slide show from a thumbnail Select Slide001.jpg) (4) Press the button on the remote control. An enlarged view of the first slide appears - Toshiba TDP-TW420U | Owners Manual - Page 43
/" recorded in step 1 above. The Web browser will then display the following page. Menu Projector name Projector ID Note: If you use a proxy server, do not enable the proxy when accessing the above IP address. When the wireless LAN is set to use Ad hoc mode, use the WEB browser function in the - Toshiba TDP-TW420U | Owners Manual - Page 44
. TOSHIBA Projector Site: The browser will display the home page at http://multimedia. projector-toshiba.com/map.html, providing projector information example, when the lamp has blown. Notes • Clicking the ? button opens a popup help window. • The security items such as "Remote control" and " - Toshiba TDP-TW420U | Owners Manual - Page 45
pieces with care to avoid injury and contact your dealer for repair service. • In the event of lamp burst, unplug the product from the wall outlet, leave and completely ventilate the room. Then, thoroughly clean the area around the projector and discard any edible items placed in that area, as they - Toshiba TDP-TW420U | Owners Manual - Page 46
to replace the outer lamp cover.) 9 Reset the lamp time. See the lamp's manual for instructions on resetting the lamp time. Notes and Precautions • The [Lamp time] item in the Status display menu indicates the time of lamp use (as a rough guide) p.43 • Please replace the lamp after 2000 hours of - Toshiba TDP-TW420U | Owners Manual - Page 47
of a ceiling-mounted unit from your projector dealership. Attempting to clean or replace the lamp in a high location by yourself may . 92 Others Trouble indications The indicator illuminates and a beep sound informs you of internal abnormalities. No power ⇒ Problem with projector (Off) - Toshiba TDP-TW420U | Owners Manual - Page 48
Troubleshooting If you think something is wrong, check the followings before contacting customer service. Please see "Trouble indications" p.93 as well. If This Happens Check No power • Is the power cord plugged in? Is it connected to the projector? • Is the main power switch turned on? p.24 • - Toshiba TDP-TW420U | Owners Manual - Page 49
. • This model may not be compatible with features and/or specifications that may be added in the future. Separately sold product Replacement Lamp Model TLPLW23 List of supported signals (RGB signals) This projector supports the following RGB signals. Note, however, that depending on the - Toshiba TDP-TW420U | Owners Manual - Page 50
)@60Hz 1080i(1125i)@50Hz 1080p(1125p)@60Hz 1080p(1125p)@50Hz * DVI digital input is not supported. fh(kHz) 15.73 31.47 15.63 31.25 45.00 37.50 33.75 00 50.00 60.00 50.00 60.00 50.00 60.00 50.00 ■ List of supported signals (Video, S-Video signals) Video mode NTSC PAL SECAM PAL-M PAL-N PAL-60 NTSC4. - Toshiba TDP-TW420U | Owners Manual - Page 51
Specifications (Continued) input commands, only ASCII-compliant all- uppercase alphanumeric characters supported. 4. Replies Acknowledge ACK (06 h) CR(0 Dh) are to be sent consecutively, wait for the response from the projector before sending the next command. Main Commands Item Power on
-
 1
1 -
 2
2 -
 3
3 -
 4
4 -
 5
5 -
 6
6 -
 7
7 -
8
-
9
-
10
-
11
-
12
-
13
-
14
-
15
-
16
-
17
-
18
-
19
-
20
-
21
-
22
-
23
-
24
-
25
-
26
-
27
-
28
-
29
-
30
-
31
-
32
-
33
-
34
-
35
-
36
-
37
-
38
-
39
-
40
-
41
-
42
-
43
-
44
-
45
-
46
-
47
-
48
-
49
-
50
-
51
 |
 |

Before Using
Preparations
Operations
Maintenance
Others
Network and
USB memory
TDP-TW420
DATA PROJECTOR
OWNER’S MANUAL
In the spaces provided below, record the Model and Serial No. located at the bottom of
your
projector.
Model No.
Serial No.
Retain this information for future reference.