Vizio XVT3D650SV XVT3D650SV User Manual
Vizio XVT3D650SV Manual
 |
UPC - 845226004834
View all Vizio XVT3D650SV manuals
Add to My Manuals
Save this manual to your list of manuals |
Vizio XVT3D650SV manual content summary:
- Vizio XVT3D650SV | XVT3D650SV User Manual - Page 1
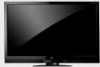
65" THEATER 3D LED LCD HDTV XVT3D650SV - USER MANUAL - Vizio XVT3D650SV | XVT3D650SV User Manual - Page 2
This product qualifies for ENERGY STAR in the "factory default" setting and this is the setting in which power savings will be achieved. Changing the factory default picture settings or enabling other features will increase power consumption that could exceed the limits necessary to qualify for - Vizio XVT3D650SV | XVT3D650SV User Manual - Page 3
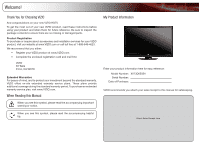
this symbol, please read the accompanying helpful tip. My Product Information Enter your product information here for easy reference: Model Number: XVT3D650SV Serial Number Date of Purchase VIZIO recommends you attach your sales receipt to this manual for safekeeping. Attach Sales Receipt Here - Vizio XVT3D650SV | XVT3D650SV User Manual - Page 4
you do not experience any of the above symptions, take regular breaks from watching 3D content. XVT3D650SV Important Safety Instructions Your DTV is designed and manufactured to operate within defined design limits. Misuse may result in electric shock or fire. To prevent your DTV from being damaged - Vizio XVT3D650SV | XVT3D650SV User Manual - Page 5
cause the batteries to leak which can damage the remote control or injure the operator. • If any of the following occurs, contact the dealer: - The power cord fails or frays. - Liquid sprays or any object drops into your HDTV. - Your HDTV is exposed to rain or other moisture - Vizio XVT3D650SV | XVT3D650SV User Manual - Page 6
lines or circuits. Remember, the screen of the coaxial cable is intended to be connected to earth in the building installation. DTV Transition Advisory The nationwide switch to digital television broadcasting was complete on June 12, 2009. Analog-only television sets that receive TV TV services, - Vizio XVT3D650SV | XVT3D650SV User Manual - Page 7
Remote Control 8 Using the Remote for Your Other Devices 8 Completing the First-Time Setup 9 Connecting Your Devices to the TV 11 Before You Begin 11 HDMI...11 Component 11 RGB...11 RF/Antenna 11 Choosing the Correct Connection 11 BEST...11 BETTER 11 Connecting Your Devices 12 Setting - Vizio XVT3D650SV | XVT3D650SV User Manual - Page 8
Profile 35 XVT3D650SV Restoring the VIA Dock to the Factory Default Settings 36 Viewing Theater 3D 37 How Theater 3D Works 37 What You Need to View 3D Content 37 Watching Blu-ray 3D Content 37 Watching SBS, TB, or Sensio 3D Content 38 Troubleshooting & Technical Support 39 The TV displays - Vizio XVT3D650SV | XVT3D650SV User Manual - Page 9
3D Glasses (2) VIZIO 65" Theater 3D HDTV with Stand Basic Theater 3D Glasses (2) XVT3D424SV / XVT3D474SV / XVT3D554SV QUICK START GUIDE XVT3D424SV / XVT3D474SV / XVT3D554SV QUICK START GUIDE User Guide and Quick Start Guide Power Cord Cleaning Cloth Safety Cable Bluetooth® Remote Control - Vizio XVT3D650SV | XVT3D650SV User Manual - Page 10
the box with the base already attached. Only use the following instructions if you need to reattach the base. To install the TV stand: 1. Place the TV screen-down on a clean, flat surface. To prevent scratches or damage to the screen, place the TV on a soft surface, such as carpet, rug, or blanket - Vizio XVT3D650SV | XVT3D650SV User Manual - Page 11
XVT3D650SV 1 Installing the TV on a Wall To mount your TV on a wall, you will need a wall mount. Consult the information below to find the appropriate mount for your TV model or damage the TV. 5. Attach your TV and wall mount to the wall, carefully following the instructions that came with the - Vizio XVT3D650SV | XVT3D650SV User Manual - Page 12
1 XVT3D650SV Watching 3D at the Best Distance and Angle For the best viewing experience, VIZIO recommends that you install the TV with the viewing distance and vertical viewing angle in mind. When viewing 3D content, it is important that you view the TV at an optimal angle, or some of the 3D - Vizio XVT3D650SV | XVT3D650SV User Manual - Page 13
of your HDTV that performs functions you might see as buttons on other TVs. Functions including volume up/down, power, input source, and channel up/down have been combined into a single Quick Menu controlled by the Jag Wheel. Remote Control Sensor VIZIO Light Front Panel Remote Control Sensor - Vizio XVT3D650SV | XVT3D650SV User Manual - Page 14
XVT3D650SV 1 2 3 USB 1 2 3 4 5 HDMI BEST USB HDMI Optical Audio Out Rear Panel USB (1, 2, 3): For service technician use only. HDMI (1, 2, 3, 4, 5): Connect external device (Blu-Ray/DVD player, game console, etc). Optical: Connect to audio device (VIZIO sound bar, home theater or cable TV. DC IN - Vizio XVT3D650SV | XVT3D650SV User Manual - Page 15
the number pad to manually enter a channel. Input: Change the input device. With each press of the button, the TV will display a different input. A/V Controls: Control external device (Blu-Ray or DVD player). List: Display list of available channels. VIA Shortcuts: Control VIZIO Internet Apps. 3D - Vizio XVT3D650SV | XVT3D650SV User Manual - Page 16
away from children and pets. Using the Remote for Your Other Devices The included remote can be used as a universal remote to control your other devices. See Using Guided Setup on page 31 to set up the remote for use with your other devices. • The remote control should be kept dry and away from - Vizio XVT3D650SV | XVT3D650SV User Manual - Page 17
Controls & Connections on page 5. • If you have a wireless network, have the network key ready. • If you are connecting to your network with an ethernet cable, connect it to the ethernet port on the TV. See Setting the remote to read and accept the Terms of Service and Privacy Policy for Yahoo! TV - Vizio XVT3D650SV | XVT3D650SV User Manual - Page 18
on the remote. 9. Choose the device you would like to connect. Answer the on-screen questions about your TV connection using the Arrow and OK buttons on the remote. 10. When you have finished adding devices, highlight Exit to Live TV and press OK. The First-Time Setup is complete. 10 XVT3D650SV - Vizio XVT3D650SV | XVT3D650SV User Manual - Page 19
TV Your 3D HDTV can be easily connected to an external device: • DVD or Blu-Ray player • Video game console • Cable box • External antenna • Or other device Before You Begin To connect an external device to the 3D HDTV Name Digital / Analog HDMI Digital BEST RGB Digital RF/Coaxial Digital - Vizio XVT3D650SV | XVT3D650SV User Manual - Page 20
list of devices/connection types below for special instructions: Cable TV (without cable box/directly from wall) Perform a channel scan. See Scanning for Channels on page 19. RGB Make sure the desktop resolution on the PC is set to 1920 x 1080. Set the Screen Mode to Normal. See . DVD Player with - Vizio XVT3D650SV | XVT3D650SV User Manual - Page 21
XVT3D650SV 4 Setting Up Your Network Connection Your TV is internet-ready, and can be connected to your home the router and to the ethernet port on the back of the TV. 3. Use the Guided Network Setup to configure the TV. See Using Guided Setup on page 31. Connecting to a Wireless Network To connect - Vizio XVT3D650SV | XVT3D650SV User Manual - Page 22
4 14 XVT3D650SV - Vizio XVT3D650SV | XVT3D650SV User Manual - Page 23
your preferences and viewing conditions. To adjust the picture settings: 1. Press the MENU button on the remote. The on-screen menu is displayed. 2. Use the Arrow buttons on the remote to highlight the TV Settings icon and press OK. The TV Settings menu is displayed. 3. Use the Up/Down Arrow buttons - Vizio XVT3D650SV | XVT3D650SV User Manual - Page 24
contrast ratio of the screen by adjusting the backlight TV's backlight. Select Low, Middle, High, or Off. When the Ambient Light Sensor is on, you will be unable to manually adjust the backlight. 4. When you have finished adjusting the Advanced Picture Settings, press the EXIT button on the remote - Vizio XVT3D650SV | XVT3D650SV User Manual - Page 25
as a PC monitor. • Custom allows you to manually change each of the color temperature settings: Red/Green/Blue Gain - Adjusts the amount of buttons on the remote to highlight Reset Picture Mode, then press OK. The TV displays, "Are you sure you want to RESET Picture Settings to the factory defaults - Vizio XVT3D650SV | XVT3D650SV User Manual - Page 26
the external speakers' volume from your home theater system controls. • Audio Controls - Select the device controlled by the VIZIO remote. Select TV to force the remote to control the TV's audio, or select External to force the remote to control the external audio device. 3. When you have finished - Vizio XVT3D650SV | XVT3D650SV User Manual - Page 27
XVT3D650SV 5 Resetting the Audio Settings To reset the audio settings to the factory default settings: 1. Press the MENU button on the remote. The on-screen menu is displayed. 2. Use the Arrow buttons on the remote to highlight the TV Settings icon and press OK. The TV Settings menu is displayed. - Vizio XVT3D650SV | XVT3D650SV User Manual - Page 28
Channel # and use the Number Pad on the remote to enter the number of the channel you are adding. 3. Highlight Add Channel and press OK. The TV scans for the channel. 4. When the TV is done scanning for the channel, press the EXIT button on the remote. XVT3D650SV Skipping Channels After a channel - Vizio XVT3D650SV | XVT3D650SV User Manual - Page 29
of an input: 1. Press the MENU button on the remote. The on-screen menu is displayed. 2. Use the Arrow buttons on the remote to highlight the TV Settings icon and press OK. The TV Settings menu is displayed. 3. Use the Arrow buttons on the remote to highlight Name Input and press OK. The Name Input - Vizio XVT3D650SV | XVT3D650SV User Manual - Page 30
1. Press the MENU button on the remote. The on-screen menu is displayed. 2. Use the Arrow buttons on the remote to highlight the TV Settings icon and press OK. The TV Settings menu is displayed. 3. Use the Arrow buttons on the remote to highlight Parental Controls and press OK. 4. Enter the Parental - Vizio XVT3D650SV | XVT3D650SV User Manual - Page 31
menu language: 1. Press the MENU button on the remote. The on-screen menu is displayed. 2. Use the Arrow buttons on the remote to highlight the TV Settings icon and press OK. The TV Settings menu is displayed. 3. Use the Arrow buttons on the remote to highlight Menu Language and press OK. The Menu - Vizio XVT3D650SV | XVT3D650SV User Manual - Page 32
button, set the TV's time zone: 1. Press the MENU button on the remote. The on-screen menu is displayed. 2. Use the Arrow buttons on the remote to highlight the TV Settings icon and press OK. The TV Settings menu is Off or On and press OK. 8. Press the EXIT button on the remote. 24 XVT3D650SV - Vizio XVT3D650SV | XVT3D650SV User Manual - Page 33
TV Settings 6 Your TV features an easy-to-use on-screen menu. To open the on-screen menu, press the MENU button on the remote. You can also open the on-screen menu by pressing the VIA button and selecting HDTV Settings from the VIA Dock, then pressing OK. From this menu, you can: • Change the 3D - Vizio XVT3D650SV | XVT3D650SV User Manual - Page 34
6 XVT3D650SV Setting Up Closed Captioning Your TV can display closed captions for programs that include them. Closed captions display a transcription of a program's dialogue. If the program you are viewing is not being broadcast with closed captions, the TV will not display them. To activate or - Vizio XVT3D650SV | XVT3D650SV User Manual - Page 35
XVT3D650SV 6 Using the Sleep Timer When activated, the TV's sleep timer will turn the TV off after a set period of time. To use the sleep timer: 1. Press the MENU button on the remote. The on-screen menu is displayed. 2. Use the Arrow buttons on the remote to highlight the Sleep Timer icon and - Vizio XVT3D650SV | XVT3D650SV User Manual - Page 36
6 XVT3D650SV Using the Network Connection Menu Your TV is internet-ready, featuring both an ethernet port and built-in high-speed wireless-N. Connecting to a Wireless Network To connect to a wireless network whose network name (SSID) is being broadcast: 1. Press the MENU button on the remote. The - Vizio XVT3D650SV | XVT3D650SV User Manual - Page 37
your network connection. 3. Press the EXIT button on the remote. Setting Up a Bluetooth Device To pair a Bluetooth device with your TV: 1. Press the MENU button on the remote. The on-screen menu is displayed. 2. Use the Arrow buttons on the remote to highlight the Bluetooth icon and press OK. The - Vizio XVT3D650SV | XVT3D650SV User Manual - Page 38
sure you would like to Restore Defaults? This will erase any custom settings." 4. Highlight Yes and press OK. 5. Press the EXIT button on the remote. XVT3D650SV Restoring the TV to Factory Default Settings All of the on-screen menu settings can be reset to the factory defaults. If you restore the - Vizio XVT3D650SV | XVT3D650SV User Manual - Page 39
XVT3D650SV 6 Using Guided Setup The TV's Setup App can be used to easily set up the Bluetooth remote, the TV tuner, your external devices, and to connect the TV with your network. To access guided setup: 1. Press the MENU button on the remote. The on-screen menu is displayed. 2. Use the Arrow - Vizio XVT3D650SV | XVT3D650SV User Manual - Page 40
6 XVT3D650SV Using the Digital Episode Guide Your TV features an on-screen digital episode guide. This guide displays program information broadcast by digital television stations as well as the current time and date. To use the digital episode guide, press the GUIDE button on the remote. While - Vizio XVT3D650SV | XVT3D650SV User Manual - Page 41
updates and to access online content. See Setting Up Your Network Connection on page 13 if your TV is not yet connected to your home network. Using the VIA Shortcut Buttons Use the four colored buttons on the remote the main display window remote. (The highlighted App is in the lower left corner of the screen - Vizio XVT3D650SV | XVT3D650SV User Manual - Page 42
Administrative Controls menu is displayed. 5. Highlight Create Owner Pin and press OK. The Owner PIN menu is displayed. 6. Highlight Create Owner Pin and press OK. The PIN Creation menu is displayed. 7. Enter a 4-digit passcode using the Number Pad on the remote or the on-screen number pad. Write - Vizio XVT3D650SV | XVT3D650SV User Manual - Page 43
Enter a 4-digit passcode using the Number Pad on the remote or the on-screen number pad. Write down your passcode Controls menu is displayed. 5. Highlight Remove Profile and press OK. The Remove Profile menu is displayed. 6. Highlight the name of the profile you want to remove and press OK. The TV - Vizio XVT3D650SV | XVT3D650SV User Manual - Page 44
the VIA Dock to the factory default settings: 1. Press the VIA button on the remote. 2. Highlight the Profile App by scrolling left and right using the Left/Right Arrow buttons on the remote. (The highlighted App is in the lower left corner of the screen.) 3. Select the App by pressing the OK - Vizio XVT3D650SV | XVT3D650SV User Manual - Page 45
Movie option in the disc's main menu. 7. The TV displays, "3D Content detected. Select YES to switch to 3D, NO to display in 2D." Highlight Yes and press OK. 8. Put on your Theater 3D glasses. VIZIO 3D HDTV 3D Blu-ray Player VIZIO Theater 3D Glasses Blu-ray 3D Disc High-Speed HDMI Cable What - Vizio XVT3D650SV | XVT3D650SV User Manual - Page 46
Press the 3D button on the remote. The Output Mode menu is displayed. 3. Highlight 3D and press OK. 4. Select the 3D mode to match the content you are watching: SBS, TB, or Sensio. 5. The TV displays, "3D viewing mode enabled. Please wear 3D glasses." Put on your Theater 3D glasses. XVT3D650SV 38 - Vizio XVT3D650SV | XVT3D650SV User Manual - Page 47
to fix the issue using this troubleshooting guide. If, after using this troubleshooting guide, you are still experiencing an issue with your TV, contact VIZIO's Support Department. Quality customer support and service are integral parts of VIZIO's commitment to service excellence. Address: 39 Tesla - Vizio XVT3D650SV | XVT3D650SV User Manual - Page 48
and V-Position in the on-screen menu are set correctly. • If you are using TV, AV1, AV2, or Component with 480i input, press the WIDE button on the remote to change the screen mode. The TV has pixels (dots) that are always dark or always lit. • Your HDTV is precision-manufactured using an extremely - Vizio XVT3D650SV | XVT3D650SV User Manual - Page 49
LED™ 120 Hz 1920 x 1080 1.07 Billion 32 Zones 1080p Yes 1,000,000:1 5 ms 450 nits 5 1 1 (Shared with Component Y Pb R) 1 178/178 3 1 B Ethernet OSD Language HD Gameport Outputs Picture In Picture (PIP) Ambient Light Sensor Bluetooth Wireless (WiFi) Theater 3D Mercury-Free Remote Control Model - Vizio XVT3D650SV | XVT3D650SV User Manual - Page 50
B 42 - Vizio XVT3D650SV | XVT3D650SV User Manual - Page 51
material or packaging that affords an equal degree of protection. VIZIO Technical Support will provide instructions for packing and shipping the covered Product to the VIZIO service center. Limitations and Exclusions VIZIO's one-year limited warranty only covers defects in materials and workmanship - Vizio XVT3D650SV | XVT3D650SV User Manual - Page 52
C 44 - Vizio XVT3D650SV | XVT3D650SV User Manual - Page 53
device, pursuant to Part 15 of the with the instructions, may cause responsible for any radio or TV interference caused by unauthorized modification BASE/BS Japan: Electric Appliance Control Act Open Source Software Notice Your PL2.0/LGPL2.1 License Agreements. VIZIO offers to provide source code - Vizio XVT3D650SV | XVT3D650SV User Manual - Page 54
D 46 XVT3D650SV - Vizio XVT3D650SV | XVT3D650SV User Manual - Page 55
- Vizio XVT3D650SV | XVT3D650SV User Manual - Page 56
SHOWN ARE THE PROPERTY OF THEIR RESPECTIVE OWNERS. IMAGES USED ARE FOR ILLUSTRATION PURPOSES ONLY. VIZIO, THE V LOGO, WHERE VISION MEETS VALUE, AND OTHER VIZIO TRADEMARKS ARE THE INTELLECTUAL PROPERTY OF VIZIO INC. PRODUCT FEATURES AND SPECIFICATIONS ARE SUBJECT TO CHANGE WITHOUT NOTICE. © 2010
-
 1
1 -
 2
2 -
 3
3 -
 4
4 -
 5
5 -
 6
6 -
 7
7 -
8
-
9
-
10
-
11
-
12
-
13
-
14
-
15
-
16
-
17
-
18
-
19
-
20
-
21
-
22
-
23
-
24
-
25
-
26
-
27
-
28
-
29
-
30
-
31
-
32
-
33
-
34
-
35
-
36
-
37
-
38
-
39
-
40
-
41
-
42
-
43
-
44
-
45
-
46
-
47
-
48
-
49
-
50
-
51
-
52
-
53
-
54
-
55
-
56
 |
 |

XVT3D650SV
– USER MANUAL
65” THEATER 3D
LED LCD HDTV