Weider Pro 550 Bench Uk Manual
Weider Pro 550 Bench Manual
 |
View all Weider Pro 550 Bench manuals
Add to My Manuals
Save this manual to your list of manuals |
Weider Pro 550 Bench manual content summary:
- Weider Pro 550 Bench | Uk Manual - Page 1
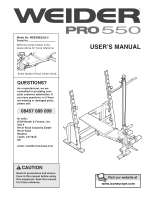
serial number in the space above for future reference. Serial Number Decal (Under Seat) QUESTIONS? As a manufacturer, we are committed to providing complete customer satisfaction. [email protected] CAUTION Read all precautions and instructions in this manual before using this equipment. Save this - Weider Pro 550 Bench | Uk Manual - Page 2
TABLE OF CONTENTS IMPORTANT PRECAUTIONS 3 BEFORE YOU BEGIN 4 PART IDENTIFICATION CHART 5 ASSEMBLY 6 ADJUSTMENTS 12 EXERCISE GUIDELINES 15 PART LIST 17 EXPLODED DRAWING 18 ORDERING REPLACEMENT PARTS Back Cover WEIDER is a registered trademark of ICON IP, Inc. 2 - Weider Pro 550 Bench | Uk Manual - Page 3
the following important precautions before using the weight bench. 1. Read all instructions in this manual and all warnings on the weight bench before using the weight bench. Use the weight bench only as described in this manual. 2. It is the responsibility of the owner to ensure that all users of - Weider Pro 550 Bench | Uk Manual - Page 4
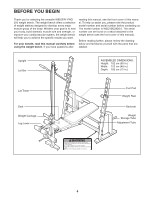
BEFORE YOU BEGIN Thank you for selecting the versatile WEIDER® PRO 550 weight bench. The weight bench offers a selection of weight stations designed to develop every major muscle group of the body. Whether your goal is to tone your body, build dramatic muscle size and strength, - Weider Pro 550 Bench | Uk Manual - Page 5
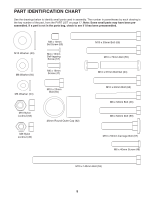
PART IDENTIFICATION CHART See the drawings below to identify small parts used in assembly. The number in parentheses by each drawing is the key number of the part, from the PART LIST on page 17. Note: Some small parts may have been preassembled. If a part is not in the parts bag, check to see if it - Weider Pro 550 Bench | Uk Manual - Page 6
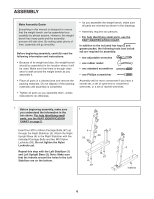
this manual is designed to ensure that the weight bench can be assembled successfully by almost anyone. However, the weight bench has many assembly, carefully read the following information and instructions: • Because of its weight and size, the weight bench should be assembled in the location where - Weider Pro 550 Bench | Uk Manual - Page 7
(1) with the indicated M10 x 50mm Carriage Bolts (67) and two M10 Nylon Locknuts (58). Do not tighten the Nylon Locknuts yet. Attach the Left Rear Support (6) to the Left Upright (31) and the Left Upright Base (3) with two M10 x 60mm Bolts (68), the Left Upright Plate (15), and two M10 Nylon - Weider Pro 550 Bench | Uk Manual - Page 8
) into the Crossbar (5) and the Frame (8). 56 58 5 8 Hole Grease 55 6. Tighten the "T"-handle (45) into the Seat Carriage (42). Pull the "T"-handle (45) out as far as it will go and slide the Seat Carriage (42) onto the Frame (8). Attach the Front Leg (12) to the Frame (8) with two M8 x 52mm - Weider Pro 550 Bench | Uk Manual - Page 9
Washers (43), and an M10 Nylon Locknut (58). Do not overtighten the Locknut; the Seat Frame and the Backrest Frames must pivot easily. Insert the Seat Pin (40) through the Seat Frame (10) and into the tube on the Seat Carriage (42). Tighten the four M6 x 40mm Screws (48) used in step 9. 17 Holes - Weider Pro 550 Bench | Uk Manual - Page 10
10mm Spacer (61), and an M8 Nylon Locknut (49). Press the 25mm Round Outer Cap (62) onto the end of the Weight Tube (19). 12. Apply grease to the barrel of an the Leg Lever (18). Slide two Foam Pads (23) onto the Pad Tube, and press a Pad Cap (25) into the end of each Foam Pad. Repeat with the - Weider Pro 550 Bench | Uk Manual - Page 11
the locking 16 bar around the Left Upright. Repeat this step with the other Weight Rest (not shown) and the Right Upright (not shown). 14 73 58 65 that all parts are properly tightened before you use the weight bench. The use of all remaining parts will be explained in ADJUSTMENTS, starting on the next - Weider Pro 550 Bench | Uk Manual - Page 12
This section explains how to adjust the weight bench. See the accompanying exercise guide to see the correct form for each exercise. Make sure all parts are properly tightened each time the weight bench is used. Replace any worn parts immediately. The weight bench can be cleaned with a damp cloth - Weider Pro 550 Bench | Uk Manual - Page 13
of weight (not included) onto the Weight Tube (19). Secure your weights with a Small Spring Clip (51). To use Olympic weights, press a Weight Tube (19). Secure your weights with Spring Clips (51, 52 not shown). WEIGHT RESTS To use a barbell (not included) with the weight bench, first move the Weight - Weider Pro 550 Bench | Uk Manual - Page 14
ATTACHING THE LAT BAR Attach the Lat Bar (33) to the Cable (73) with the Weight Clip (74). STORING THE WEIGHT BENCH Set the Backrest (22) and the Adjustment Tube (9) to the position shown (see ADJUSTING THE BACKREST on page 12), and store the Lat Tower (14, - Weider Pro 550 Bench | Uk Manual - Page 15
more sets rather than by using high amounts of weight. Weight Loss To lose weight, use a low amount of weight and increase the number of repetitions in each manner will leave you feeling exhausted. On the exercise guide accompanying this manual you will find photographs showing the correct form for - Weider Pro 550 Bench | Uk Manual - Page 16
keep a record of each workout. List the date, the exercises performed, the resistance used, and the numbers of sets and repetitions completed. Record your weight and key body measurements at the end of every month. Remember, the key to achieving the greatest results is to make exercise a regular and - Weider Pro 550 Bench | Uk Manual - Page 17
5 1 Crossbar 6 1 Left Rear Support 7 1 Right Rear Support 8 1 Frame 9 1 Adjustment Tube 10 1 Seat Frame 11 1 Front Stabilizer 12 1 72 2 Carriage Bushing 73 1 Cable 74 1 Weight Clip # 1 User's Manual # 1 Exercise Guide # 1 Grease Pack # 2 Hex Key Note: - Weider Pro 550 Bench | Uk Manual - Page 18
EXPLODED DRAWING A-Model No. WEEVBE2926.0 R0706A 71 23 25 23 25 23 22 36 17 24 17 58 43 54 23 24 71 36 36 43 48 21 53 54 23 24 25 57 48 40 23 25 35 35 10 41 20 41 45 13 34 34 18 64 34 49 50 61 62 50 46 12 34 66 42 26 41 49 8 49 50 50 56 50 50 64 58 - Weider Pro 550 Bench | Uk Manual - Page 19
EXPLODED DRAWING B-Model No. WEEVBE2926.0 R0706A 57 16 57 58 34 37 70 43 43 30 68 69 70 73 28 14 58 33 30 37 57 7 68 43 58 66 27 58 43 58 58 58 43 58 63 4 58 38 47 73 58 37 60 44 66 72 37 2 67 67 66 58 57 31 16 72 65 57 29 58 44 44 47 57 68 5 60 15 66 43 58 58 - Weider Pro 550 Bench | Uk Manual - Page 20
give the following information: • the MODEL NUMBER of the product (WEEVBE2926.0) • the NAME of the product (WEIDER PRO 550 weight bench) • the SERIAL NUMBER of the product (see the front cover of this manual) • the KEY NUMBER and DESCRIPTION of the part(s) (see the PART LIST and EXPLODED DRAWING on
-
 1
1 -
 2
2 -
 3
3 -
 4
4 -
 5
5 -
 6
6 -
 7
7 -
8
-
9
-
10
-
11
-
12
-
13
-
14
-
15
-
16
-
17
-
18
-
19
-
20
 |
 |
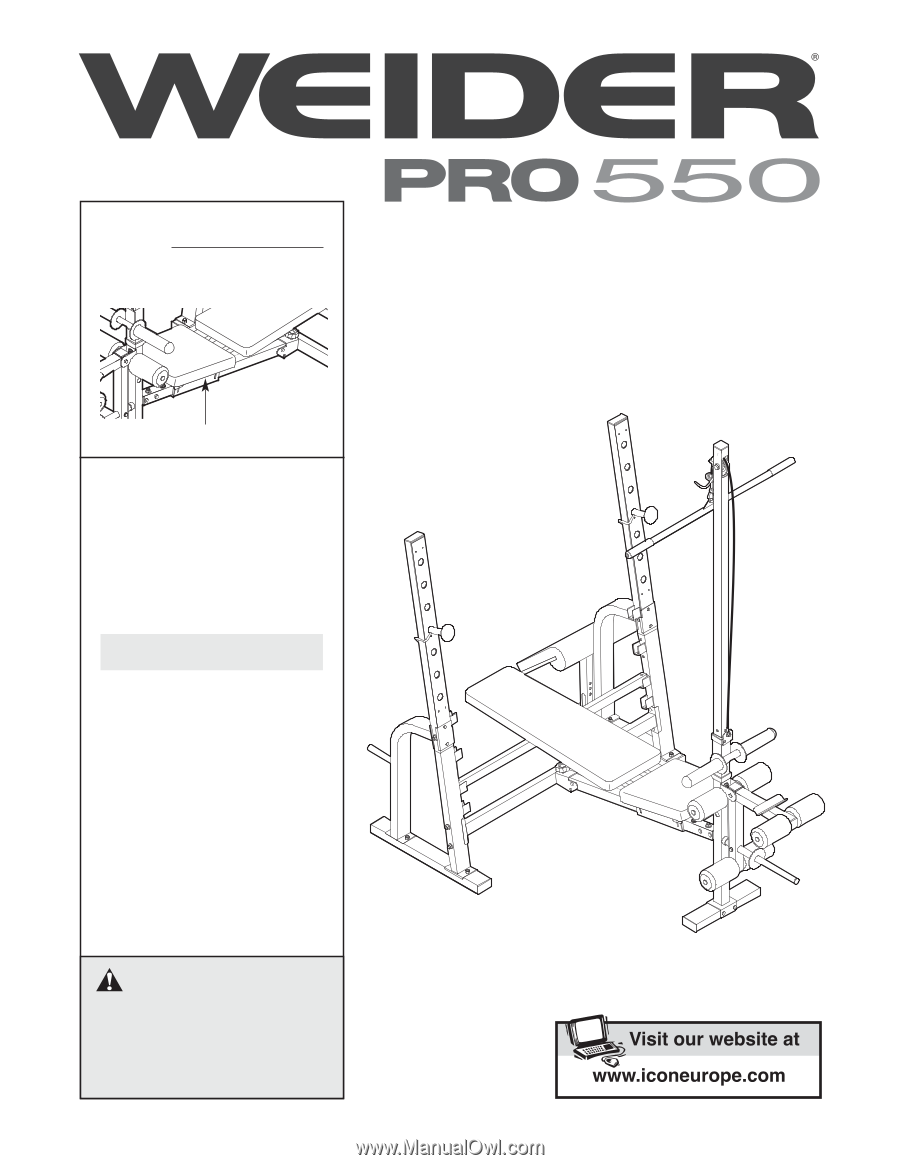
CAUTION
Read all precautions and instruc-
tions in this manual before using
this equipment. Save this manual
for future reference.
Model No. WEEVBE2926.0
Serial No.
Write the serial number in the
space above for future reference.
Serial Number Decal (Under Seat)
QUESTIONS?
As a manufacturer, we are
committed to providing com-
plete customer satisfaction. If
you have questions, or if there
are missing or damaged parts,
please call:
Or write:
ICON Health & Fitness, Ltd.
Unit 4
Revie Road Industrial Estate
Revie Road
Beeston
Leeds, LS118JG
UK
email: [email protected]
08457 089 009
USER’S MANUAL