Weider Pro 9725 English Manual - Page 5
tighten
 |
View all Weider Pro 9725 manuals
Add to My Manuals
Save this manual to your list of manuals |
Page 5 highlights
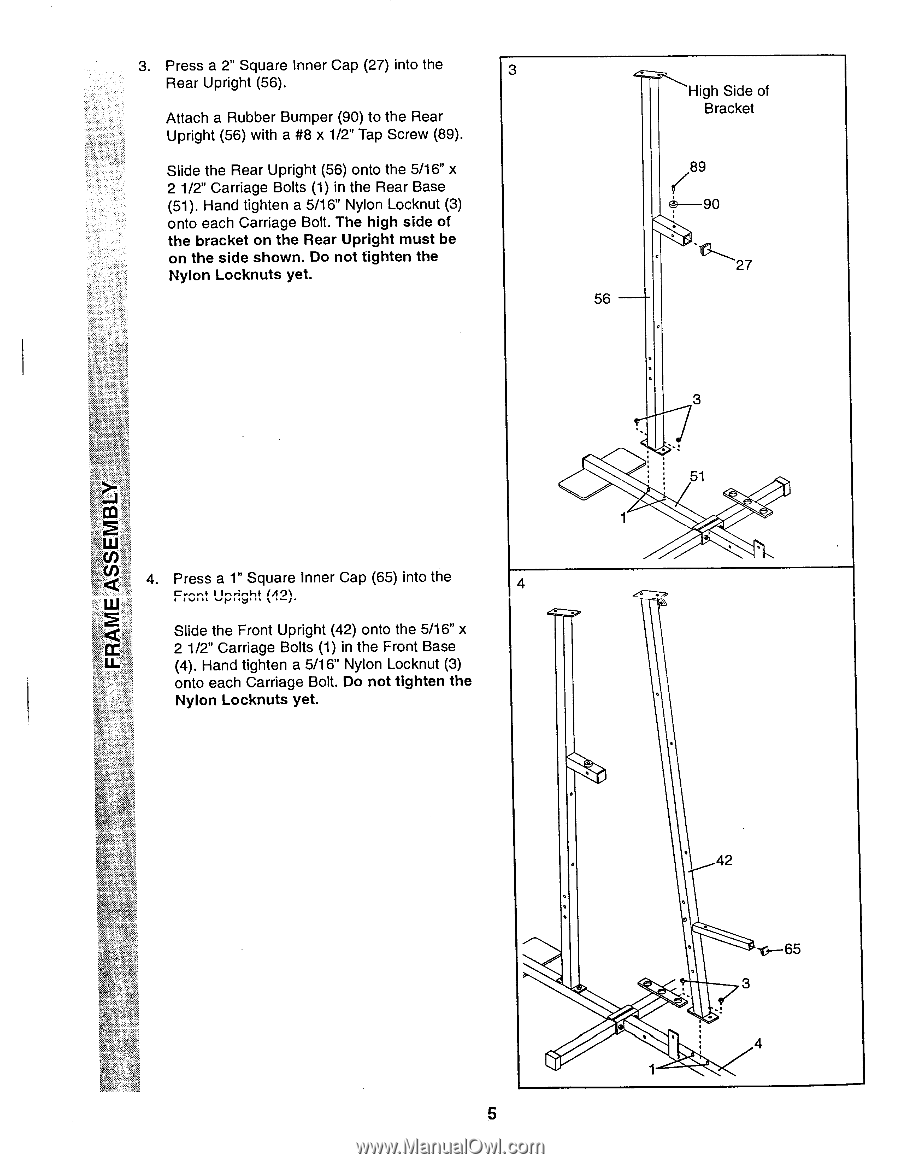
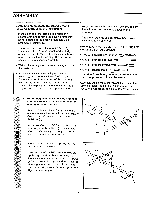
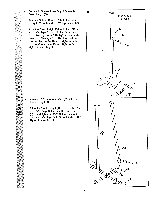
3. Press a 2" Square Inner Cap (27) into the 3 Rear Upright (56). Attach a Rubber Bumper (90) to the Rear Upright (56) with a #8 x 1/2" Tap Screw (89). Slide the Rear Upright (56) onto the 5/16" x 2 1/2" Carriage Bolts (1) in the Rear Base (51). Hand tighten a 5/16" Nylon Locknut (3) onto each Carriage Bolt. The high side of the bracket on the Rear Upright must be on the side shown. Do not tighten the Nylon Locknuts yet. 56 High Side of Bracket 89 27 3 51 4. Press a 1" Square Inner Cap (65) into the 4 C....N.A. I I.Nr;r4-1.1. IA.3\ Slide the Front Upright (42) onto the 5/16" x 2 1/2" Carriage Bolts (1) in the Front Base (4). Hand tighten a 5/16" Nylon Locknut (3) onto each Carriage Bolt. Do not tighten the Nylon Locknuts yet. 42 v--65 3 4 5
-
 1
1 -
 2
2 -
 3
3 -
 4
4 -
 5
5 -
 6
6 -
 7
7 -
 8
8 -
 9
9 -
 10
10 -
 11
11 -
12
-
13
-
14
-
15
-
16
-
17
-
18
-
19
-
20
-
21
-
22
-
23
-
24
-
25
-
26
-
27
-
28
-
29
-
30
-
31
 |
 |