Whirlpool WED6400S Use and Care Manual
Whirlpool WED6400S - 29" Electric Dryer Manual
 |
UPC - 883049025087
View all Whirlpool WED6400S manuals
Add to My Manuals
Save this manual to your list of manuals |
Whirlpool WED6400S manual content summary:
- Whirlpool WED6400S | Use and Care Manual - Page 1
CARESYSTEM ELECTRICDRYER For questions about features, operation/perlormance, parts, accessories or service call: 1-800-253-130t In Canada, call: 1-800-807-6777 or visit our website at www,whirlpool.eom or www.whirlpool,ca P SECADORAELECTRICA CABRIOTMCON SISTEMADECUIDADO DE LAROPA i_ - Whirlpool WED6400S | Use and Care Manual - Page 2
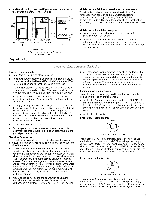
TABLEOF CONTENTS DRYER SAFETY 3 INSTALLATION INSTRUCTIONS 4 Tools and Parts 4 Location Requirements 4 Electrical Requirements - U.S.A. Only 5 Electrical Requirements - Canada Only 6 Electrical Connection - U.S.A. Only 7 Venting Requirements 12 Plan Vent System 13 Install Vent System 14 - Whirlpool WED6400S | Use and Care Manual - Page 3
in this manual and on your appliance. Always dryer where it will be exposed to the weather. [] Do not tamper with controls. [] Do not repair or replace any part of the dryer or attempt any servicing unless specifically recommended in this Use and Care Guide or in published user-repair instructions - Whirlpool WED6400S | Use and Care Manual - Page 4
• If you are using a power supply cord, a grounded electrical outlet located within 2 ft (61 cm) of either side of the dryer. See "Electrical Requirements." • A sturdy floor to support the total weight (dryer and load) of 200 Ibs (90.7 kg). The combined weight of a companion appliance should also be - Whirlpool WED6400S | Use and Care Manual - Page 5
qualified electrician determine that the ground path is adequate. Electrical Connection To properly install your dryer, you must determine the type of electrical connection you will be using and follow the instructions provided for it here. • This dryer is manufactured ready to install with a 3-wire - Whirlpool WED6400S | Use and Care Manual - Page 6
numbers located in the "Assistance or Service" section of this manual. GROUNDING INSTRUCTIONS [] For a grounded, cord-connected dryer: This dryer must be grounded. In the event of malfunction or breakdown, grounding will reduce the risk of electric shock by providing a path of least resistance - Whirlpool WED6400S | Use and Care Manual - Page 7
remaining 2 supply wires to remaining 2 terminals (gold). Securely tighten all electrical connections. Failure to do so can result in death, fire, or electrical shock. 3. Install strain relief. Style 1: Power supply cord strain relief Remove the screws from a 3/4"(1.9 cm) UL listed strain relief - Whirlpool WED6400S | Use and Care Manual - Page 8
, 120/240-volt 3-wire direct 30-amp, dryer mpoinwimerumsu, pply cord* A fused disconnect or cbiorcxu* it breaker Go to Section: 4-wire connection: Power Supply Cord 4-wire connection: Direct Wire 3-wire connection: Power Supply Cord 3-wire connection: Direct Wire *If local codes do not permit - Whirlpool WED6400S | Use and Care Manual - Page 9
) of power supply cord under center, silver-colored terminal block screw. Tighten screw. D A 5. Tighten strain relief screws. 6. Insert tab of terminal block cover into slot of dryer rear panel. Secure cover with hold-down screw. 7. You have completed your electrical connection. Now go to "Venting - Whirlpool WED6400S | Use and Care Manual - Page 10
tab of terminal block cover into slot of dryer rear panel. Secure cover with hold-down screw. 7. You have completed your electrical connection. Now go to "Venting Requirements." 3-wire connection: Power supply cord Use where local codes permit connecting cabinet-ground conductor to neutral wire - Whirlpool WED6400S | Use and Care Manual - Page 11
screw. Optional 3-wire connection Use for direct wire or power supply cord where local codes do not permit connecting cabinet-ground conductor to into slot of dryer rear panel. Secure cover with hold-down screw. 6= You have completed your electrical connection. Now go to "Venting Requirements - Whirlpool WED6400S | Use and Care Manual - Page 12
exhaust vent DURASAFE TM vent products can be purchased from your dealer or by calling Whirlpool Parts and Accessories. For more information, see the "Assistance or Service" section of this manual. Rigid metal vent • For best drying performance, rigid metal vents are recommended. • Rigid metal vent - Whirlpool WED6400S | Use and Care Manual - Page 13
see the "Assistance or Service" section of this manual to order. • Over-the-Top Installation: Part Number 4396028 • Periscope Installation (For use with dryer vent to wall vent mismatch): Part Number 4396037 - 0" (0 cm) to 18" (45.72 cm) mismatch Part Number 4396011 - 18" (45.72 cm) to 29" (73.66 cm - Whirlpool WED6400S | Use and Care Manual - Page 14
35 ft (10.7 m) 29 ft (8.8 m) Flexible metal 25 Connect vent to exhaust hood. Vent must fit inside exhaust hood. Secure vent to exhaust hood with 4" (10.2 cm) clamp. 3. Run vent to dryer location. Use the straightest path possible. See "Determine vent path" in "Plan Vent System." Avoid 90 ° turns - Whirlpool WED6400S | Use and Care Manual - Page 15
door opening from where they were removed. NOTE: Door strike and plugs must be on the same side of the dryer door opening. Reinstall the door 1. Remove the 4 screws and 2 hinges from the dryer door. 2. Replace the 4 screws in the same holes. 3. Remove the 4 screws from the opposite side of the door - Whirlpool WED6400S | Use and Care Manual - Page 16
the dryer. Check that both fuses are intact and tight, or that both circuit breakers have not tripped. If there is still no heat, contact a qualified technician. NOTE: You may notice an odor when the dryer is first heated. This odor is common when the heating element is first used. The odor will go - Whirlpool WED6400S | Use and Care Manual - Page 17
electric shock, or injury to persons, read the IMPORTANT SAFETY INSTRUCTIONS before operating this appliance. This manual covers several different models. Your dryer estimated time display will adjust again, showing the final drying time. To use an Automatic Cycle • Press POWER. • Turn the knob to - Whirlpool WED6400S | Use and Care Manual - Page 18
To use a Timed Cycle Turn knob to desired Timed dryer will shut off. Select new cycle settings before restarting the dryer instructions. • To reduce wrinkling, remove the load from the dryer settings. • Refer to the Automatic or Timed Preset Cycle Settings chart (in the "Cycles" section) for a guide - Whirlpool WED6400S | Use and Care Manual - Page 19
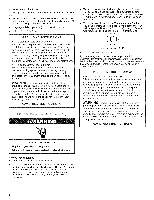
The Cool Down light illuminates during the cool down part of the cycle. Laundry cools for ease in handling high heat for heavyweight mixed loads, cottons and jeans. Normal Use this cycle to get medium heat for being left in the dryer too long. Timed Preset Cycle Settings Timed Cycles Load Type - Whirlpool WED6400S | Use and Care Manual - Page 20
light will turn on when DRUM LIGHT is pressed or the dryer door is opened, and it will remain on until the dryer door has been open for 5 minutes, the dryer door is closed or DRUM LIGHT is pressed again. Press DRUM LIGHT at any time to turn the drum light ON or OFR WRINKLE SHIELD TM Setting - Whirlpool WED6400S | Use and Care Manual - Page 21
setting will not flash, but the other settings will flash. 4. Press START to save the drying setting. 5. The drying setting you selected will become your new preset drying setting for all Auto Dry cycles. Use the Drying Rack to dry items such as sweaters and pillows without tumbling. The drum turns - Whirlpool WED6400S | Use and Care Manual - Page 22
drum. NOTE: Garments that contain unstable dyes, such as denim blue jeans or brightly colored cotton items, may discolor the dryer interior. These stains are not harmful to your dryer and will not stain future loads of clothes. Dry unstable dye items inside-out to avoid dye transfer. From Inside the - Whirlpool WED6400S | Use and Care Manual - Page 23
. Replace the bulb with a 10-watt appliance bulb only. Replace the cover and secure with the screw. 4. Plug in dryer or reconnect power. TROUBLESHOOTING First try the solutions suggested here and possibly avoid the cost of a service call... Dryer will not run Has a household fuse blown - Whirlpool WED6400S | Use and Care Manual - Page 24
Check that the exhaust vent is not too long or has too many turns. Long venting will increase drying times. See the Installation Instructions. Explosion Hazard Keep flammable materials and vapors, such as gasoline, away from dryer. Place dryer at least 18 inches (46 cm) above the floor for a garage - Whirlpool WED6400S | Use and Care Manual - Page 25
area, rewash and dry the clothing. Is the dryer being used for the first time? The new electric heating element may have an odor. The odor will be gone after the first cycle. ASSISTANCEORSERVICE Before calling for assistance or service, please check "Troubleshooting." It may save you the cost of - Whirlpool WED6400S | Use and Care Manual - Page 26
this major appliance is operated and maintained according to instructions attached to or furnished with the product, Whirlpool Corporation or Whirlpool Canada LP (hereafter "Whirlpool") will pay for Factory Specified Parts and repair labor to correct defects in materials or workmanship. Service must - Whirlpool WED6400S | Use and Care Manual - Page 27
27 - Whirlpool WED6400S | Use and Care Manual - Page 28
importante. Hemos incluido muchos mensajes importantes de seguridad en este manual y en su electrodomestico. Lea y obedezca siempre todos las areas adyacentes a esta apertura sin pelusa, polvo o tierra. [] La parte interior de la secadora y el ducto de escape se deben limpiar peri6dicamente. Esta - Whirlpool WED6400S | Use and Care Manual - Page 29
Para obtener mas informaci6n, sirvase referirse a la secci6n "Ayuda o servicio tecnico" de este manual. Tambien puede ponerse en contacto con el distribuidor en donde compr6 la secadora, Peligro de o en dormitories. P6ngase en contacto con el inspector de construcciones de su Iocalidad. 29 - Whirlpool WED6400S | Use and Care Manual - Page 30
medidas de espacio para esta secadora. Esta secadora ha sido puesta a prueba para espacios de 0" (0 cm) en los costados yen la parte posterior. El espacio recomendado debe ser considerado por los siguientes motivos: • Debe considerarse el espacio adicional para facilitar la instalaci6n y el servicio - Whirlpool WED6400S | Use and Care Manual - Page 31
Conexibn el_ctrica Para instalar su secadora adecuadamente, usted debe determinar el tipo de conexi6n electrica que va a usar y seguir las instrucciones que aquf se proveen para el caso. [] Esta secadora ha sido manufacturada lista para ser instalada en una conexi6n de suministro de energia - Whirlpool WED6400S | Use and Care Manual - Page 32
Cable de suministro el_ctrico Cable directo Peligro de Incendio Use un cable de suministro electrico nuevo de 30 amperes que este en la lista de UL. Use un protector de cables que este en la lista de UL. Desconecte el suministro electrico antes de hacer las conexiones electricaso Conecte el - Whirlpool WED6400S | Use and Care Manual - Page 33
Haga pasar el cable de suministro de energia a traves del protector de cables. AsegQrese de que el aislamiento de cables del cable de suministro de energia este dentro del protector de cables. El protector de cables debera encajar bien con el gabinete de la secadora y estar en posici6n horizontal. - Whirlpool WED6400S | Use and Care Manual - Page 34
1. Saque el tornillo plateado central del bloque de terminal. 2. Saque el hilo de tierra neutro del tornillo conductor de tierra externo. Conecte el hilo neutro de puesta a tierra y el hilo neutro (hilo blanco o central) del cable de suministro de energfa debajo del tornillo central de color - Whirlpool WED6400S | Use and Care Manual - Page 35
1= Saque el tornillo central de color plateado del bloque de terminal. 2. Saque el hilo de tierra neutro del tornillo conductor de tierra externo. Conecte el hilo neutro de puesta a tierra y coloque el extreme en forma de gancho (gancho mirando hacia la derecha) del hilo neutro (blanco o central) - Whirlpool WED6400S | Use and Care Manual - Page 36
3. Conecte los otros hilos a los tornillos exteriores del bloque de terminal. Apriete los tornillos. !! !! 1= Afloje o saque el tornillo central de color plateado del bloque de terminal. 2. Coloque el extreme en forma de gancho del hilo neutro (hilo blanco o central) del cable directo debajo del - Whirlpool WED6400S | Use and Care Manual - Page 37
son recomendables. Ducto de escape de metal pesado de 4" (10,2 cm) Los productos de ventilaci6n DURASAFE TM pueden adquirirse con su distribuidor o Ilamando a Whirlpool Parts and Accessories (Piezas y accesorios de Whirlpool). Para mas informaci6n, vea la secci6n "Ayuda o servicio tecnico" de este - Whirlpool WED6400S | Use and Care Manual - Page 38
. Seleccione su tipo de instalacibn de ventilacibn Instalaciones recomendadas de escape Las instalaciones tipicas tienen la ventilaci6n en la parte posterior de la secadora. B /1 ..... C Abrazadera Respiradero Los estilos recomendados de capotas de ventilaci6n se ilustran aqu[. B _ (10,2 cm - Whirlpool WED6400S | Use and Care Manual - Page 39
la secci6n "Ayuda o servicio tecnico" de este manual. • Instalaci6n en la parte superior: Pieza nOmero 4396028 • Instalaci6n de periscopio (8,5 m) 48 pies (14,6 m) 23 pies (7 m) 38 pies (11,6 m) 19 pies (5,8 m) 29 pies (8,8 m) 17 pies (5,2 m) 21 pies (6,4 m) 15 pies (4,6 m) S Determinacibn de la via - Whirlpool WED6400S | Use and Care Manual - Page 40
consola. I Luego, verifique la nivelaci6n de adelante hacia atras colocando un nivel en la plegadura que esta en el costado de la secadora entre la parte superior de la secadora y el gabinete de la misma. Si la secadora no esta nivelada, apuntale la secadora, usando un bloque de madera. Use una - Whirlpool WED6400S | Use and Care Manual - Page 41
izquierda, si Io desea. 1. Coloque una toalla o un paso suave en la parte superior de la secadora o de la superficie de trabajo, para proteger la superficie. . Coloque la puerta sobre una superficie plana y protegida con la parte interior de la puerta mirando hacia arriba. Quite los 2 tornillos - Whirlpool WED6400S | Use and Care Manual - Page 42
3. Quite los 4 tornillos del lado opuesto de la puerta. bisagra y la puerta. Instale los dos tornillos inferiores. Apriete todos los tornillos de las bisagras. I I 4. Instale las 2 bisagras en el panel frontal de la secadora usando 4 tornillos. Utilice el lade sin ranuras para ajustar la bisagra - Whirlpool WED6400S | Use and Care Manual - Page 43
INSTRUCCIONES IMPORTANTES DE SEGURIDAD antes de operar el aparato. Este manual cubre varies modelos diferentes. Es posible que su secadora no cierre la puerta. 3. Presione el bot6n de suministro de energfa (POWER). Peligro de Incendio Ninguna lavadora puede eliminar completamente el aceite. No - Whirlpool WED6400S | Use and Care Manual - Page 44
hacia arriba o hacia abajo y el tiempo cambiara en intervalos de 5 minutes. NOTA: Las caracteristicas de ajuste de tiempo (Time Adjust) pueden set usadas s61o con ciclos programados. TIMEADJUST • Presione Temperatura (TEMP) hasta que la temperatura deseada se ilumine. TEMP NOTA: La caracter(stica - Whirlpool WED6400S | Use and Care Manual - Page 45
Seleccione el ciclo y el nivel de secado o la temperatura correctos para su carga. Siesta en marcha un ciclo automatico (Automatic Cycle) la pantalla muestra el tiempo estimado del ciclo que la secadora determina al detectar automaticamente el nivel de sequedad de la carga. Siesta funcionado un - Whirlpool WED6400S | Use and Care Manual - Page 46
Seleccione el ciclo de secado de acuerdo con el tipo de carga que va a secar. Vea los cuadros de Ajustes prefijados de ciclos automaticos o programados. HEAVYDUTY CASUAL DELICATE TIMED DRY QUICK TOUCH DRY UP DRY CYCLES Ciclos automaticos (Automatic Cycles) Los ciclos automaticos (Automatic - Whirlpool WED6400S | Use and Care Manual - Page 47
Modificadoredselosciclosautomaticos Use el modificador de nivel de sequedad (Dryness) para seleccionar los niveles de sequedad para los ciclos de secado automatico (Auto Dry Cycles). Presione el nivel de sequedad hasta que se ilumine el ajuste deseado de nivel de sequedad. El ajuste de sequedad - Whirlpool WED6400S | Use and Care Manual - Page 48
el estante no se mueve. Si su modelo no tiene un estante de secado, usted puede comprar uno para su modelo. Refierase a la portada del manual o p6ngase en contacto con el distribuidor donde compr6 su secadora para saber si puede usar un estante de secado con su modelo, y para recibir informaci6n - Whirlpool WED6400S | Use and Care Manual - Page 49
4. Cierre la puerta. 5. Oprima el bot6n de suministro de energia (POWER). 6. Seleccione el ciclo programado de secado y la temperatura (vea el la pelusa. Limpieza de cada carga El filtro de pelusa esta ubicado en la parte superior de la secadora. Jale el filtro de pelusa hacia usted. Quite la - Whirlpool WED6400S | Use and Care Manual - Page 50
Limpieza peribdica 1. Quite la pelusa enrollandola con los dedos. 2. Moje ambos lados del filtro de pelusa con agua caliente. 3. Moje un cepillo de nylon con agua caliente y detergente liquido. Talle el filtro de pelusa con el cepillo para quitar la acumulaci6n de residues. 4. Enjuague el filtro con - Whirlpool WED6400S | Use and Care Manual - Page 51
que se escuche un sonido fuerte durante los primeros minutes de funcionamiento. &Hay una moneda, botbn o sujetapapeles entre el tambor y la parte frontal o trasera de la secadora? Revise los bordes frontales y traseros del tambor para verificar si hay objetos pequer_os. Limpie los bolsillos antes - Whirlpool WED6400S | Use and Care Manual - Page 52
de pelusa obstruido con pelusa? El filtro de pelusa debe set limpiado antes de cada carga, • &Es el diametro un armario? Las puertas del armario deben tenet aberturas de ventilaci6n en la parte superior e inferior de la puerta. La parts posterior de la secadora requiere un espacio de 5" (12,7 cm); - Whirlpool WED6400S | Use and Care Manual - Page 53
para el use y mantenimiento. • Venta de accesorios y partes para reparaci6n. Ayuda especializada para el consumidor (habla hispana, ayuda adicional, puede escribir a Whirlpool Corporation con sus preguntas o dudas a: Whirlpool Brand Home Appliances Customer eXperience Center 553 Benson Road - Whirlpool WED6400S | Use and Care Manual - Page 54
Estados Unidos y CanadA. P6ngase en contacto con el distribuidor autorizado de Whirlpool para determinar si corresponde otra garantia. Si necesita servicio, consulte primero la secci6n "Soluci6n de problemas" del Manual de uso y cuidado. Despues de consultar la secci6n "Soluci6n de problemas - Whirlpool WED6400S | Use and Care Manual - Page 55
s'enfiammer. [] Ne pas faire secher dans la machine des articles qui ont deja et6 nettoyes, laves, pres d'eux. [] Avant d'enlever la secheuse du service ou la jeter, enlever la porte du compartiment de dans le guide d'utlilisation et d'entretien, ou publiee dans les instructions de reparation - Whirlpool WED6400S | Use and Care Manual - Page 56
rderer a la section "Assistance ou service" de ce manuel. Vous pouvez un garage. Le non-respect de ces instructions peut causer un d_ces, une explosion ou secheuse. Voir "Specifications electriques". • Un plancher robuste capable de supporter un poids total (secheuse et charge) de 200 Ib (90,7 - Whirlpool WED6400S | Use and Care Manual - Page 57
_,6cm) ] 1" _' (2,5 ¢m) __ 3"* (7,6cm) Risque de choc _lectrique Brancher sur une prise a 4 alv_oles reli_e a la terre. Le non-respect de cette instruction peut causer un deces ou un choc _lectrique. C'est & rutilisateur qu'incombe la responsabilit_ de • Communiquer avec un electricien qualifie - Whirlpool WED6400S | Use and Care Manual - Page 58
de service qui se trouvent a la section "Assistance ou service" de ce manuel. iNSTRUCTiONS DE d'evacuation de la secheuse ne dolt pas _tre connecte a une evacuation de gaz, une cheminee, service Pieces et accessoires de Whirlpool. Pour plus de renseignements, voir la section "Assistance ou service - Whirlpool WED6400S | Use and Care Manual - Page 59
ne dolt pas _tre connecte ou fixe avec des problemes de sant& Autres installations ou le d_gagement est r_duit II existe de nombreux types de systemes d'evacuation. Choisir le type qui convient le mieux a I'installation. Deux installations degagement reduit sont illustrees. Voir les instructions - Whirlpool WED6400S | Use and Care Manual - Page 60
est reduit. Veuillez consulter la section "Assistance ou service" de ce guide pour commander. • Installation au-dessus de la secheuse 72 cm) de decalage Piece numero 4396011 - 18" (45,72 cm) a 29" (73,66 cm) de decalage Piece numero 4396014 - 29" (73,66 cm) a 50" (127 cm) de decalage • Installation - Whirlpool WED6400S | Use and Care Manual - Page 61
deux ou plus de personnes pour d_placer et installer la eecheuse. Le non-respect de cette instruction peut causer une blessure au des eu d'autre blessure. 1. Pour proteger le plancher, utiliser une proche de son emplacement final. Laisser assez d'espace pour connecter le conduit d'evacuation. 61 - Whirlpool WED6400S | Use and Care Manual - Page 62
Le sens d'ouverture de la porte peut @re change du c6te droit au c6te gauche, si desir& 1. Placer une serviette ou un linge doux sur le dessus de la secheuse ou du plan de travail pour proteger la surface. D_pose de la porte 1. Ouvrir la porte de la secheuse. 2. Retirer la vis inf@ieure de chacune - Whirlpool WED6400S | Use and Care Manual - Page 63
de chaleur, contacter un technicien qualifi& REMARQUE : II est possible que la secheuse degage une odeur Iors du chauffage initial. Cette odeur est normale Iorsque I'element chauffant est utilise pour la premiere fois. L'odeur disparaftra. 63 - Whirlpool WED6400S | Use and Care Manual - Page 64
les v6tements dans la secheuse et fermer la porte. 3. Appuyer sur POWER (alimentation). Risque d'incendie Aucune laveuse ne peut completement enlever I'huile. doivent 6tre seches sur une corde a linge ou par le programme de sechage a Fair. Le non-respect de ces instructions peut causer un deces ou - Whirlpool WED6400S | Use and Care Manual - Page 65
Suivre les directives figurant sur I'etiquette Iorsqu'elles sent disponibles. • Si desire, ajouter une feuille d'assouplissant de tissu. Suivre les instructions figurant sur I'emballage. • Pour reduire le froissement, enlever la charge de la secheuse aussit6t que le culbutage cesse. Cette action est - Whirlpool WED6400S | Use and Care Manual - Page 66
des programmes automatiques ou minutes (a la section "Programmes") pour un guide de sechage de charges diverses. • La temperature de sechage et et regle automatiquement la duree pour un sechage optimal. Heavy Duty (service intense) Utiliser ce programme pour le sechage a temperature elevee des - Whirlpool WED6400S | Use and Care Manual - Page 67
automatiques Programmes automatiques Type de charge Temperature HEAVY DUTY (service intense) Charges mixtes Iourdes, articles en coton, jeans DELICATE (articles delicats) Lingerie, chemisiers, tricots lavables en machine Extra-Low (extrabasse) Programmes minutes Utiliser les programmes - Whirlpool WED6400S | Use and Care Manual - Page 68
Air Only (air seulement) Utiliser le modificateur Air Only pour les articles qui doivent _tre sechGs sans chaleur, tels que le caoutchouc, le plastique et les tissus sensibles a la chaleur. Ce tableau donne des exemples d'articles qui peuvent _tre sechGs au reglage Air Only. Type de charge Dur_e* - Whirlpool WED6400S | Use and Care Manual - Page 69
II est possible de changer les programmes automatiques et minutes, les modificateurs et les options & tout moment avant d'appuyer sur le bouton Start (mise en marche). • Trois brefs signaux sonores marquent le choix d'une combinaison non disponible. La derniere selection ne sera pas acceptee. - Whirlpool WED6400S | Use and Care Manual - Page 70
POWER (alimentation). 6. Selectionner un programme de sechage minute et une temperature (voir tableau suivant). Les articles contenant de la mousse, du caoutchouc ou du plastique doivent _tre seches sur une corde un garage. Le non-respect de ces instructions peut causer un d_ces, une explosion ou un - Whirlpool WED6400S | Use and Care Manual - Page 71
Nettoyage au besoin 1. Enlever la charpie du filtre en la roulant avec les doigts. 2. Mouiller les deux c6tes du filtre & charpie avec de I'eau chaude. 3. Mouiller une brosse en nylon avec de I'eau chaude et du detergent liquide. Frotter le filtre avec la brosse pour enlever I'accumulation de - Whirlpool WED6400S | Use and Care Manual - Page 72
disjoncteur. Si le probleme persiste, appeler un electricien. Sons inhabituels La s_cheuse est-elle rest_e hors service pendant un certain La secheuse peut vibrer si elle n'est pas correctement installee. Voir les instructions d'installation. Les v_tements sont-ils emm_l_s ou en boule? Une charge - Whirlpool WED6400S | Use and Care Manual - Page 73
secheuse, Placer la s_cheuse au moins 46 cm (18 po) au-dessus du plancher pour une installation dans un garage. Le non-respect de ces instructions peut causer un d_ces, une explosion ou un incendie. • La s_cheuse se trouve-t-elle dans une piece o_ la temperature ambiante est inf_rieure a 45 - Whirlpool WED6400S | Use and Care Manual - Page 74
Tempsdeprogrammetropcourt Risque du poids excessif Utiliser deux ou plus de personnes pour deplacer et installer la secheuseo Le non-respect de cette instruction peut causer une blessure au dos eu d'autre blessure. • Le programme automatique se termine-t-il trop tbt? La charge n'est peut-_tre pas en - Whirlpool WED6400S | Use and Care Manual - Page 75
produits et fournir un service apres la garantie, partout au Canada. Pour plus d'assistance Si vous avez besoin de plus d'assistance, vous pouvez ecrire & Whirlpool Canada LP en soumettant toute question ou tout probleme au : Centre d'interaction avec la clientele Whirlpool Canada LP 1901 Minnesota - Whirlpool WED6400S | Use and Care Manual - Page 76
installe dans un endroit inaccessible ou n'est pas installe conformement aux instructions d'installation fournies. 11. Le coot des pieces de rechange et Whirlpool autorise pour determiner si une autre garantie s'applique. Si vous avez besoin de service, voir d'abord la section "Depannage" du Guide
-
 1
1 -
 2
2 -
 3
3 -
 4
4 -
 5
5 -
 6
6 -
 7
7 -
8
-
9
-
10
-
11
-
12
-
13
-
14
-
15
-
16
-
17
-
18
-
19
-
20
-
21
-
22
-
23
-
24
-
25
-
26
-
27
-
28
-
29
-
30
-
31
-
32
-
33
-
34
-
35
-
36
-
37
-
38
-
39
-
40
-
41
-
42
-
43
-
44
-
45
-
46
-
47
-
48
-
49
-
50
-
51
-
52
-
53
-
54
-
55
-
56
-
57
-
58
-
59
-
60
-
61
-
62
-
63
-
64
-
65
-
66
-
67
-
68
-
69
-
70
-
71
-
72
-
73
-
74
-
75
-
76
 |
 |
W10054070A
cabr o
FABRIC
CARE
SYSTEM
CABRIO
TM
FABRIC
CARESYSTEM
ELECTRICDRYER
For questions
about
features,
operation/perlormance,
parts,
accessories
or service
call:
1-800-253-130t
In Canada,
call: 1-800-807-6777
or
visit our
website
at
www,whirlpool.eom
or www.whirlpool,ca
P
SECADORAELECTRICA
CABRIOTMCON
SISTEMADECUIDADO
DE LAROPA
i_ J;,
_
1
_
_:
.......
Si tiene preguntas
respecte
a las caraeteristicas,
funeionamiento,
rendimiento,
partes,
aacesories
e servicio
tecnico,
lame
al:
1-800-253-130t
o visite
nuestro
sitio web en
www.whirlpool.com
P
SECHEUSE
ELECTRIQUE,CABRIO
TM
AVECSYSTEMEDE
SOINDESTISSUS
"
+'
*
I
Au Canada,
pour assistance,
installation
ou service,
composez
le :
1-800-807-6777
ou visitez
notre site internet
&
www.whirlpool.ca
Table of Contents/Indice/Table
des matieres
......
2