Whirlpool WGD92HEF Instruction Sheet - Page 4
Screw, Console, Assembly, Screws, Top - Rear, To 7.5 Cubic Foot Models With 27, Cabinet,
 |
View all Whirlpool WGD92HEF manuals
Add to My Manuals
Save this manual to your list of manuals |
Page 4 highlights
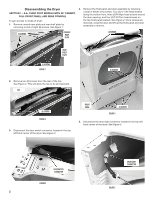
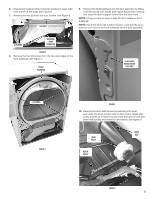
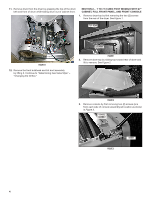
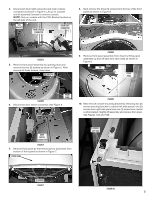
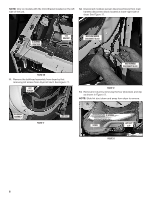
11. Remove drum from the dryer by grasping the top of the drum belt and front of drum while sliding drum out of cabinet front. SECTION 2 - 7 TO 7.5 CUBIC FOOT MODELS WITH 27" CABINET, FULL FRONT PANEL, AND FRONT CONSOLE 1. Remove dryer top by first removing the two (2) screws from the rear of the dryer. See Figure 1. TOP - REAR FIGURE 10 12. Remove the front bulkhead and lint duct assembly by lifting it. Continue to "Determining Gas Valve Style" - "Changing the Orifice." (2) SCREWS FIGURE 1 2. Remove dryer top by sliding top toward rear of dryer and lift to remove. See Figure 2. FIGURE 2 3. Remove console by first removing two (2) screws (one from each side of console assembly) at location as shown in Figure 3. CONSOLE ASSEMBLY FIGURE 3 SCREW 4
-
 1
1 -
 2
2 -
 3
3 -
 4
4 -
 5
5 -
 6
6 -
 7
7 -
 8
8 -
 9
9 -
 10
10 -
11
-
12
-
13
-
14
-
15
-
16
-
17
-
18
-
19
-
20
-
21
-
22
-
23
-
24
-
25
-
26
-
27
-
28
 |
 |
