Whirlpool WRFF5333P Owners Manual - Page 12
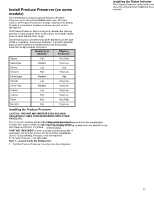
Installing the Filter Status Indicator on some, models
 |
View all Whirlpool WRFF5333P manuals
Add to My Manuals
Save this manual to your list of manuals |
Page 12 highlights
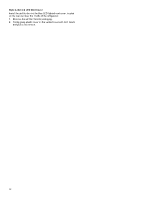
Style 2-Behind LED Vent Cover Install the air filter behind the blue LED-lighted vent cover, located on the rear wall near the middle of the refrigerator. 1. Remove the air filter from its packaging. 2. Firmly grasp plastic cover on the vented cover with both hands and pull out to remove. Replacing the Air Filter The disposable air filter should be replaced every 6 months, or when the status indicator air filter icon turns on and starts flashing when the refrigerator door is opened. To order a replacement air filter, see ordering information in the Quick Start Guide. 1. Remove the used air filter by squeezing in on the side tabs. 2. Install the new air filter and status indicator using the instructions in the previous sections. Air Filter Status Indicator-Standard Installation The filter comes with a status indicator, which should be activated and installed at the same time the air filter is installed. NOTE: When cover is removed for the first time, a small foam part the size of the filter will need to be discarded. 3. Snap the filter into place. A. Air filter Installing the Filter Status Indicator (on some models) The air filter icon on the control panel displays the air filter status. � Blue: Good. � Yellow: Order a replacement. � Red: Replace air filter. � Red and flashing "Replace Filter": Expired. After replacing the air filter, press and hold the Air Filter button for 3 seconds. The filter icons will turn off. See "Quick Start Guide." When the system is reset, the air filter icon will return to its blue color and the words "Replace Filter" will disappear from the control panel. NOTE: At any filter status, pressing and holding the Air Filter button for 3 seconds will reset the air filter status to Good and the air filter icon will turn off. 1. Place the indicator facedown on a firm, flat surface. 2. Apply pressure to the bubble on the back of the indicator, until the bubble pops to activate the indicator. 3. Lift open the vented air filter door. On some models, there are notches behind the door. On models with notches: � With the indicator screen facing outward, slide the indicator down into the notches. NOTE: The indicator will not easily slide into the notches if the rear bubble has not been popped. � Close the air filter door, and check that the indicator is visible through the window in the door. A. Status indicator window B. Air filter status indicator C. Notches � Place the indicator in a visible place you will easily remember either inside the refrigerator or elsewhere in your kitchen or home. Replacing the Air Filter The disposable air filter should be replaced every 6 months, when the status indicator has completely changed from white to red. To order a replacement air filter, see ordering information in the Quick Start Guide. 1. Remove the used air filter by squeezing in on the side tabs. 2. Remove the used status indicator. 3. Install the new air filter and status indicator using the instructions in the previous sections. 12
-
 1
1 -
2
-
3
-
4
-
5
-
6
-
 7
7 -
 8
8 -
 9
9 -
 10
10 -
 11
11 -
 12
12 -
 13
13 -
 14
14 -
 15
15 -
 16
16 -
 17
17 -
18
-
19
-
20
-
21
-
22
-
23
-
24
-
25
-
26
-
27
-
28
-
29
-
30
-
31
-
32
-
33
-
34
-
35
-
36
-
37
-
38
-
39
-
40
-
41
-
42
-
43
-
44
-
45
-
46
-
47
-
48
-
49
-
50
-
51
-
52
-
53
-
54
-
55
-
56
-
57
-
58
-
59
-
60
-
61
-
62
-
63
-
64
 |
 |
