Whirlpool WRFF5333P Owners Manual - Page 5
Changing the LED Module, Refrigerator Shelves
 |
View all Whirlpool WRFF5333P manuals
Add to My Manuals
Save this manual to your list of manuals |
Page 5 highlights
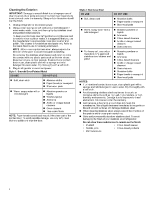
Condenser Cleaning WARNING 3. Depending on your model, lift the back or front of the shelf past the stop. Pull the shelf out the rest of the way. To replace a shelf: 1. Slide the back of the shelf into the track in the wall of the cabinet. 2. Guide the front of the shelf into the shelf track. Be sure to slide the shelf in all the way. Explosion Hazard Risk of Fire or Explosion due to Puncture of Refrigerant Tubing; Follow Handling Instructions Carefully. Flammable Refrigerant Used. There is no need for routine condenser cleaning in normal home operating environments. If the environment is particularly greasy or dusty or there is significant pet traffic in the home, the condenser should be cleaned every 6 months to ensure maximum efficiency. 1. Unplug refrigerator or disconnect power. 2. Remove the base grille. 3. Use a vacuum cleaner with a soft brush to clean the grille, the open areas behind the grille, and the front surface area of the condenser. 4. Replace the base grille when finished. 5. Plug in refrigerator or reconnect power. NOTE: If you are unable to clean the condenser, please call for service. Changing the LED Module IMPORTANT: The lights in both the refrigerator and freezer compartments use LED technology that do not need to be replaced. If the lights do not illuminate when the door or drawer is opened, call for assistance or service. Refer to the Quick Start Guide for contact information. If an LED module(s) do not illuminate when the refrigerator and/or freezer door is opened, call for assistance or service. Refrigerator Shelves Important information to know about glass shelves and covers: Do not clean glass shelves or covers with warm water when they are cold. Shelves and covers may break if exposed to sudden temperature changes or impact, such as bumping. Tempered glass is designed to shatter into many small, pebble-size pieces. This is normal. Glass shelves and covers are heavy. Use both hands when removing them to avoid dropping. The shelves in your refrigerator are adjustable to match your individual storage needs. Storing similar food items together in your refrigerator and adjusting the shelves to fit different heights of items will make finding the exact item you want easier. It will also reduce the amount of time the refrigerator door is open, and save energy Glass Shelves To remove a shelf: 1. Remove items from the shelf. 2. Slide the shelf straight out to the stop. Shelves with Shelf Frames To remove and replace a shelf/shelf frame: 1. Remove the shelf/frame by tilting it up at the front and lifting it out of the shelf supports. 2. Replace the shelf/frame by guiding the rear shelf hooks into the shelf supports. Tilt the front of the shelf up until rear shelf hooks drop into the shelf supports. 3. Lower the front of the shelf and make sure that the shelf is in position. Shelves with Under-Shelf Lighting (on some models) By moving LED lighting to a new spot under the shelves, this leading-edge technology improves interior refrigerator lighting and aids in locating storage items. � For models with the shelf frames, the hooks on the rear of the shelf must be fully engaged in the shelf supports to maintain proper electrical flow. � No more than two shelves with under-shelf lighting may be used in the refrigerator at one time. Shelves with Shelf Mounts Shelf height can be adjusted by changing the adjustable shelf mounts between their vertical and horizontal positions. 1. Carefully lift the shelf off the shelf mounts and turn the flipper to the desired orientation. 2. Repeat for remaining shelf mounts. 3. Apply pressure to the top of the shelf to ensure the shelf is properly seated on the shelf mounts. 5
-
 1
1 -
 2
2 -
 3
3 -
 4
4 -
 5
5 -
 6
6 -
 7
7 -
 8
8 -
 9
9 -
 10
10 -
 11
11 -
12
-
13
-
14
-
15
-
16
-
17
-
18
-
19
-
20
-
21
-
22
-
23
-
24
-
25
-
26
-
27
-
28
-
29
-
30
-
31
-
32
-
33
-
34
-
35
-
36
-
37
-
38
-
39
-
40
-
41
-
42
-
43
-
44
-
45
-
46
-
47
-
48
-
49
-
50
-
51
-
52
-
53
-
54
-
55
-
56
-
57
-
58
-
59
-
60
-
61
-
62
-
63
-
64
 |
 |
