Whirlpool WRFF5333P Owners Manual - Page 19
Refrigerator Door Handle Style 5
 |
View all Whirlpool WRFF5333P manuals
Add to My Manuals
Save this manual to your list of manuals |
Page 19 highlights
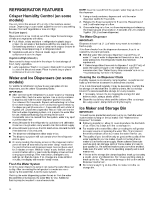
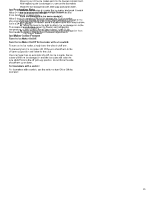
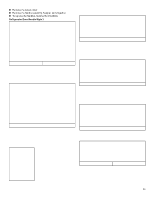
� Remove the screw cover. � Remove the handle assembly. Keep all parts together. � To replace the handles, reverse the directions. Refrigerator Door Handle Style 3 FREEZER DOOR HANDLES Freezer Door Handle Style 1 A. Flat-Head Handle Screws B. Refrigerator Door Handle � Using a 3/32" or 1/8" hex key, loosen the two setscrews located on the side of each handle. Pull the handle straight out from the drawer. Make sure you keep the screws for reattaching the handles. � To replace the handles, reverse the directions. Refrigerator Door Handle Style 4 A. 3/32" Setscrew � Using a 3/32" or 1/8" hex key, loosen the two setscrews located on the side of each handle. Pull the handle straight out from the drawer. Make sure you keep the screws for reattaching the handles. � To replace the handles, reverse the directions. Freezer Door Handle Style 2 A. 3/32" or 1/8" Setscrews � Using a 3/32" or 1/8" hex key, loosen the two setscrews located on the side of each handle. Pull the handle straight out from the drawer. Make sure you keep the screws for reattaching the handles. � To replace the handles, reverse the directions. Freezer Door Handle Style 3 A. 3/32" or 1/8" Setscrews � To remove the handle, remove the screw attaching the trim to the upper end of the handle. Using a flat-blade screwdriver wrapped in masking tape, pry the trim piece from the lower end of the handle. Then, remove the screws attaching the handle to the door. � To replace the handles, reverse the directions. Refrigerator Door Handle Style 5 � To remove the handle, grasp the lower part of the handle firmly, slide the handle up and pull the handle straight out from the door. � To replace the handle, position the handle so that the large holes in the mounting clips are down and align the holes with the door studs. Rotate the handle so that the mounting clips are flat against the door and slide the handle down to engage. A. Flat-Head Handle Screws � Remove screws and handle. � To replace the handles, reverse the directions. Freezer Door Handle Style 4 A. Flat-Head Screws B. Freezer Drawer Handle � Remove screws and handle. � To replace the handles, reverse the directions. 19
-
 1
1 -
2
-
3
-
4
-
5
-
6
-
7
-
8
-
9
-
10
-
11
-
12
-
13
-
 14
14 -
 15
15 -
 16
16 -
 17
17 -
 18
18 -
 19
19 -
 20
20 -
 21
21 -
 22
22 -
 23
23 -
 24
24 -
25
-
26
-
27
-
28
-
29
-
30
-
31
-
32
-
33
-
34
-
35
-
36
-
37
-
38
-
39
-
40
-
41
-
42
-
43
-
44
-
45
-
46
-
47
-
48
-
49
-
50
-
51
-
52
-
53
-
54
-
55
-
56
-
57
-
58
-
59
-
60
-
61
-
62
-
63
-
64
 |
 |
